A garden planning layout is the map that turns available ground into usable growing space, and the right one depends on what that ground actually gives you.
Heavy clay or a rental balcony rules out the same options that loose backyard soil leaves wide open. The 100-square-foot plot, roughly 10 by 10 feet, is the practical ceiling for a first season; anything larger and July maintenance outruns April enthusiasm.
[link-whisper-related-posts]1. Square Foot Gardening
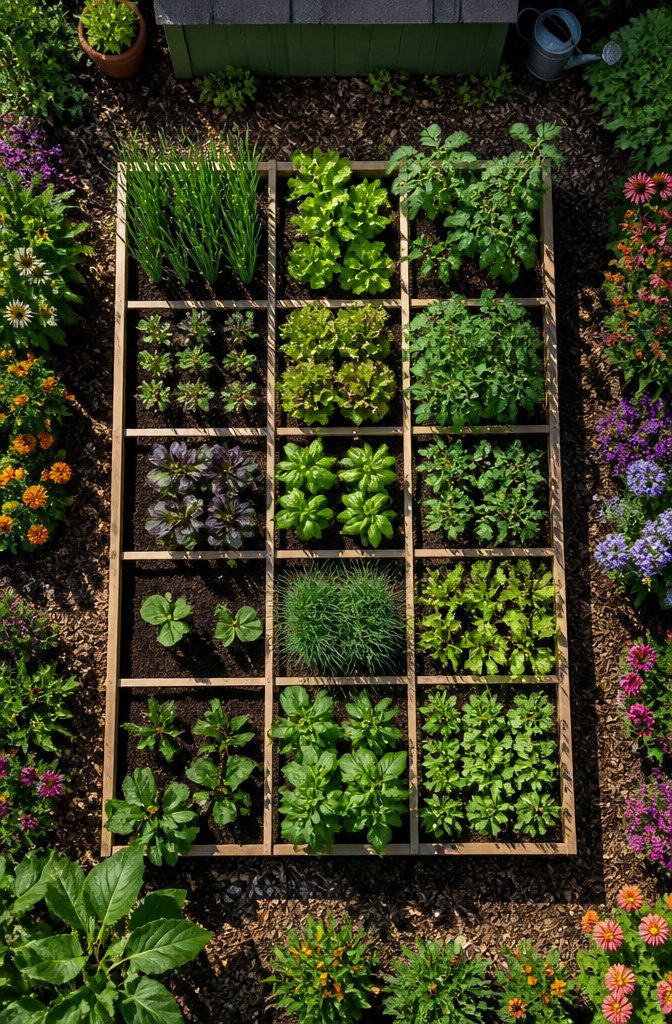
Square foot gardening divides your bed into a grid of 1×1-foot squares, each one planted with a single vegetable type based on its spacing needs.
A tomato might fill a whole square alone, while a crop with 3-inch spacing lets you fit 16 plants in that same foot.
The grid itself can be string tied to stakes, thin wood strips, or whatever keeps the lines straight in dirt.
Beginners do well with this method because the math is built in. No guessing how many carrots fit in a row; you check the seed packet, divide 12 inches by the spacing number, and plant what the square holds.
It also happens to be an efficient use of space, since block planting shades more soil and leaves less room for weeds to take hold than bare rows do.
If you are starting fresh, 100 square feet (10×10 feet) is the manageable ceiling to aim for, though a 4×8-foot bed is plenty to learn on.
The real mistake is going bigger before you know what tending it costs you in time. You can always add squares next season once you have a sense of the rhythm.
2. Traditional Rows
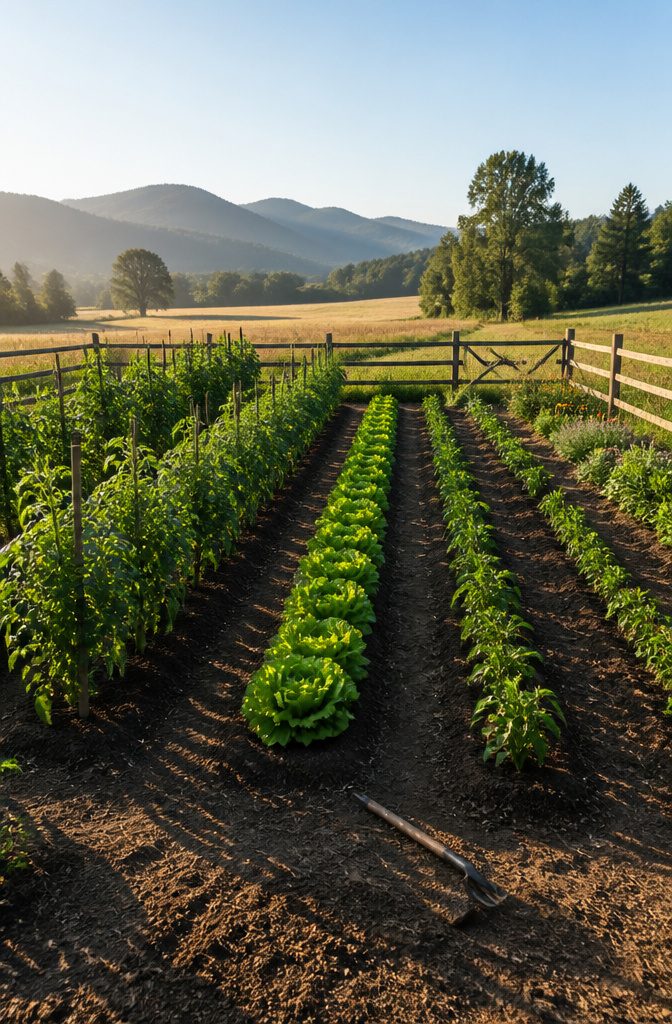
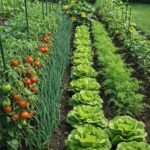
Straight-line planting still earns its place in any garden planning layout for one practical reason: it keeps your tallest crops from stealing sun from the shorter ones.
Set tomatoes, corn, or pole beans on the north side of the plot, medium-height peppers or bush beans in the middle, and low growers like lettuce or strawberries on the south end.
That north-to-south orientation matters because the sun tracks east to west across the southern sky; get this wrong and your shorter plants spend the afternoon in shadow.
Spacing between rows needs to fit a wheelbarrow or at least your own two feet at harvest time.
The old farm layouts assumed you’d cultivate between rows with a hoe, which controlled weeds in large fields where labor was tighter than space. At home, that same gap becomes wasted ground unless you’re running a tiller through it.
For the crops that truly demand rows, potatoes work well because you can hill soil up from both sides, and staked tomatoes or pole beans are easier to pick when you can circle the support.
Peas also reward the row format since the pods hide among foliage and you need both sides within reach.
Block planting squeezes more food into the same footprint, but rows win when the plant needs staking, hilling, or access from both flanks.
3. Block Planting
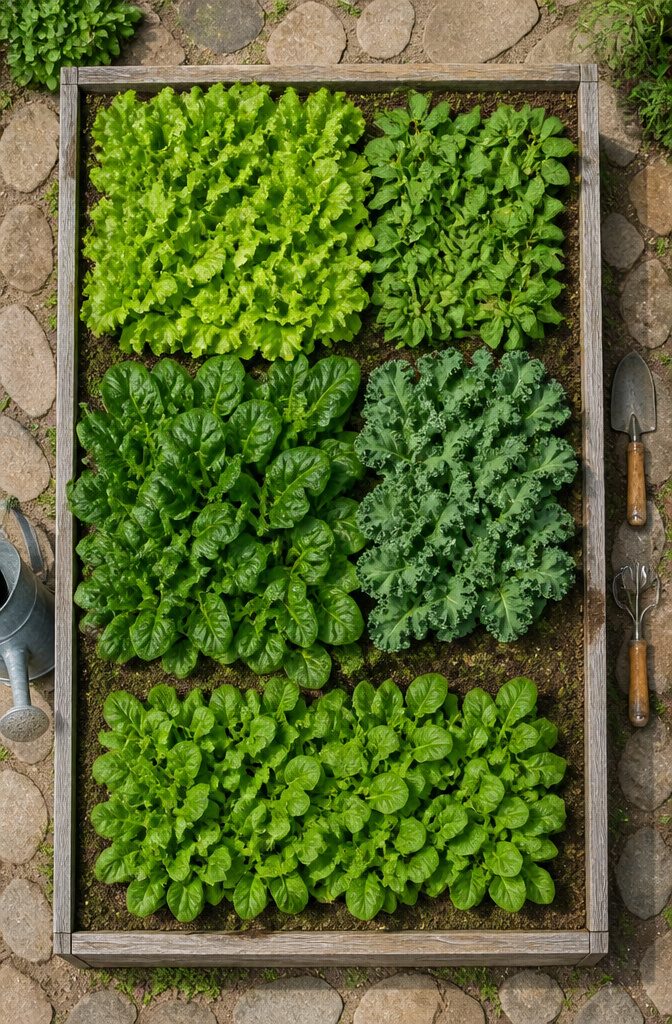
Block planting groups vegetables into solid rectangles instead of scattering them in long single rows. Block planting works because you eliminate the bare soil between rows, which means fewer weeds germinating and more production from the same footprint.
In a traditional row layout, that aisle space is reserved for walking and cultivating. That design makes sense when labor is cheap and land is unlimited, but most home gardeners face the opposite problem.
The visual effect is denser and more intentional. A block reads as a living mass rather than a series of parallel lines, and the tighter canopy shades the soil surface before weeds can take hold.
Pollination tends to improve too, with flowers clustered where pollinators can work efficiently rather than strung out in thin ribbons.
I would keep each block to about 3 or 4 feet in its longest dimension.
That length lets you reach the center without stepping into the bed and compacting the soil. Raised beds suit this method especially well, since the defined edges already encourage a contained shape.
Leafy greens, bush beans, and determinate tomatoes thrive in blocks. Plants that need staking on individual poles, like indeterminate tomatoes, still work better as single rows where you can walk the aisle and tie them without crushing neighbors.
Blocks do demand more upfront planning on spacing, since overcrowding in every direction is easier than in a row. Measure twice, or you will thin later.
4. Four Square Garden
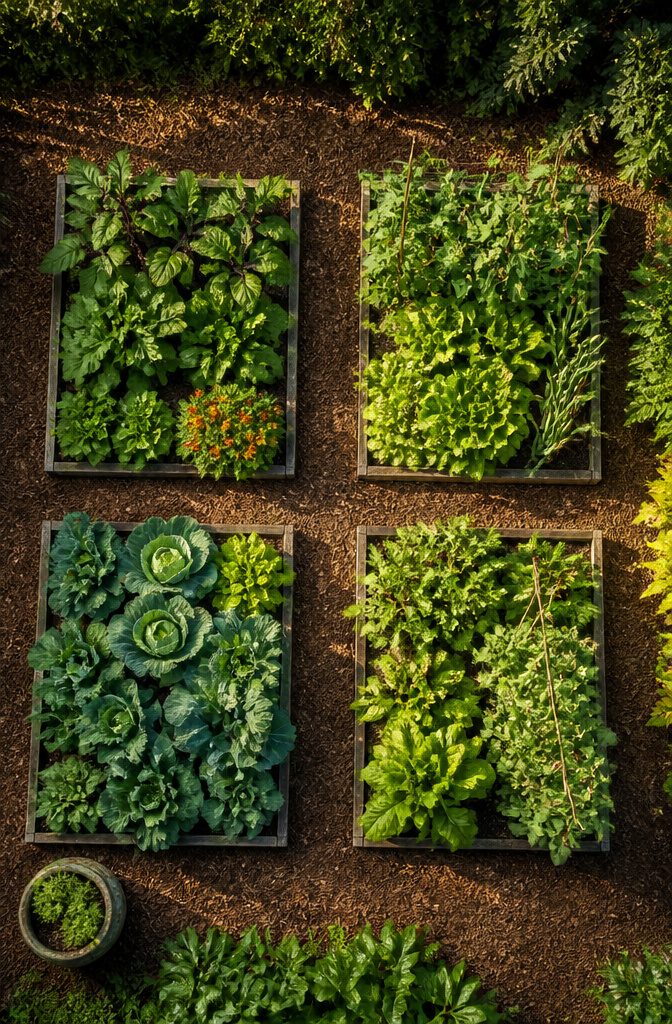
Dividing a garden into four equal quadrants is the oldest systematic layout I know, and it still earns its keep for one reason: crop rotation becomes automatic.
Each bed gets its own plant family, and every spring you shift everything clockwise one quarter.
Tomatoes move where the beans were, beans take the corn’s spot, and so on. The fourth year puts that family back where it started, which hits the minimum gap most soil-borne diseases need to fade out.
The rotation itself matters more than the geometry. Vegetables in the same botanical family pull the same nutrients and attract the same pests.
Give them three to four years before they return to the same ground, and you break disease cycles while keeping the soil from going bankrupt on any one mineral.
In a small backyard plot, that spacing can feel like a squeeze, but the four-square system makes it visual. You see at a glance what grew where, so you do not accidentally repeat.
I would start with families that play well together: nightshades in one bed, legumes in the next, brassicas and then root crops.
The clockwise shift is rigid, which is the point. Rigid is what keeps you honest when you are tempted to plant tomatoes in the same sunny corner three years running.
5. Container Gardening
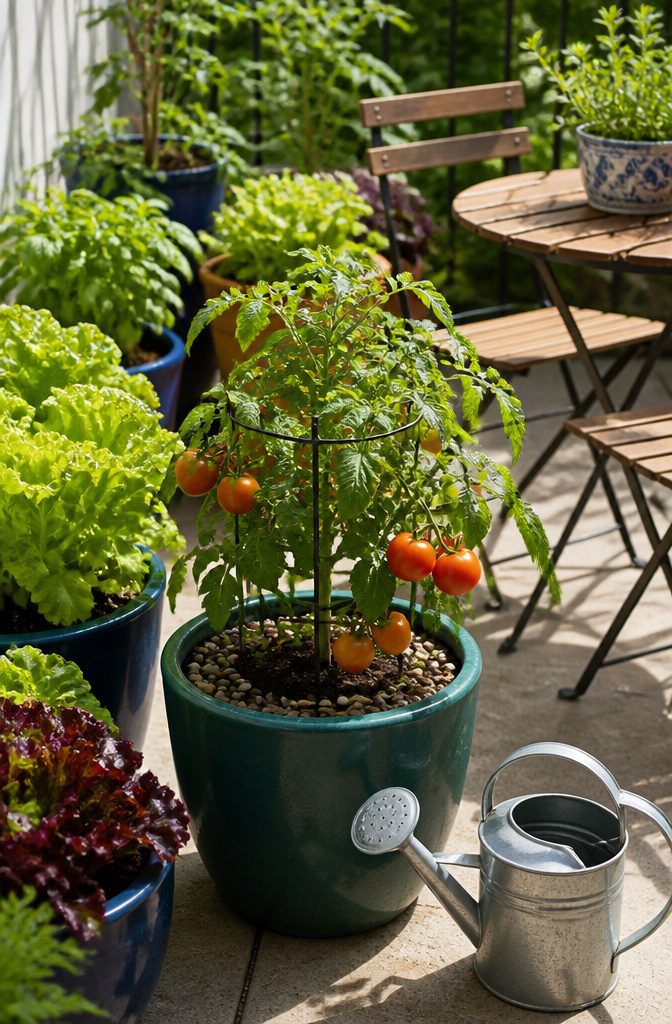
Pots and containers turn a concrete patio or rental balcony into workable growing space without asking permission from a landlord. Drainage is what trips people up.
A tomato in a pot with no hole rots at the roots faster than it fruits, so drainage holes are non-negotiable; add an inch of gravel at the bottom only if the saucer underneath still lets water escape.
Soil matters just as much.
Garden dirt or bagged topsoil compacts in a container and suffocates roots. Potting soil is the right choice here; it is formulated to stay loose and hold moisture without drowning the plant.
Size sets the limit.
A 10-inch diameter is the practical floor for most vegetables, and anything smaller belongs to herbs or a single lettuce. Radishes and lettuce are forgiving starters for someone new to this.
Compact or dwarf varieties are the ones that actually produce in tight quarters; full-size tomatoes or sprawling squash outgrow their pot and their welcome by midsummer. Peppers handle elevation well, sitting above ground competition where they still catch sun.
The vegetables that struggle are the ones with deep taproots or heavy fruit that needs staking: standard carrots, full-size eggplant, and indeterminate tomatoes demand more soil volume and support than a weekend setup on a deck usually offers.
6. Vertical Gardening
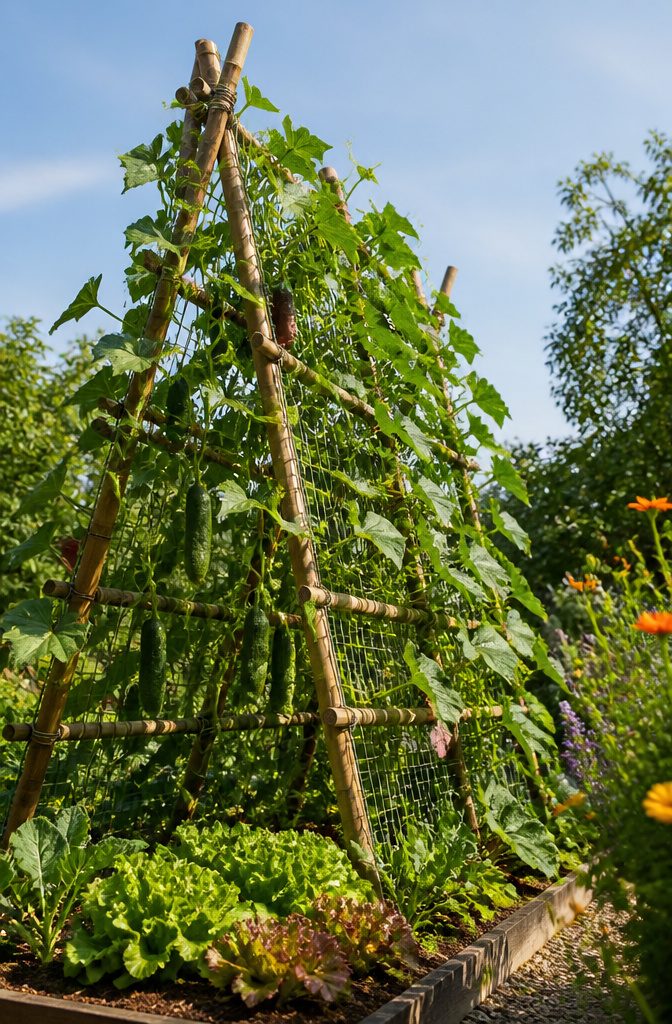
Vertical gardening turns the smallest footprint into productive ground by growing upward on trellises, stakes, or supports instead of letting vines sprawl.
A bamboo-and-wire-mesh A-frame is one sturdy, inexpensive structure that frees the soil beneath for a second crop, like leafy greens that appreciate summer shade.
The plants that actually need this are the vining types: cucumbers, pole beans, runner beans, sugar snap peas, tomatoes, and squash.
Bush varieties won’t climb, so check your seed packet before you commit. Malabar spinach and achocha, sometimes called Bolivian cucumber, are less common climbers that handle heat well if you’re looking past the usual choices.
Air circulation improves dramatically when stems hang in open space rather than tangling on the ground. That spacing also means faster drying after rain and less pressure from soil-borne disease.
Structure cost and the time spent training tendrils early in the season are the real costs. Without that attention, a vertical garden collapses into the same mess it was supposed to prevent.
I think the effort pays off on any bed under eight feet wide, where a trellis at the back creates a green wall without eating your walking room.
7. Raised Bed Gardening
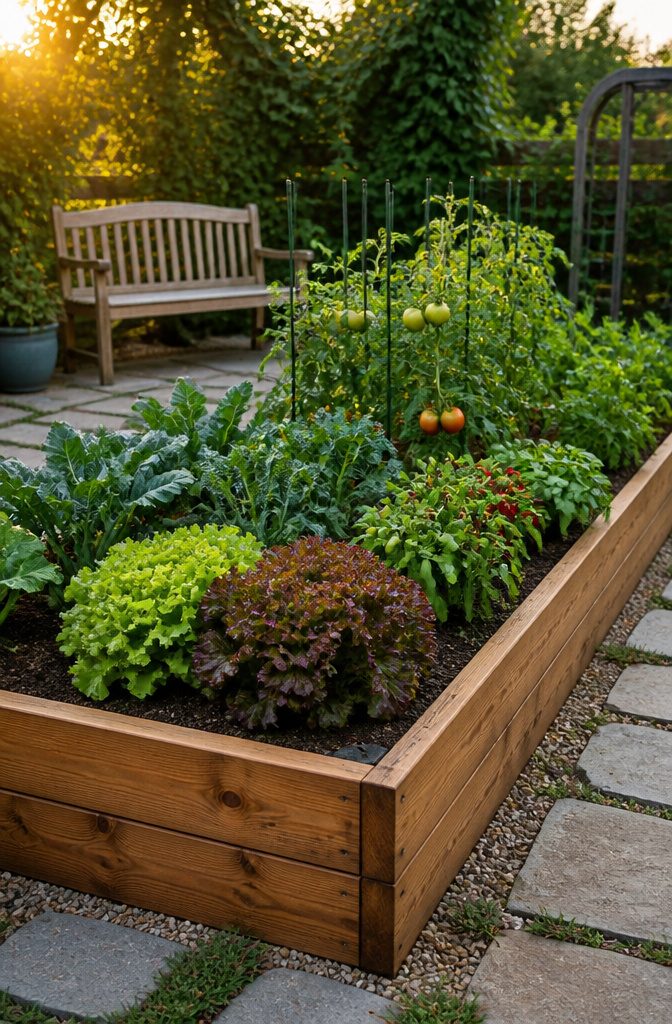
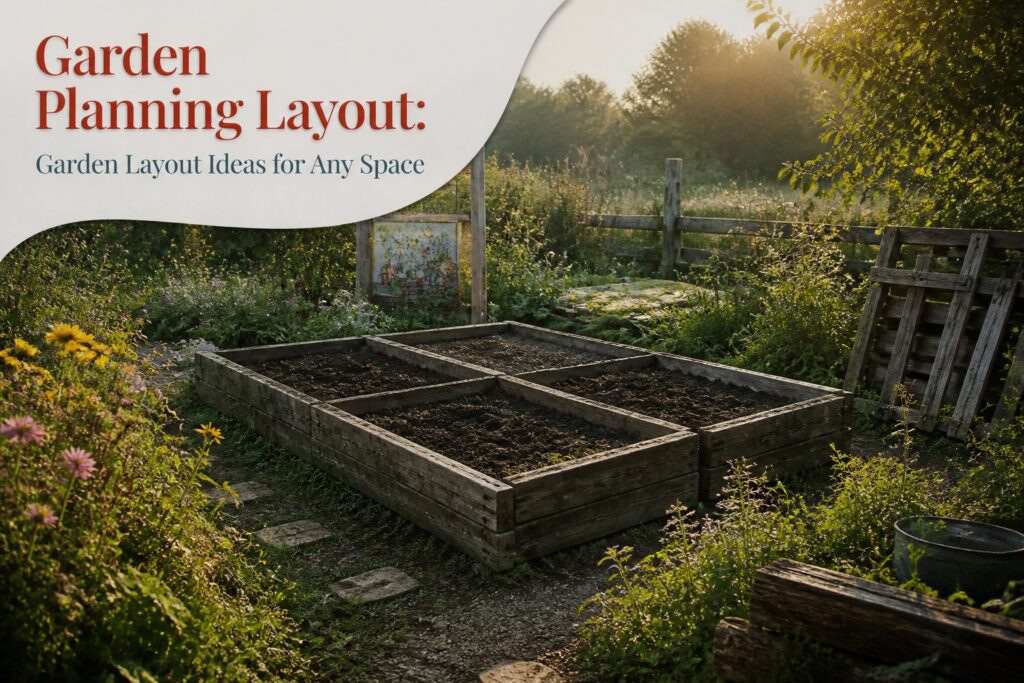
Raised beds give you control over soil from day one, which matters if your yard came with heavy clay, compacted construction fill, or roots from an old maple.
You fill the frame with loose, organic mix instead of spending years amending what is there, and the elevation lets that mix drain fast even after a soaking rain.
Leafy greens and annual vegetables especially need that drainage; their roots rot quickly in standing water.
For width, keep the bed between 3 and 4 feet. At that span you can reach the center from either side without stepping onto the soil, and avoiding that foot traffic is why you built it.
Step in, and you undo the loose structure you just built. Cedar or hemlock boards last several seasons without treatment, though I would skip anything thinner than 1.5 inches; the outward pressure of wet soil bows cheap lumber by August.
If you are planting against a wall or fence, cut that width to about 2 feet, roughly the length of your arm, since you will only tend from one side.
A bed narrower than 1.5 feet wastes the effort; you will not fit enough rows to justify the construction.
Sunlight and Water
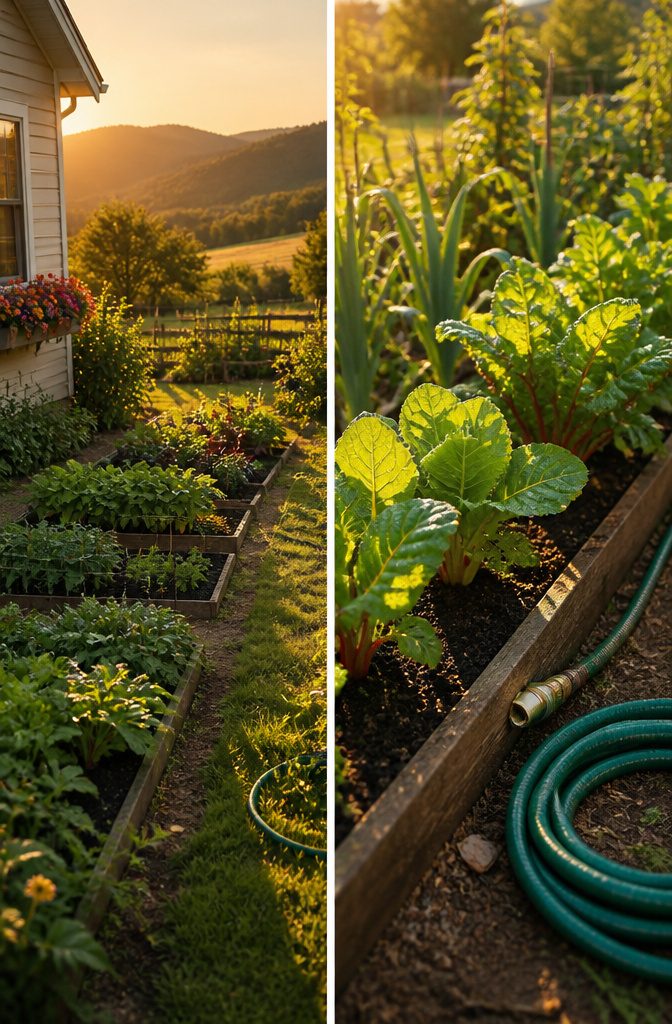
Most vegetables need 6 to 8 hours of direct sunlight to produce well, and the winter sun sits lower and stretches shadows farther than you might expect from midsummer memory.
I would walk the space with a notebook at three or four points across a single day, then again in early spring when bare branches let through light that leaf cover will steal by June.
Mark the north-facing edge on any sketch; it keeps you honest about which beds stay shaded until noon.
Water access matters just as much. A hose that barely reaches the far corner turns daily watering into a chore you will skip, and skipped watering shows up in stunted fruit within a week.
I place beds within easy reach of a spigot, or I run a short line of soaker hose before the plants go in.
Layout shapes efficiency here: grouping thirsty crops together beats scattering them across a plot that needs three separate trips with the can.
Soil Quality
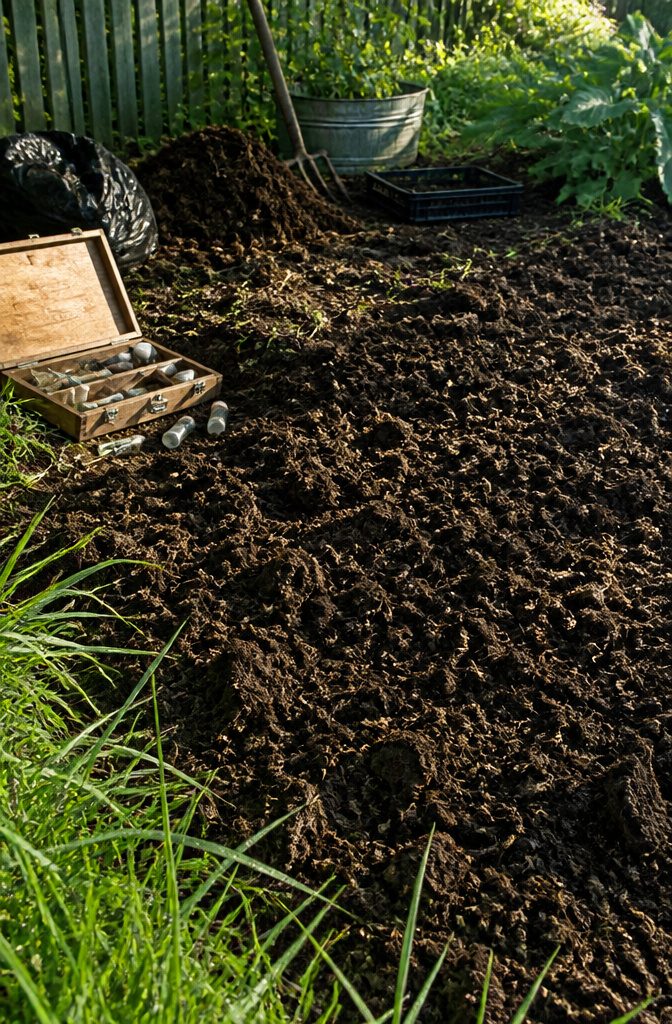
Soil testing is the first move I make before deciding on a garden planning layout. A simple kit from the hardware store tells you pH and nutrient levels, but the real test is watching where water stands after a rain.
Low spots that hold water for more than a day mean "wet feet" and root rot for most vegetables, and no amount of compost fixes that drainage problem in the ground itself.
Compost improves fertility and structure, and I work it in each fall after harvest and again in spring.
Bulk or bagged, it is the cheapest way to build soil health over time. But heavy clay or very sandy native soil changes what layout actually works.
In-ground rows or blocks need years of amendment before they perform, and impatient gardeners, or those with truly poor ground, should skip straight to raised beds or containers.
Raised beds filled with imported mix give you a fresh start.
The soil warms and dries faster in spring, so you plant earlier, and drainage is built in even after heavy rains. Keep them 3 to 4 feet wide so you can reach the center without stepping in and compacting the soil.
For leafy greens and annual fruits, this is the layout I would choose over native ground almost every time. Native plants, shrubs, and flowers are less particular, and they will tolerate in-ground planting with minimal amendment.
Cost and labor are the real costs. Raised beds cost more upfront and need filling.
Containers go even further for renters or tiny spaces, but they dry out faster and need more frequent watering. If your soil is only moderately imperfect, amend what you have and plant in ground.
If it is heavy clay that stays soggy or sand that will not hold moisture, raised beds are not a luxury; they are the only layout that will not fail you.
Plant Spacing and Compatibility
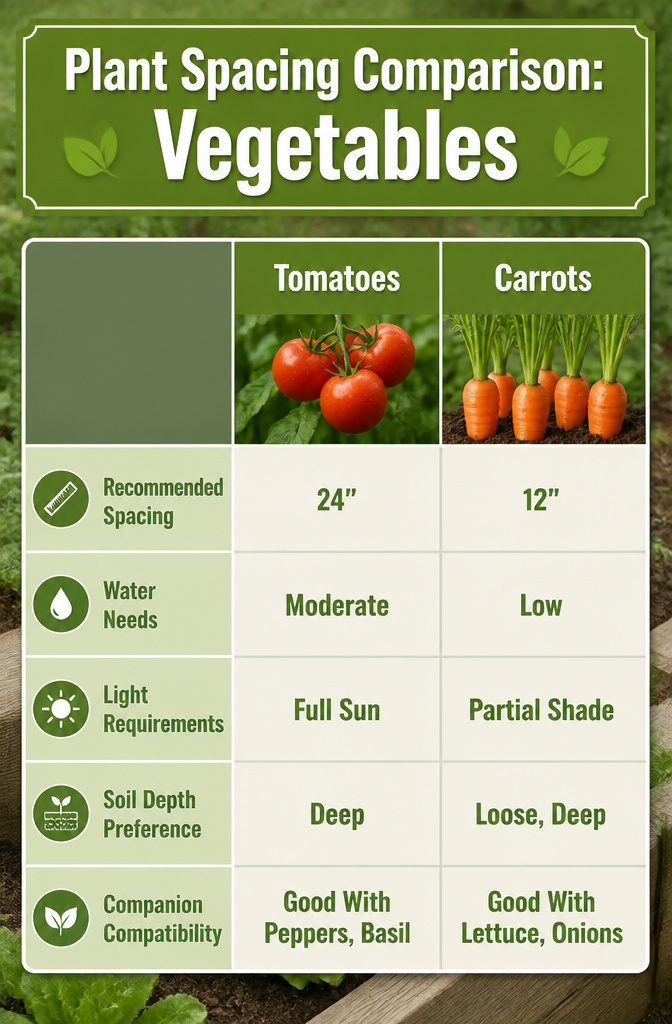
The seed packet is the only map you need for plant spacing, and follow the smaller number when you’re unsure.
Most packets list a range, and crowding on the tight end beats thinning later over guessing too wide and wasting soil. I treat those numbers as a ceiling, not a target, especially in a raised bed where every inch counts.
Mixing vegetables in the same bed works fine if their growth needs line up. Tomatoes and peppers share sun and water demands; carrots and lettuce pair well because one roots deep while the other stays shallow.
The real risk is packing them so tight that leaves overlap and block air circulation. That stagnant space between plants is where mildew and rot set in fast.
Give them room to breathe, even if it means fewer plants per square foot. A slightly sparse bed outproduces a packed one that succumbs to disease by midsummer.
Starting Size and Common Mistakes
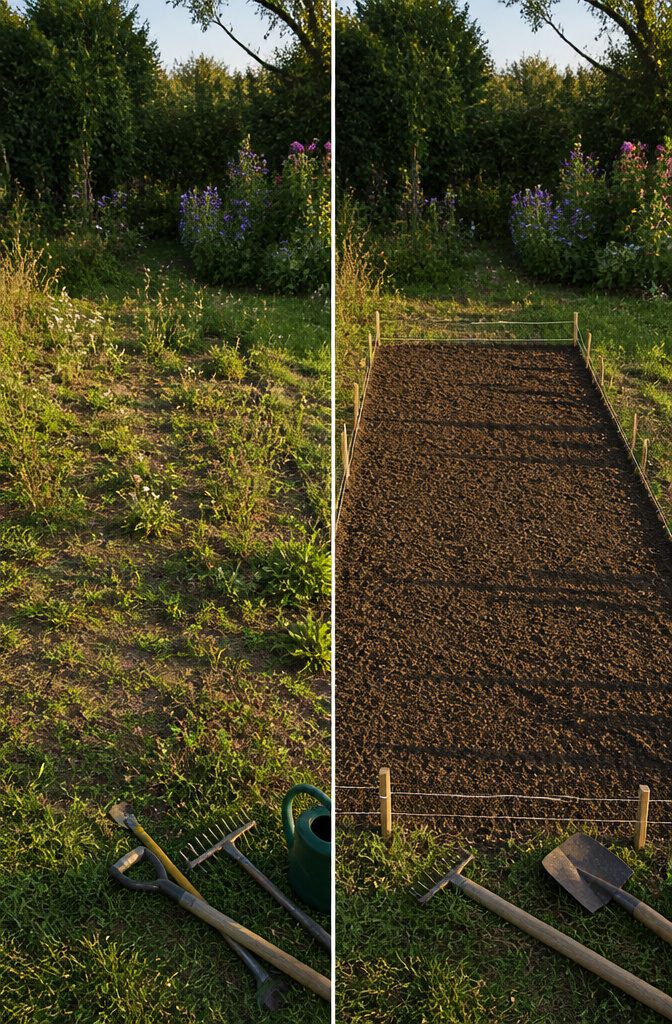
A 100 square feet plot, or roughly 10 by 10 feet, is the starting size I would actually stake out if I were helping a friend plan their first garden.
Anything larger and the math of maintenance starts working against you in ways that are hard to see in April but obvious by July.
Every additional square foot multiplies weeding, watering, and the sheer hours you spend on your knees in soil.
Sources consistently describe the same arc, an enthusiastic beginner tills up half the backyard, plants aggressively, and by midsummer the plot is half weeds, half regret, with tomatoes going woody on the vine because nobody had time to stake them.
A 4 by 8 foot bed, even smaller than that 100 square foot benchmark, still teaches you what your actual habits are before you have invested too much pride to walk away.
I would rather see someone finish their first season wanting more ground than finish it dreading next spring.
You can always expand in year two once you understand how much evening time you will reliably spend out there. The garden you keep is always more productive than the garden you abandon.
Digital Planners and Community Options
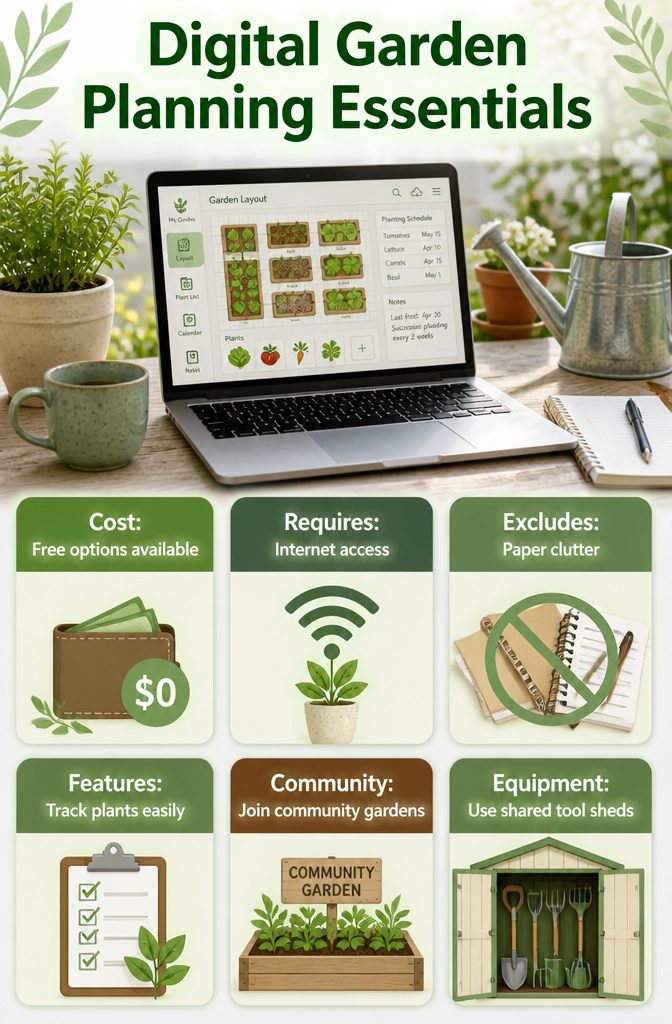
Digital tools can keep your garden planning layout organized without the clutter of paper notebooks.
Most free apps let you drag beds into place, set planting dates, and track what worked last season. I would skip the paid upgrades; the free tiers handle everything a weekend gardener needs.
- A simple spreadsheet is what I actually use for my own schedule. I note last frost, succession planting dates, and which varieties flopped, all in one tab I can check from my phone in the garden.
- Community gardens are worth joining if your rental lacks sun or your soil is questionable. Plot fees typically run $25–$75 per season, water and compost included, with waitlists in some cities and open spots in others. Commute time and rules about what you can plant are the real costs.
- Shared tool sheds at community sites mean you can skip owning a rototiller or buying one for a single bed. I would rather borrow twice a year than store machinery I rarely touch.
Frequently Asked Questions
What is the best vegetable garden layout for beginners?
Square foot gardening is the best starting point for beginners.
It divides your bed into a grid of 1×1-foot squares, each holding a single vegetable type based on its spacing needs, so the math is built in and there is no guessing how many plants fit.
A 4×8-foot bed is plenty to learn on, and 100 square feet is the manageable ceiling for a first season.
How do I determine the spacing for my vegetables?
Check the seed packet and follow the smaller number when you are unsure.
Most packets list a range, and planting on the tighter end beats guessing too wide and wasting soil. In square foot gardening, you divide 12 inches by the spacing number to find how many plants fit in one square.
Can I mix different vegetables in the same garden layout?
Yes, if their growth needs line up. Tomatoes and peppers share sun and water demands, while carrots and lettuce pair well because one roots deep and the other stays shallow.
Leave enough room between plants for air to circulate, since crowded leaves trap moisture where mildew and rot spread fast.
What is the 70/30 rule in gardening?
Focus instead on matching plant families to compatible neighbors and giving each plant the spacing its seed packet recommends.
Is there an app to plan a garden layout?
Yes, several free digital tools let you drag beds into place, set planting dates, and track what worked last season.
The free tiers handle everything a weekend gardener needs. A simple spreadsheet also works well for noting last frost dates, succession planting, and which varieties flopped.
What is the 3-5-7 rule in landscaping?
For edible gardens, the more relevant numbers are 3 to 4 feet for raised bed width so you can reach the center without stepping in, and 6 to 8 hours of direct sunlight for most vegetables to produce well.
What is the 5, 4, 3, 2, 1 gardening method?
For planning a productive vegetable garden, the systems it describes, square foot gardening, block planting, and the four-square rotation, give clearer frameworks for spacing, compatibility, and keeping soil healthy year to year.