These 12 ideas range from a scrap-wood sofa sleeve that costs nothing but offcuts to a full outdoor picnic table that asks for a full Saturday and a trip to the lumberyard.
The one that belongs in your shop depends on whether you need it to roll, sit, organize drawers, or hold a plant above the floorboards.
I would check that the caster rating matches your expected load before I committed to the rolling shelving unit; cheap ones flatten under bags of potting mix or power tools, and that single detail saves the whole project from tipping halfway across the garage.
[link-whisper-related-posts]1. DIY Plant Stand
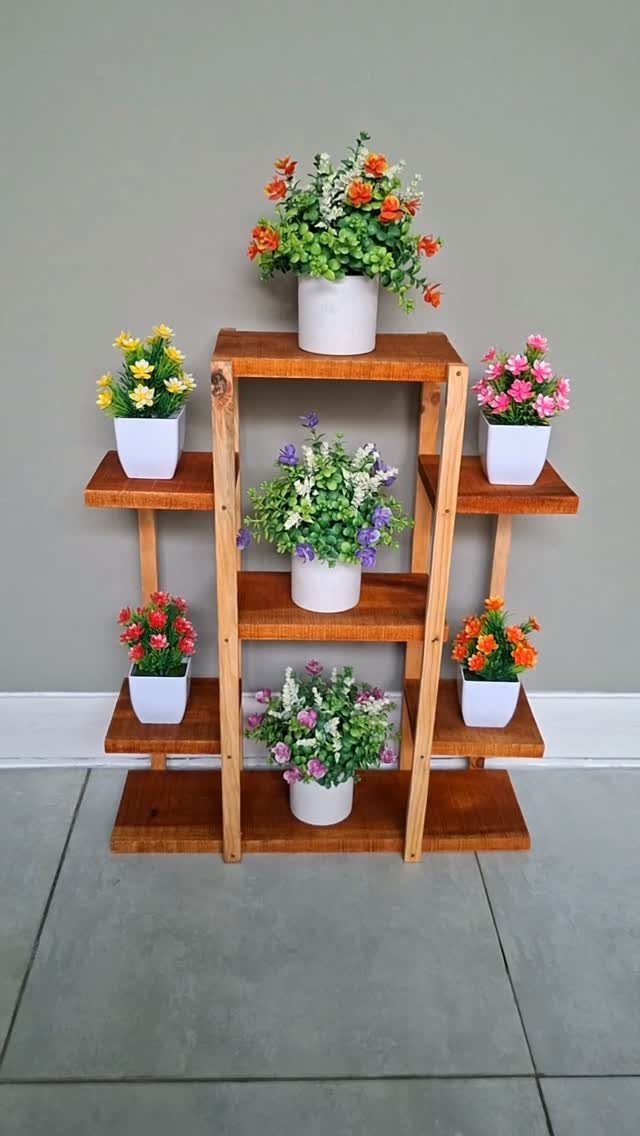
A tiered plant stand turns a scattered collection of pots into a single display piece. The stepped levels mean measuring your tallest plant first; the top tier needs clearance to the ceiling or light above it.
I would check whether the feet sit flat on tile or if they need leveling pads, since a wobble gets worse as you water.
Pine or poplar works fine indoors, but cedar holds up if you plan to move it outside later.
2. DIY Laptop Stand for Desk
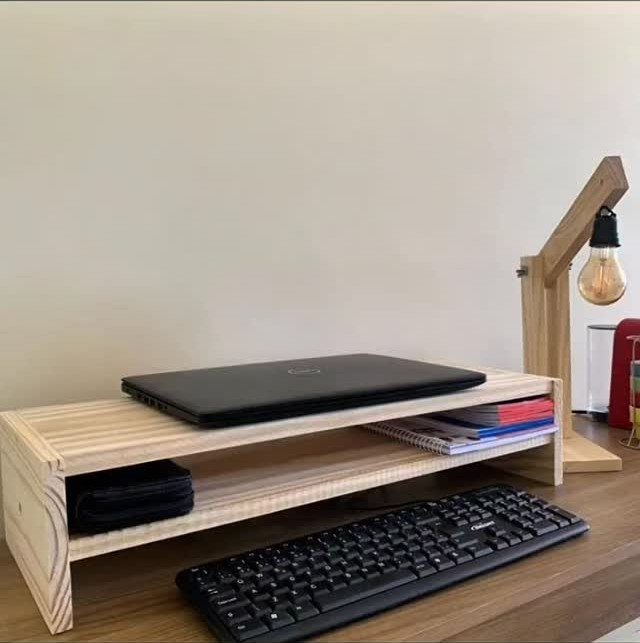
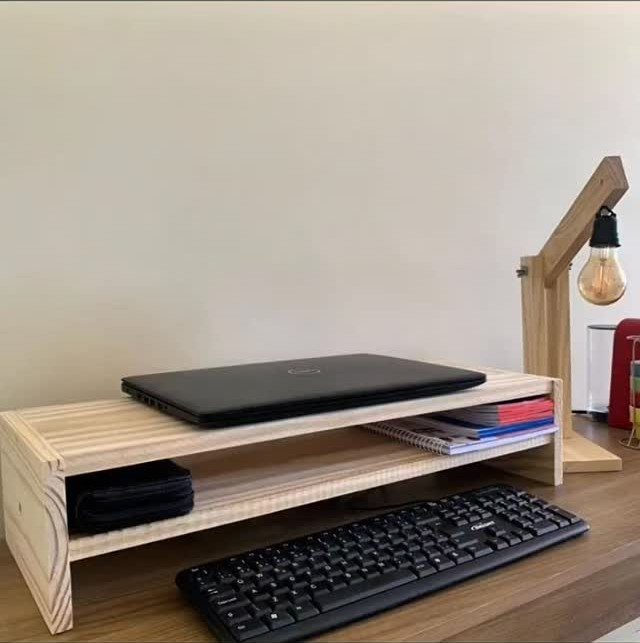
The pine stand lifts a laptop enough to bring the screen closer to eye level without an external monitor.
The maker of this piece used solid pine, which tells me the weight stays light enough to slide aside when you need the desk clear.
I would cut the angle so the base footprint stays wide and the machine does not tip if you bump it.
A slot routed in back for cables keeps the keyboard from pushing the stand forward; that detail costs nothing in lumber but saves frustration later.
3. DIY Wooden Bench
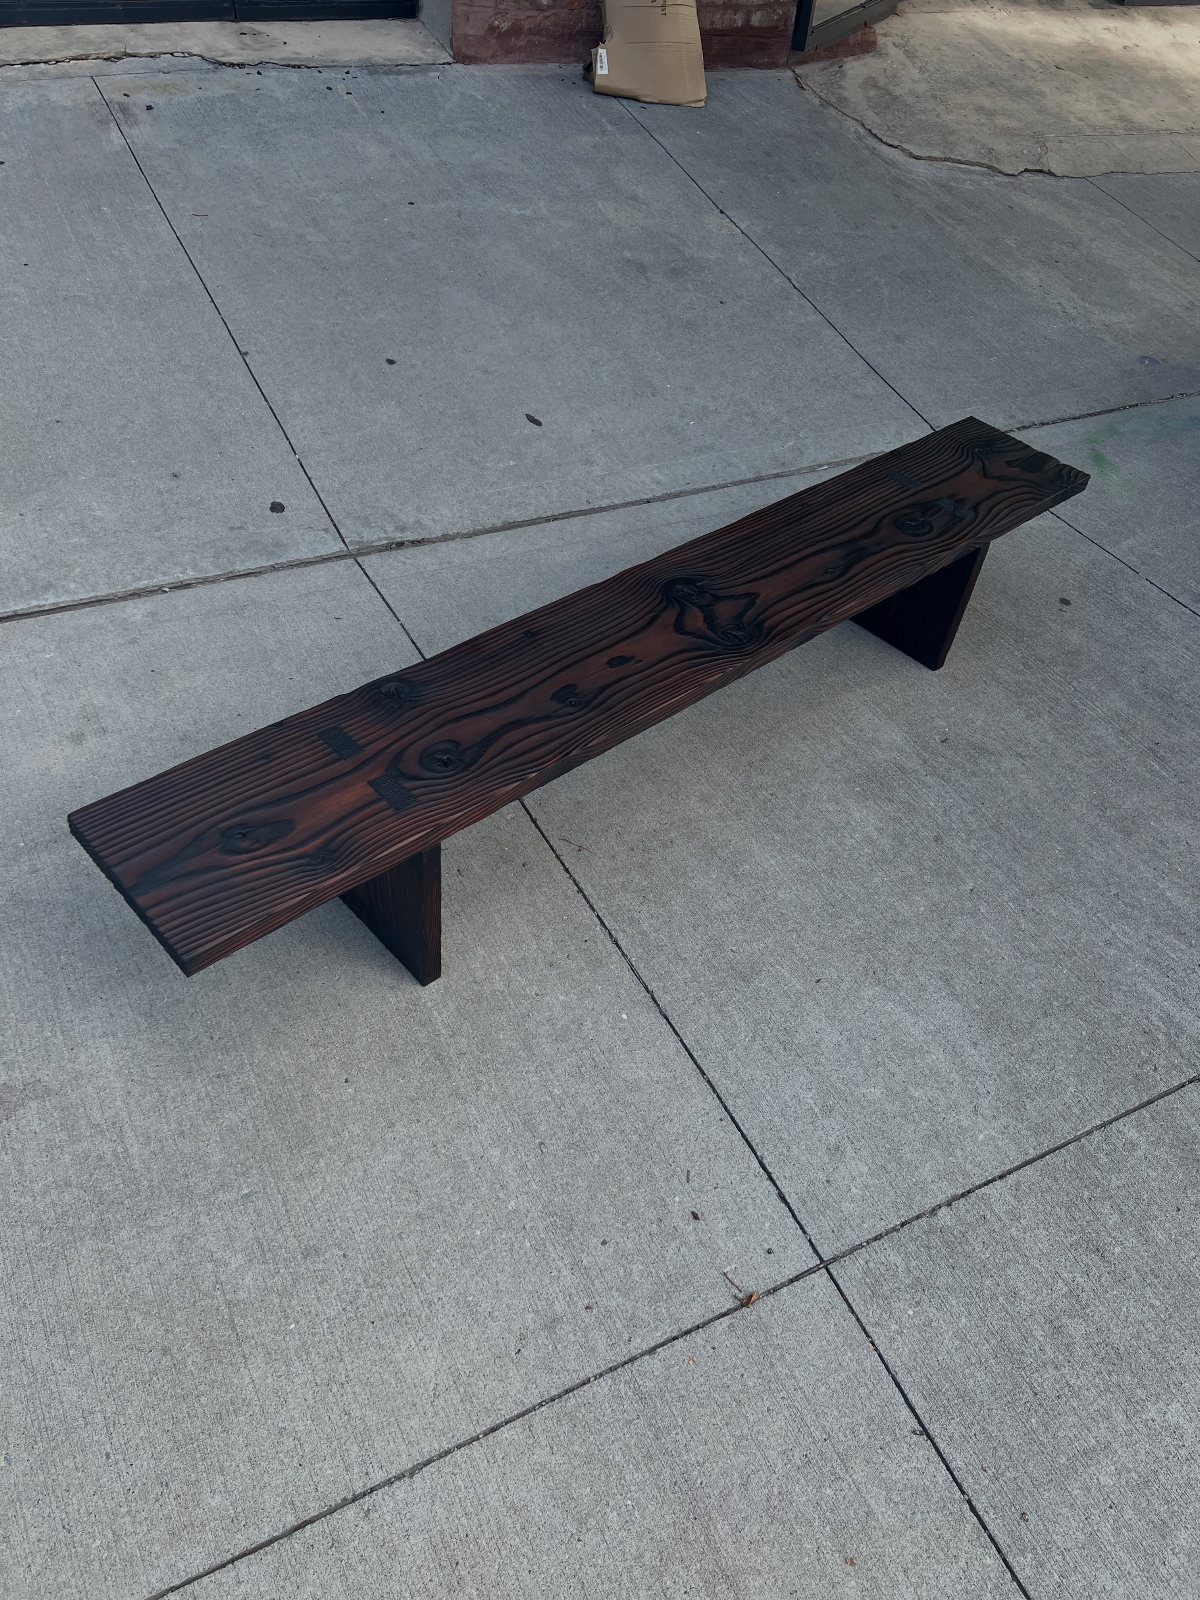
A simple bench like the dark-stained version can be built from 2x4s and a single 2×10 for the seat in an afternoon. The visible length suits sitting without requiring the internal bracing a longer span would need.
I would sink screws from the inside face so the outer surfaces stay clean, then plug the holes if you plan to stain; paint hides more, but the grain is worth showing off.
Softwood moves outdoors, so gap the seat boards for drainage and let the stain dry fully before the first rain.
4. DIY Step Stool
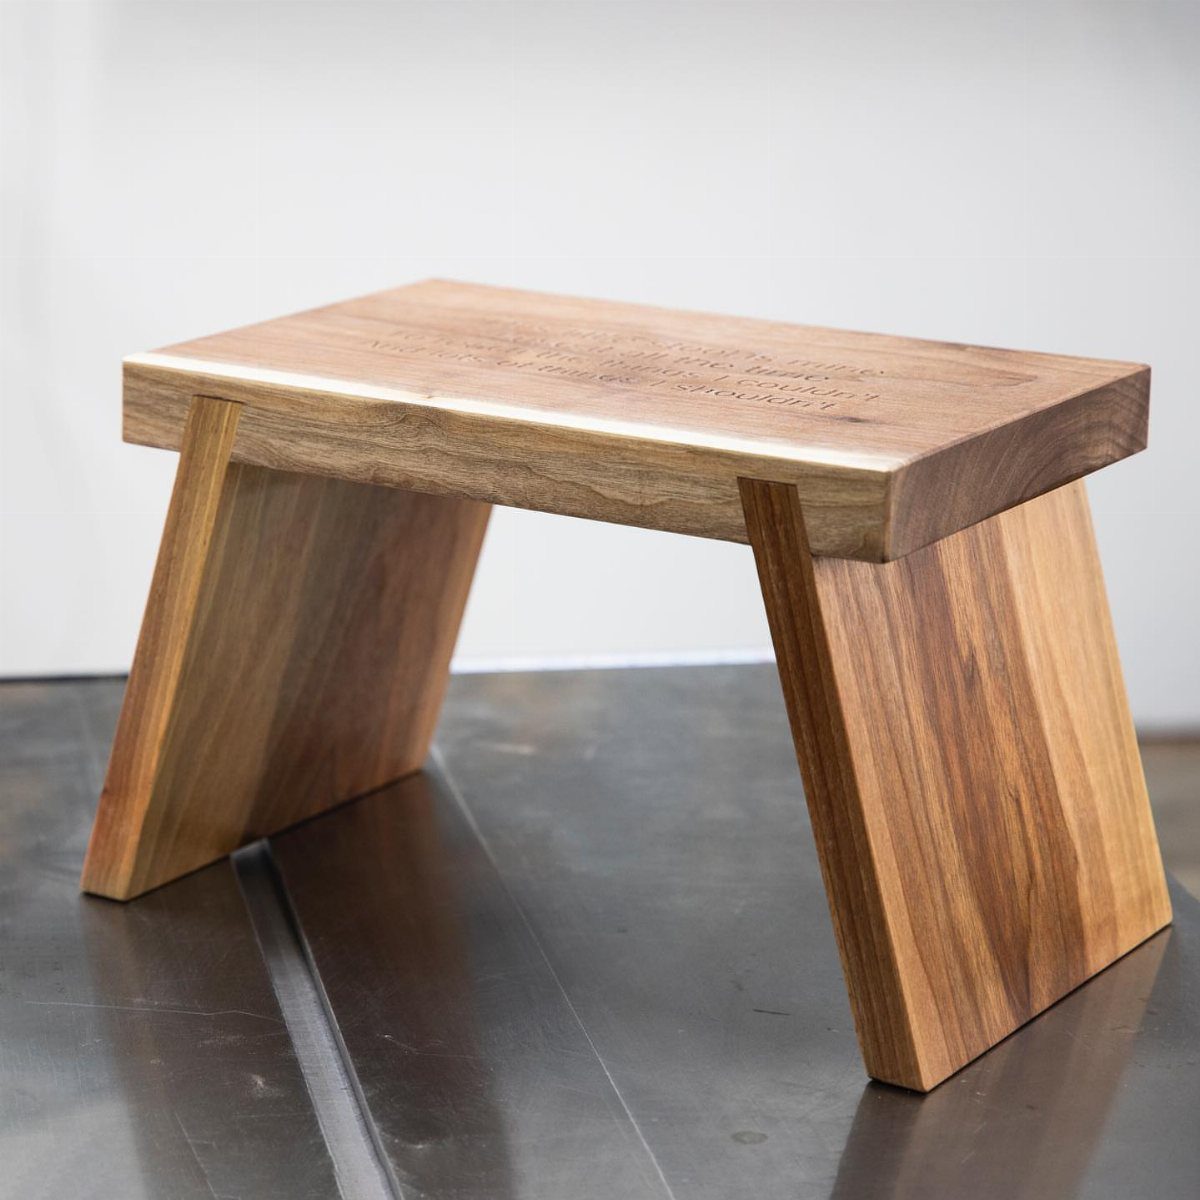
A step stool with thick planks and angled legs gains its stability from the width at the base, not the top.
The engraved version sits low, which is the height I would pick for kitchen use; anything taller starts to feel wobbly on a single step.
Check that the legs splay at least 2 inches wider at the floor than at the seat, and rout a handhold in the top board before assembly; lifting by the edges tilts the thing against your shins.
Soft maple takes engraving cleanly if you want the personalized detail.
5. DIY Wooden Drawer Organizer
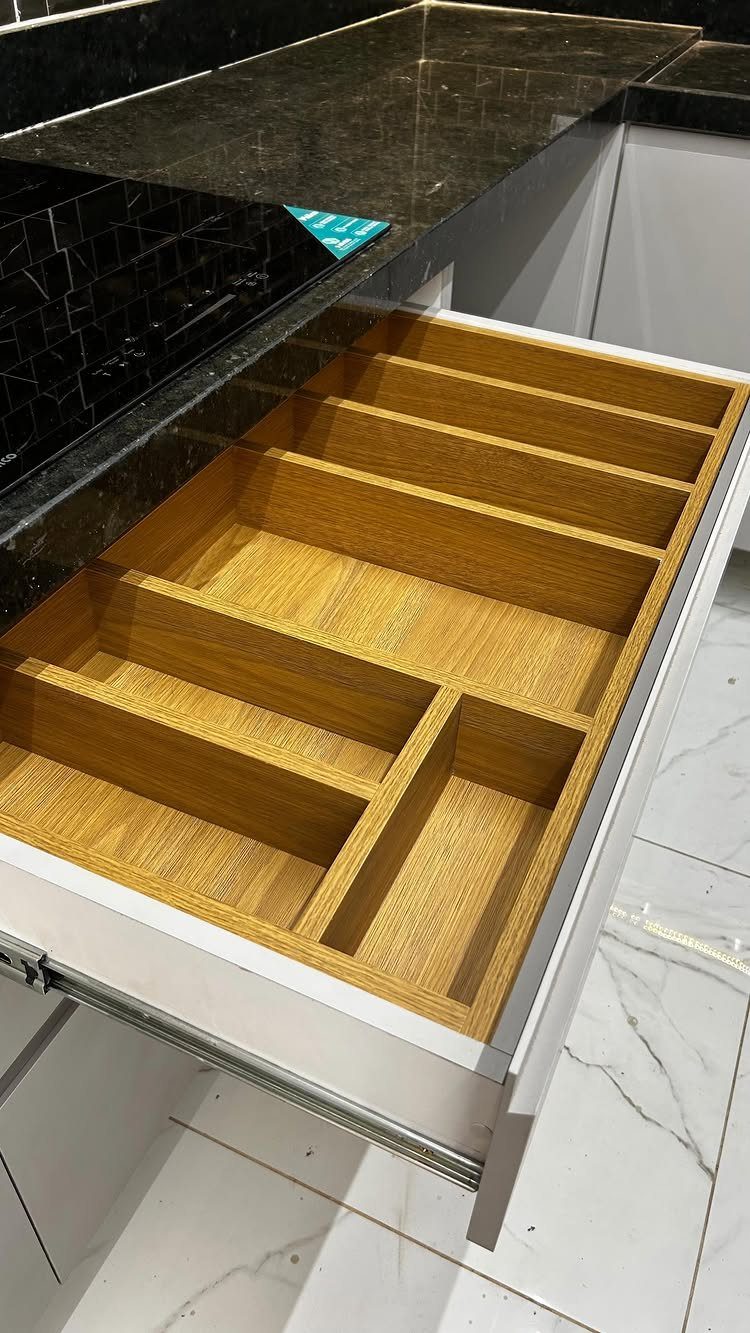
A custom drawer organizer beats buying adjustable plastic because you can build the compartments to your actual utensils, not an average.
The visible version fills a white kitchen drawer with fixed dividers; I would measure the longest tool first, usually a serving spoon, then set one full-length bay before cutting the smaller slots around it.
Baltic birch plywood at half an inch resists the humidity swings that warp solid wood in a kitchen.
Leave an eighth of an inch total clearance side to side so the insert slides in without binding as the drawer faces swell in summer.
6. DIY Wall Hooks
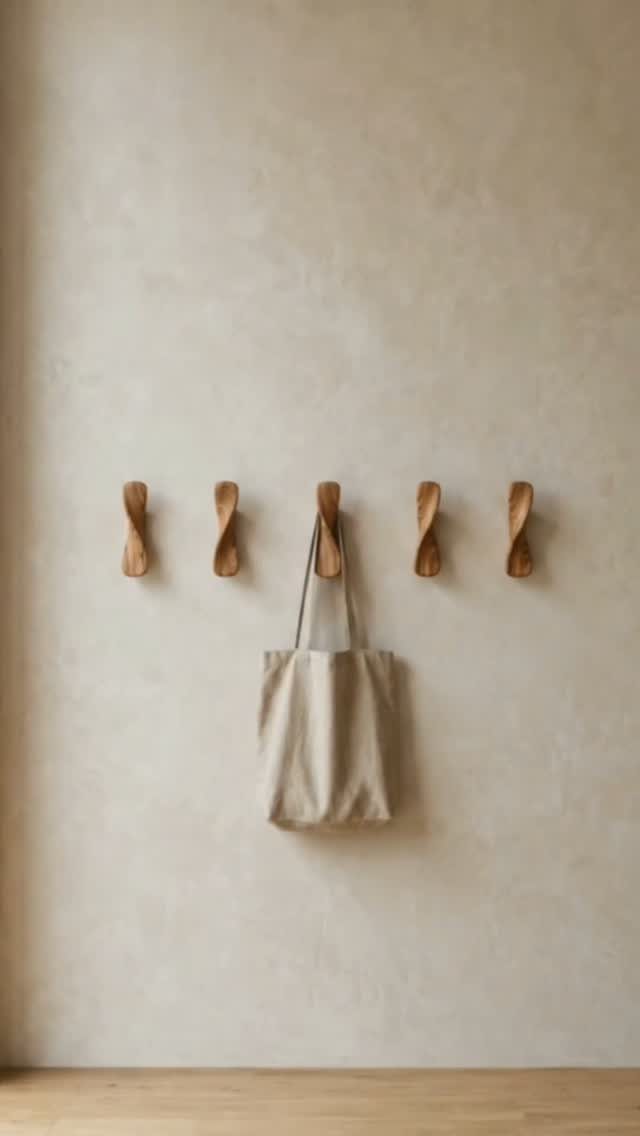
Twisted wooden hooks turn a row of wall storage into something that reads as hand-shaped rather than bought.
I would mount them on a backing board first, then hang that board on studs, since plaster or drywall alone strips under the lever of a loaded tote bag.
Oak or ash withstands the diagonal grain where the twist runs, and a French cleat behind the board lets you level the whole row after the fact.
7. Scrap Wood Table for Sofa Arm
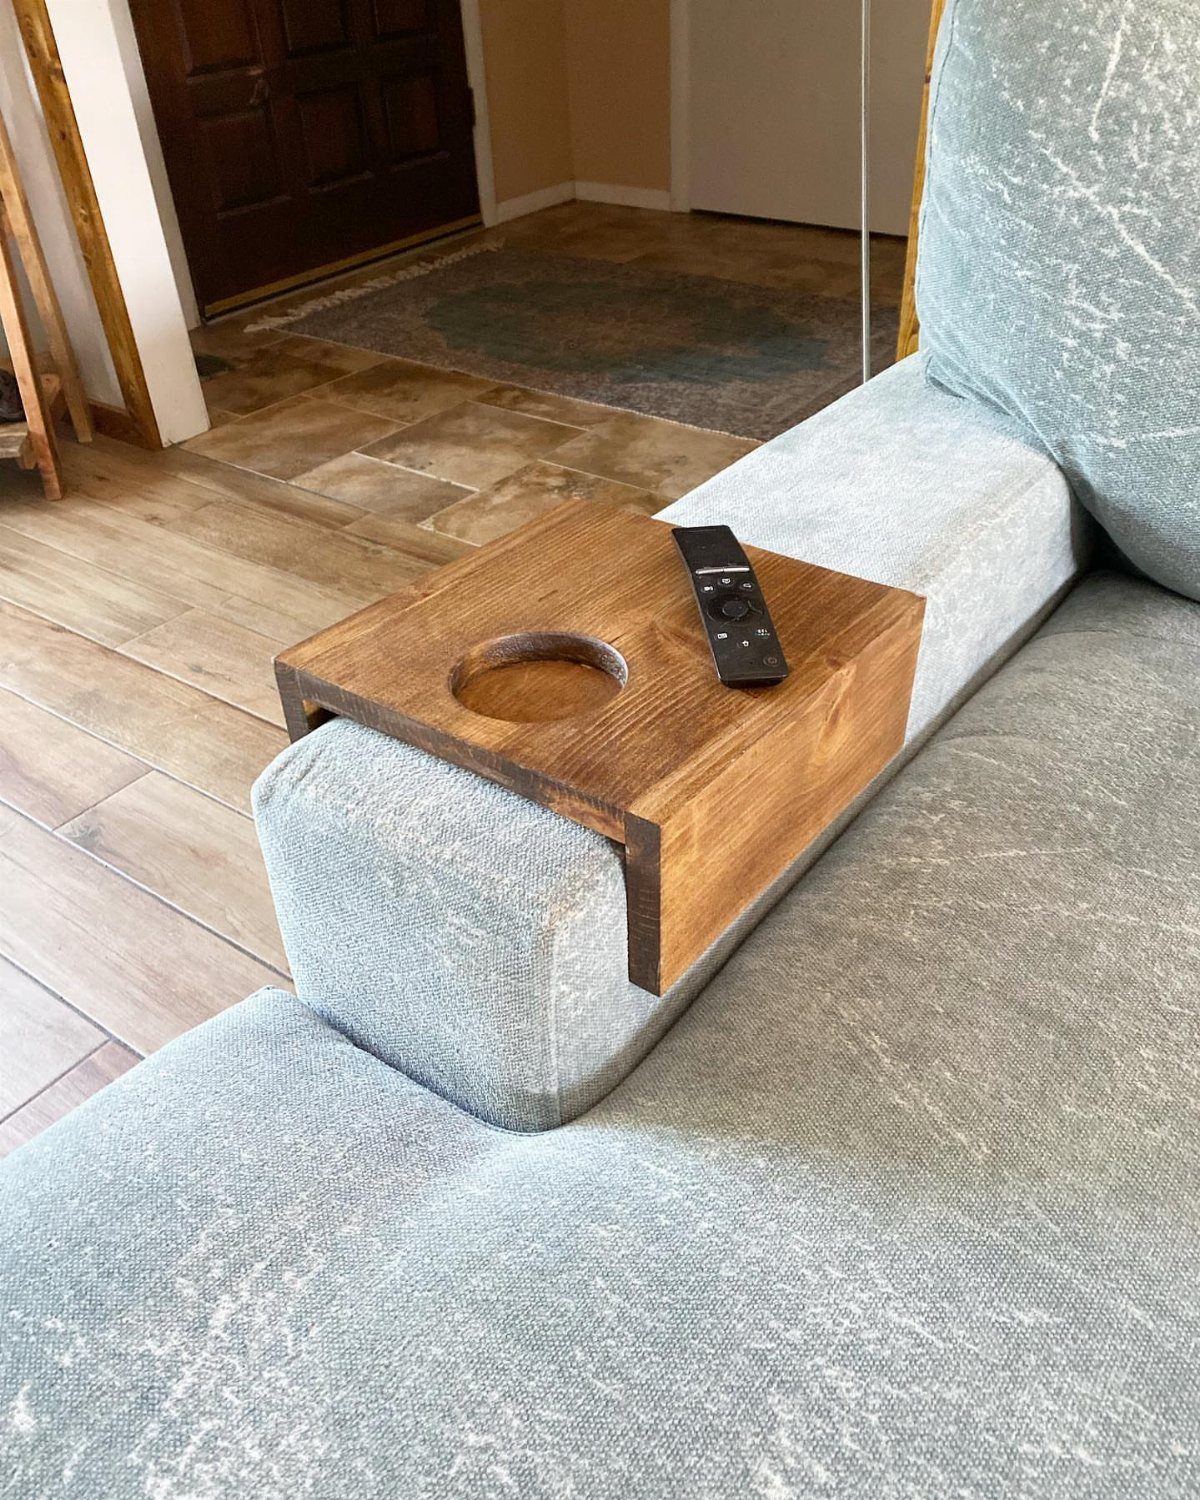
A scrap wood sleeve table bridges the gap between sofa arm and usable surface without legs to stub a toe on.
The visible version carries a routed recess for a drink, which I would size to fit my actual mug before cutting; a shallow well catches condensation, a deep one risks a spill over the rim.
I would check the arm width at 3 points since upholstery tapers, and pad the inner faces with felt if the fit runs tight.
Soft pine or fir offcuts work here; the grain hides under use, and the piece lifts away when you rearrange.
8. Kids’ Picnic Table
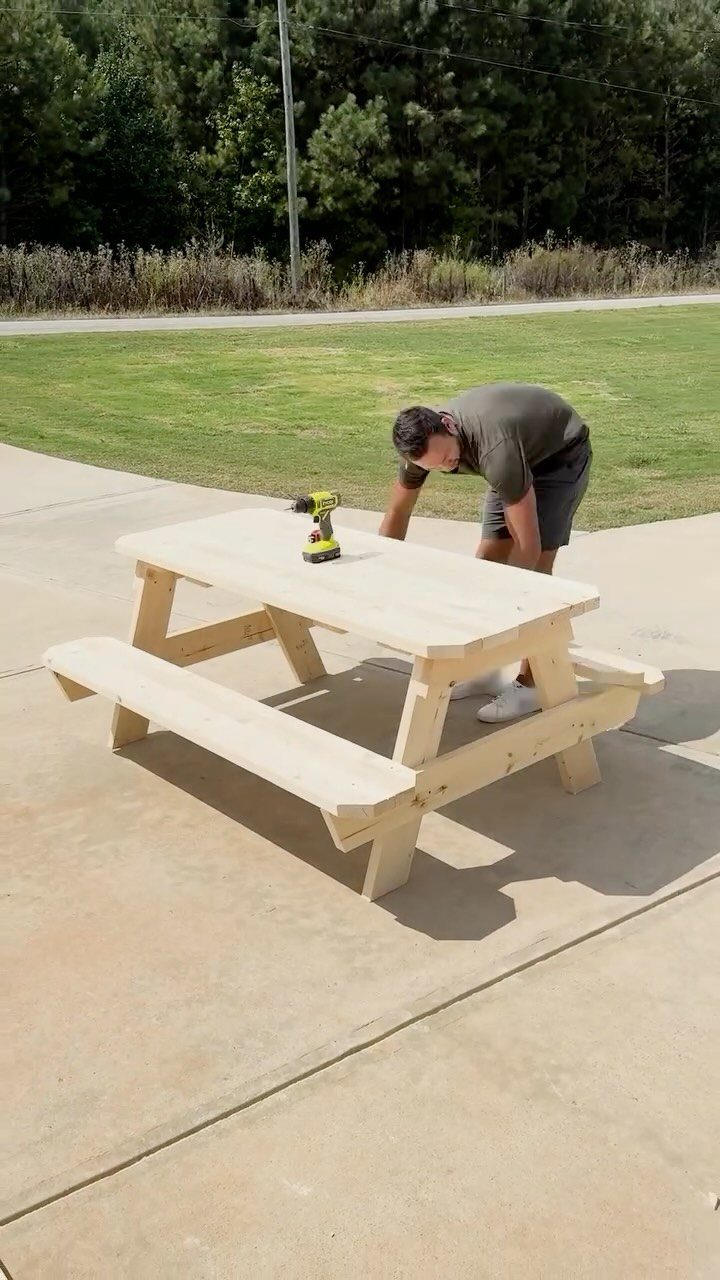
A kids’ picnic table scaled to small legs keeps them at the meal instead of dangling.
The visible build sits low enough that a fall is a stumble, not a drop; I would keep the bench height low for ages 3 to 6.
Cedar or pressure-treated 2x4s survive ground contact, though I would round every edge with a router before assembly since small hands grip everywhere.
The attached benches save chasing loose chairs across the patio. Build it knockdown with bolts if you need storage space come October.
9. DIY Dog Bowl Stand
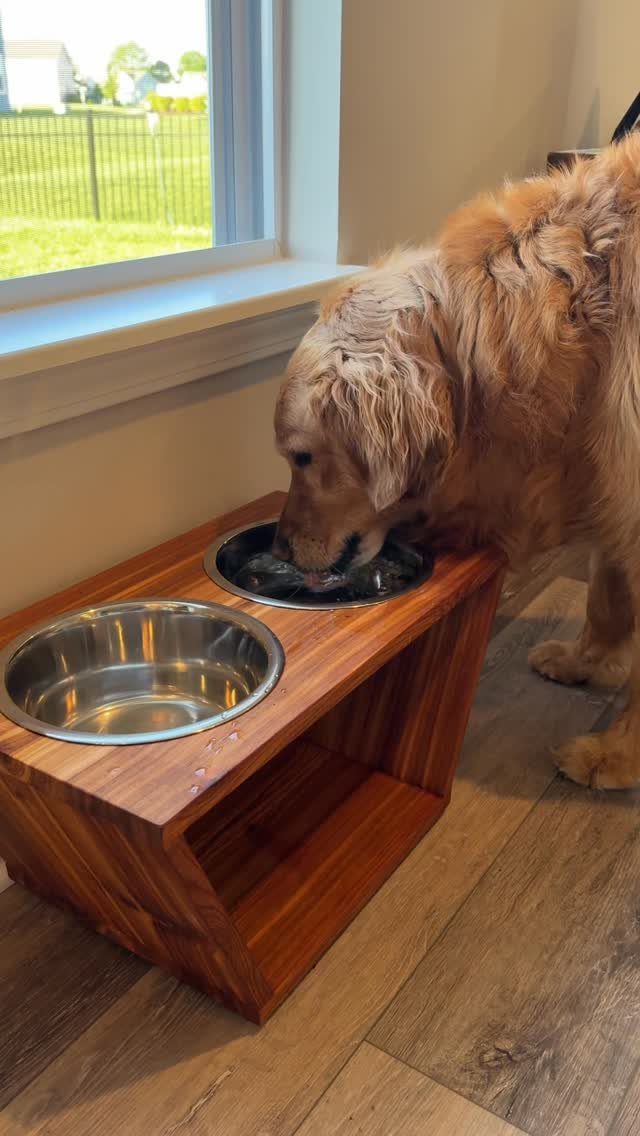
An elevated dog bowl stand brings the rim to chest height for a mid-sized dog, which takes strain off the neck and slows the gulp.
The visible version holds 2 stainless bowls in a simple box frame; I would set the height at the dog’s lower chest, measured while standing, since too tall splay the front legs.
Pine works indoors, but I would use cedar or finish the interior with a food-safe seal if water splashes sit. Rubber feet or a heavier base prevent the push-and-slide across the floor that happens once the dog commits to dinner.
10. Rolling Wooden Shelving Unit
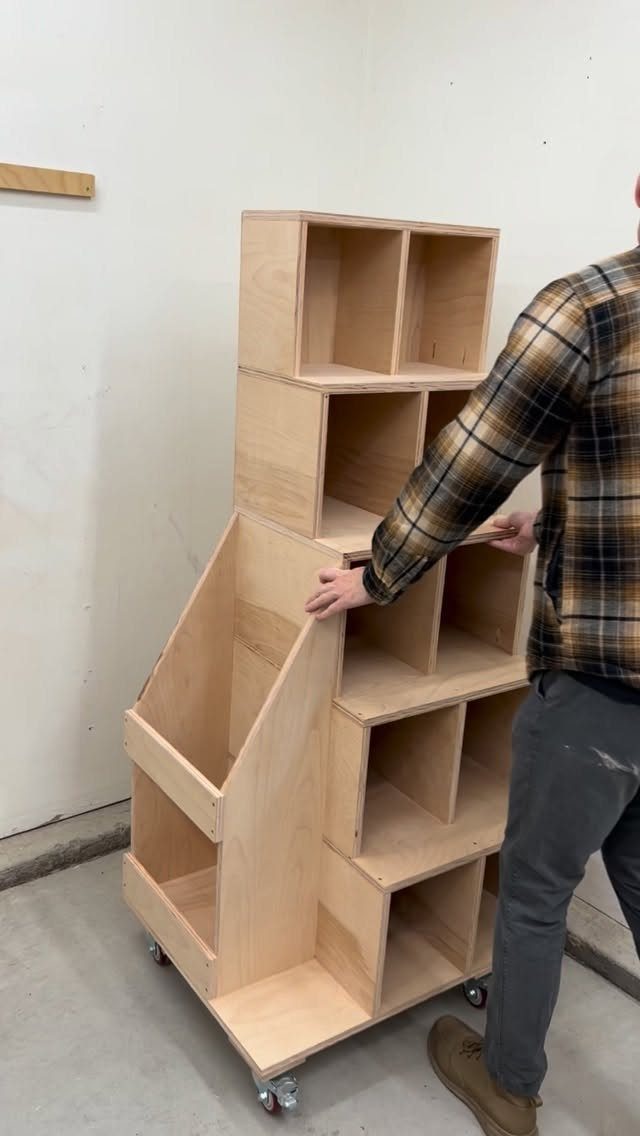
A rolling shelving unit turns wall-fixed storage into something you can wheel to the project.
The visible build uses plywood compartments on casters, which tells me the weight stays manageable even full; I would check the caster rating against my expected load, since cheap ones flatten under bags of potting mix or power tools.
Plywood resists the racking that hits solid wood when you roll across a jointed floor, and the open fronts let you grab without unstacking.
I would add a back panel if the unit faces traffic; otherwise, contents walk out on the first turn.
11. Outdoor Wooden Picnic Table
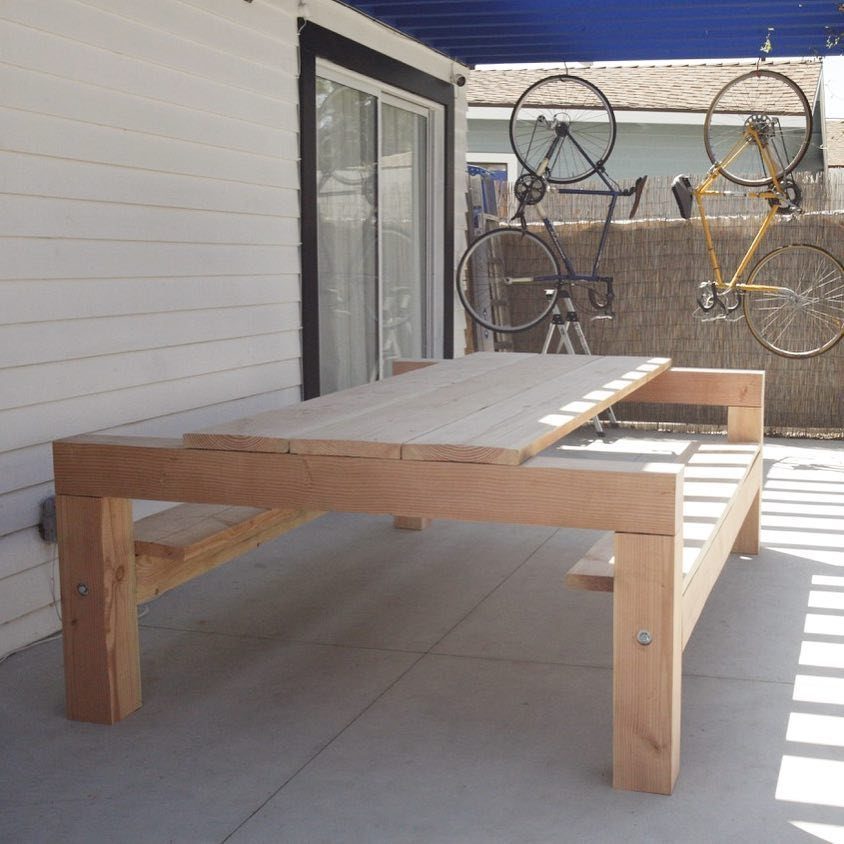
A full-sized picnic table with attached benches survives as the default outdoor gathering spot because it costs less in lumber than separate seating and never needs chair retrieval from the lawn.
The visible version sits unfinished on a patio; I would build in cedar or redwood if I planned to leave it bare, since pine gray and splinters within 2 seasons of sun.
The bench height needs to clear the tabletop edge by an inch so thighs slide in without a pinch. I would gap the tabletop boards for rain and predrill every hole; end grain splits fast under a screw driven dry.
12. Three-Tier Slanted Wooden Shelf
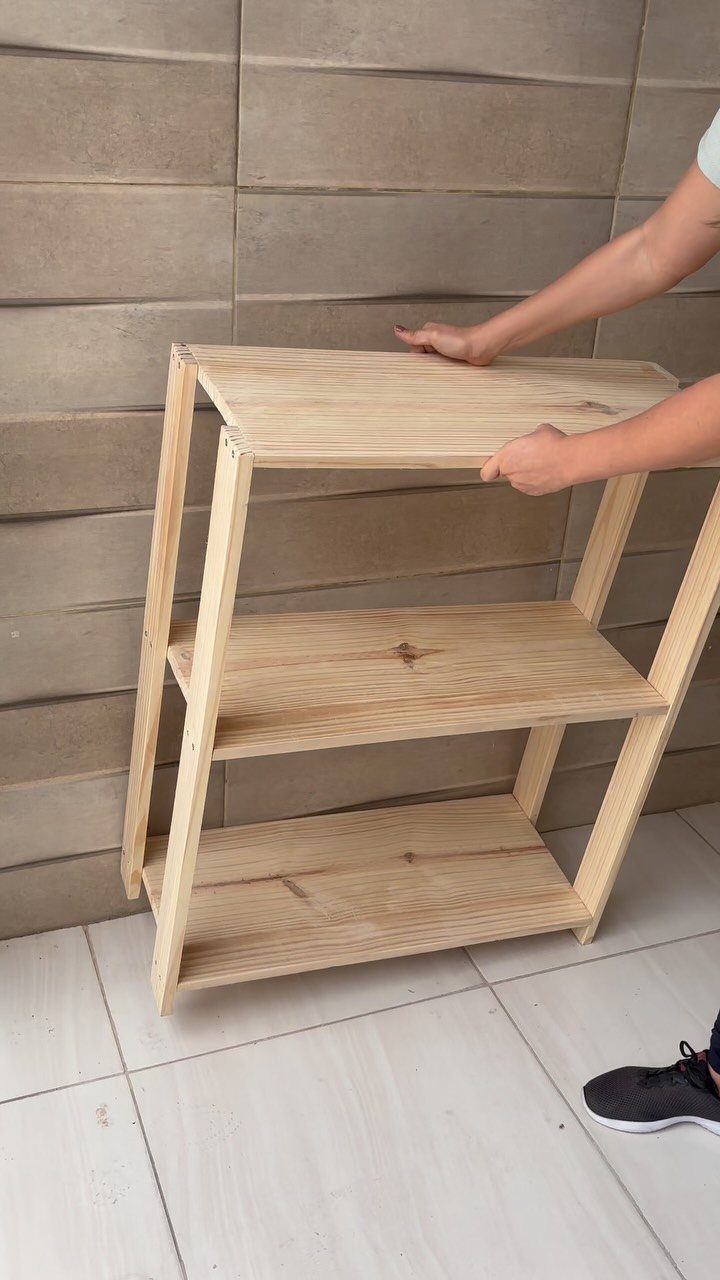
A slanted three-tier shelf leans its weight against the wall instead of standing plumb, which saves the width a bookcase would need for stability.
The visible version shows light wood and open sides; I would check that the back feet grip or that I can anchor the top to the wall, since the angle turns any bump into a slide.
I would size the tiers deep enough for the actual items, not display objects, since the slope already costs you front-to-back security.
Pine or poplar takes the angle cuts cleanly; a single misplaced degree at the foot repeats itself 3 times by the top shelf.
Beginner Woodworking Tips
Start with a project that needs only crosscuts and butt joints. A circular saw or even a backsaw gets you through pine or poplar without the expense of a table saw.
I would buy one quality blade rather than three cheap ones; a 40-tooth carbide stays sharp longer and leaves a cleaner edge that needs less sanding.
Clamp a straightedge to your workpiece when you cut freehand. A factory edge on a level or a ripping guide from the home center costs next to nothing and saves the frustration of a wandering cut.
I would rather spend time setting up right than filling a gap with putty later.
A simple jig matters more than a fancy tool.
A crosscut sled built from scrap plywood turns any flat surface into something square. I would build that before I built anything for the house; every project after goes together tighter.
Pine splits under a driven screw, and a countersink bit lets the head sit flush without the dent of a hammer. Glue the joint too; screws hold it while the glue dries, but glue carries the load for years.
Using Scrap Wood Effectively
Sort your scraps by thickness before you plan anything.
A drawer organizer needs half-inch plywood, not a mix of three-quarter and half-inch pieces that leave stepped joints. I would cut shelves and small boxes from the same pile so the parts mate without planing.
The sofa arm table in the list is a good test of your scrap habit.
Measure the widest offcut first, then decide the depth of the sleeve; working from the material you own beats buying a board to fit a drawing.
I would keep a bin of pine and fir offcuts under 12 inches for exactly this kind of piece.
A scrap wood organizer built from scrap sounds circular because it is, but it works.
The cart corrals pieces you might otherwise burn, and having them visible means you reach for them before you reach for your wallet. I would sort by size, not species; a small project rarely needs matching grain.
Small pieces warp faster than big boards because the ratio of surface area to volume is higher.
I would use scraps quickly or store them flat with weight on top, not leaned in a corner where they twist into shapes no joint closes.
Build these simple wood storage bins and have all of your favorites at your fingertips instead of lost in a towering pile. You can build four bins from one 2 ft. x 4 ft. sheet of 1/4-in. plywood and two 6-ft. long 1x4s.
Cost-effective Project Ideas
Pine and poplar cost half what oak or maple runs, and paint or stain covers the difference unless the grain is the point.
I would buy construction-grade 2x4s for anything painted; the knots add character or get puttied, and the savings buy better hardware.
Free plans from reputable woodworkers skip the trial and error that wastes lumber.
Print the cut list and take it to the store; I would have the yard rough-cut long boards to lengths that fit my car, since full sheets and 10-foot stock charge delivery fees that eat the material savings.
A single project per shopping trip keeps the budget honest.
I would rather build the plant stand this month and the bench next month than overspend on lumber that sits and cups before I touch it. The scrap pile feeds the small projects in between.
Frequently Asked Questions
What are some easy woodworking projects I can make?
A tiered plant stand, a simple bench from 2x4s, and a wall-mounted hook board all need only crosscuts and butt joints.
I would start with the plant stand or bench because both teach you to measure for actual use, not just follow a plan.
Can I build furniture with plywood?
Yes, and Baltic birch plywood at half an inch is my choice for drawer organizers because it resists the humidity swings that warp solid wood.
Plywood also works well for rolling shelving units since it resists racking when you wheel across jointed floors.
What should I build outdoor furniture with?
Cedar or redwood survives sun and rain if you plan to leave the piece bare; pine grays and splinters within 2 seasons.
Pressure-treated 2x4s also work for ground-contact pieces like a kids’ picnic table. Cedar or white oak hold up outside, and I would still gap any seat or tabletop boards for drainage so water does not pool.