The ideas below range from a weekend project with a shovel to a layout that needs a plan drawn to scale, and the one you pick depends on whether your gap is measured in feet or in yards.
[link-whisper-related-posts]1. Incorporate Walkways
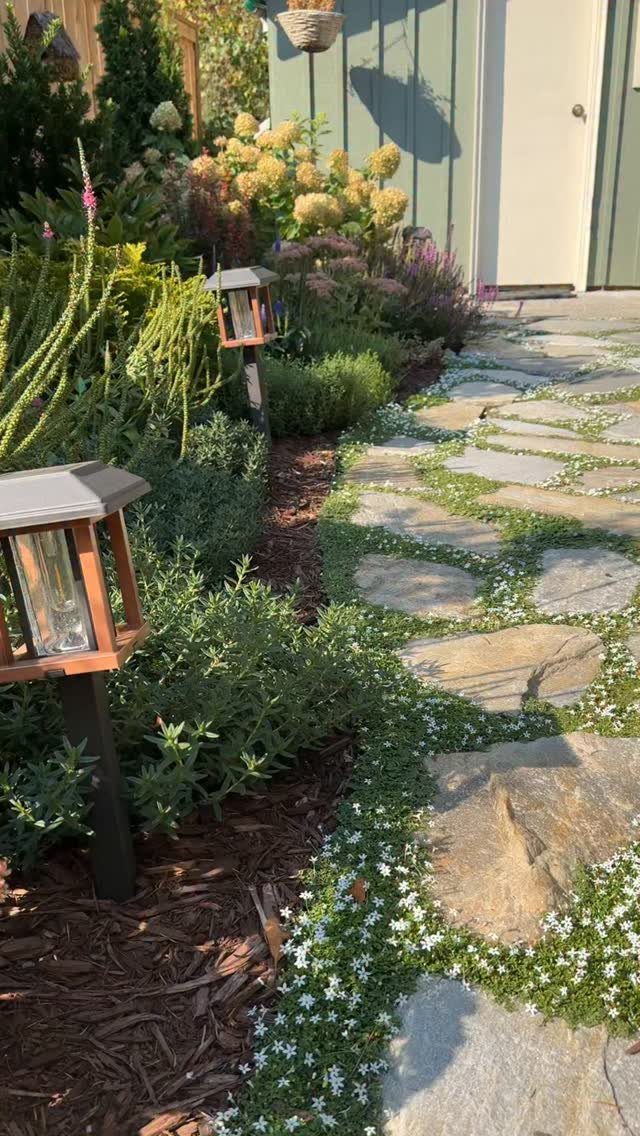
A walkway turns a narrow side strip into a path you actually use. Flagstone set with creeping ground cover, like the white flowers between these stones, handles foot traffic without looking like a sidewalk.
The mulch beds on either side keep maintenance low and the post lights mean you are not fumbling for keys in the dark.
Before you start, check your slope; water pooling on stone turns slick and grows algae fast. I would spend the money on thicker stone, 2 inches or more, so it does not crack under freeze cycles.
2. Vertical Gardening
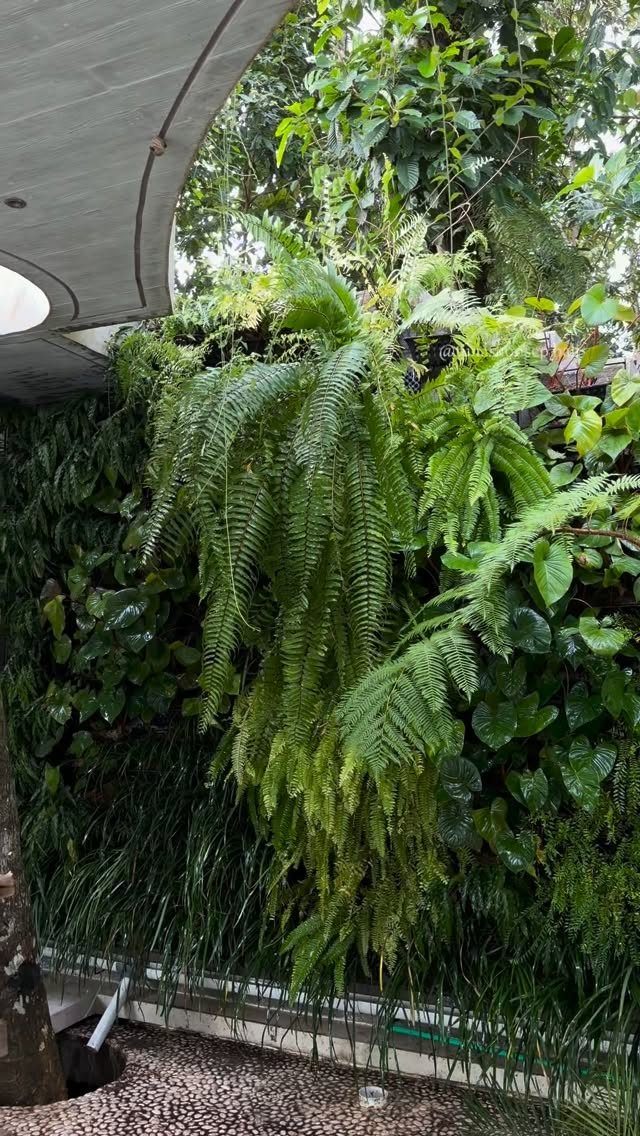
Vertical gardening is how you plant when there is nowhere to plant. A living wall of ferns and broad-leaf tropicals turns a bare siding or fence into green coverage without eating floor space.
The pebble ground beneath this one is smart; irrigation runoff drains straight through instead of rotting roots. I would skip the tropicals if your wall faces afternoon sun in a hot zone; they will fry without constant water.
A simple drip line run from a hose timer keeps the whole thing alive through summer travel. Cost scales with the frame; a modular system runs more than DIY pockets but lasts longer.
3. Focal Points in Landscaping
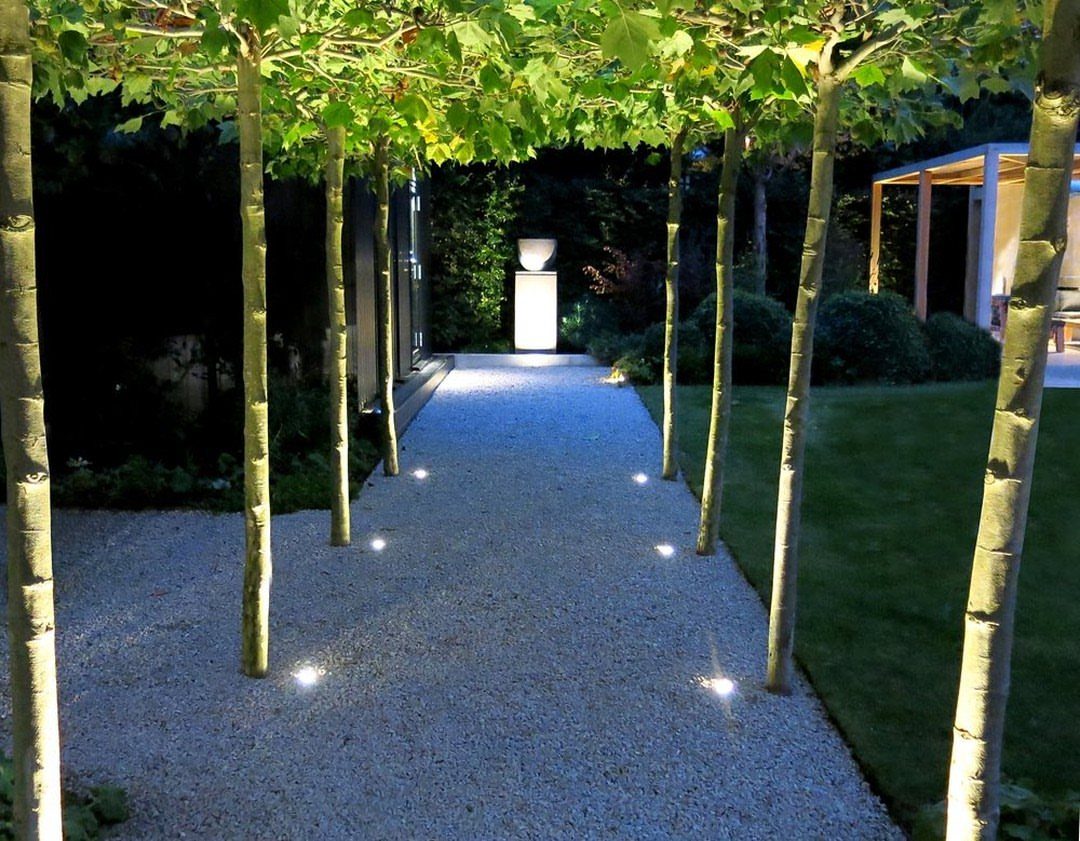
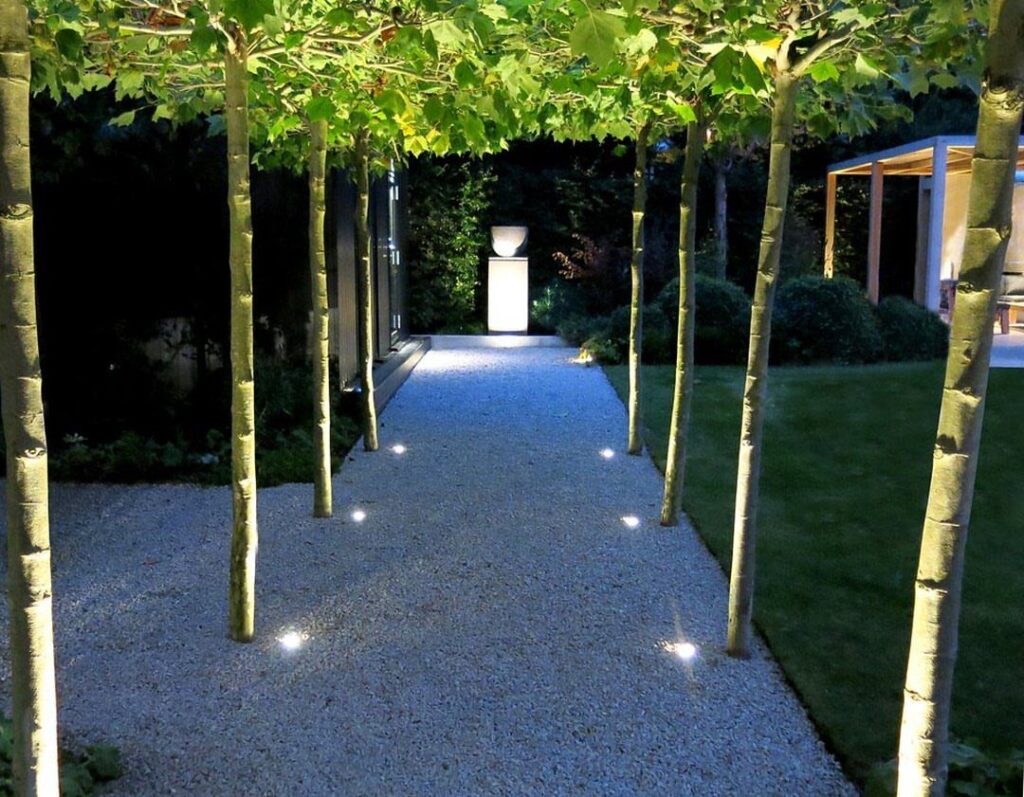
A focal point gives the eye somewhere to land in a long, narrow passage. Uplighting is doing the real work; without it, this reads as a white column in daylight and disappears after dark.
I would build around something you already own, a sculptural planter or a steel bowl, rather than buying "art" that tries too hard.
The gravel base needs edging to stay crisp; steel strip is my preference over plastic, which heaves in winter.
4. Using Decorative Stones
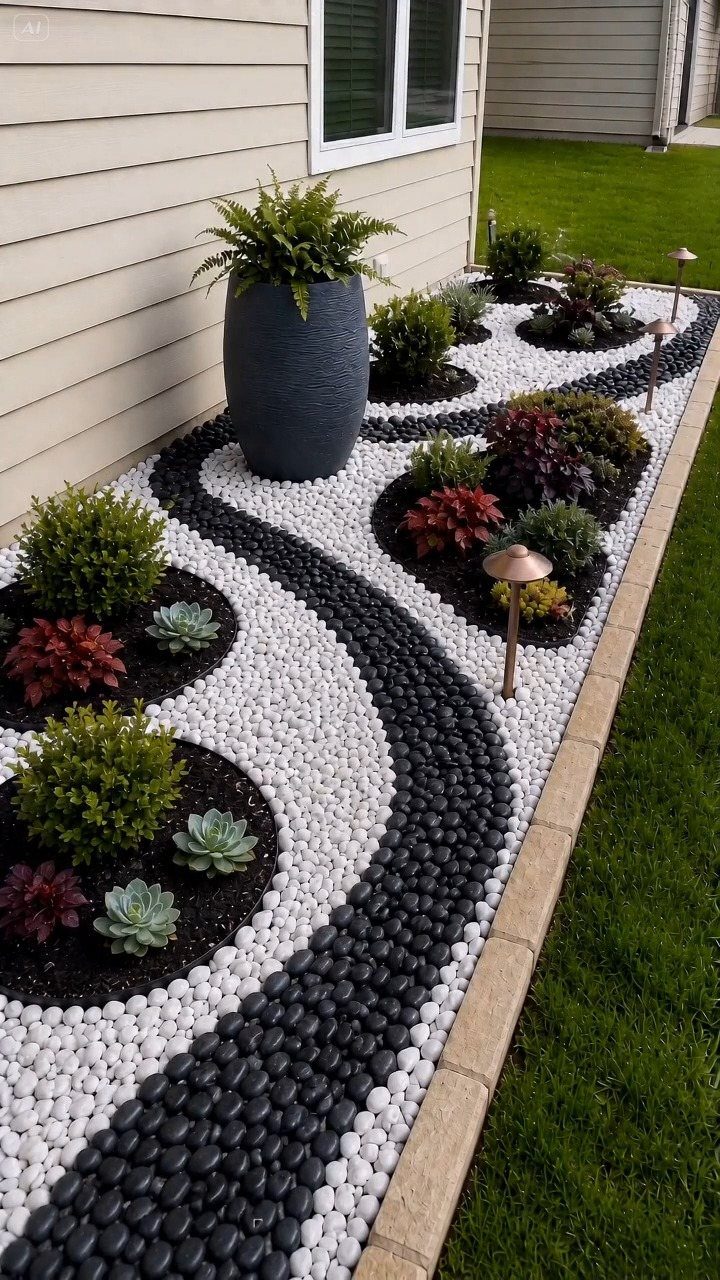
Polished black and white stone in swirling patterns is a statement, not a background.
The contrast reads as deliberate design rather than default mulch, and it stays clean-looking since nothing organic decomposes on top. Small shrubs and succulents break up the mass so it does not feel like a parking lot.
I would avoid this near heavy tree cover; fallen leaves on polished stone look like litter and are a pain to pick out. Cost runs higher than basic river rock but the maintenance is nearly zero once it is laid.
5. Privacy Hedges
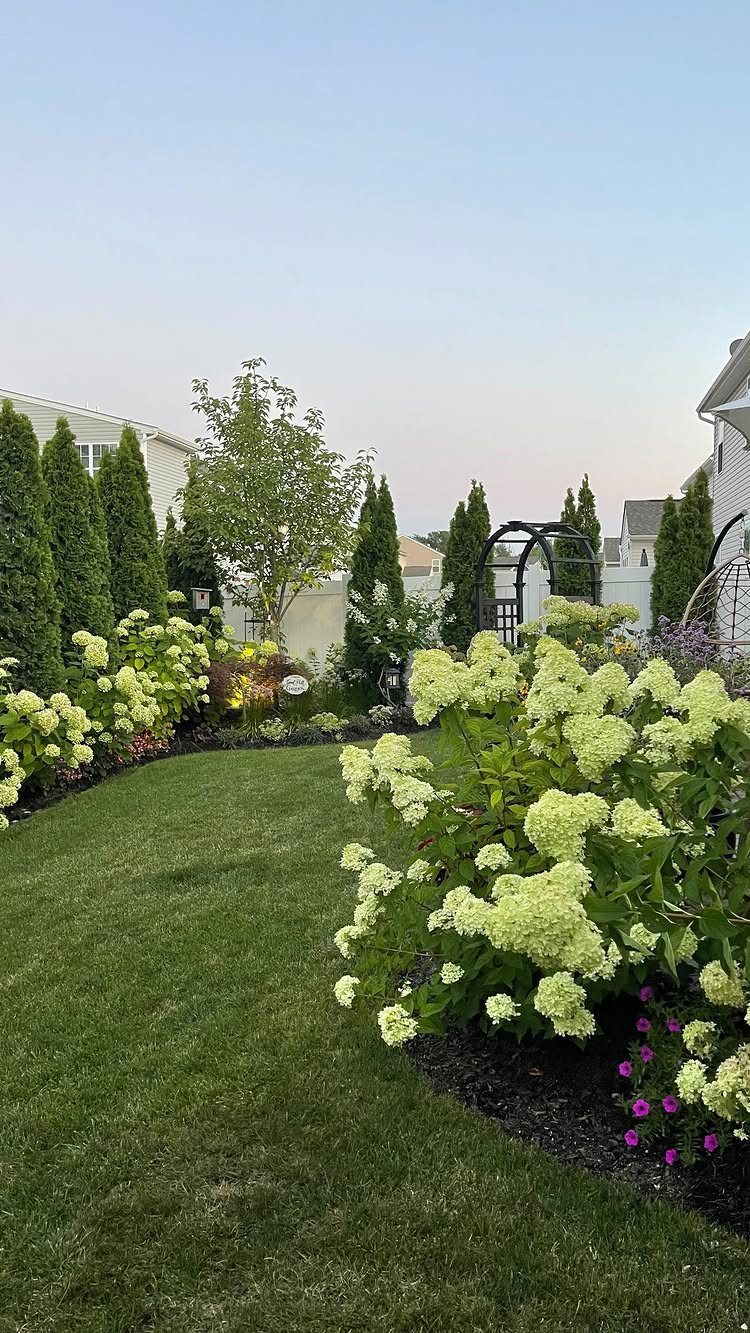
Arborvitae is the workhorse of fast privacy once established, and it grows fast enough that you will notice the difference in a single season.
The hydrangea border in front softens the green wall so it does not read as a fortress from the street.
I space shrubs by their mature width from day one, even when I want screening fast; the gap fills in healthier than a hedge planted too tight and then thinned later.
Check mature width before you buy; some arborvitae varieties spread wide enough to swallow a narrow side yard whole. Mulch rings keep mowers back so bark does not get nicked; a girdled trunk dies fast.
6. Compact Shrubs
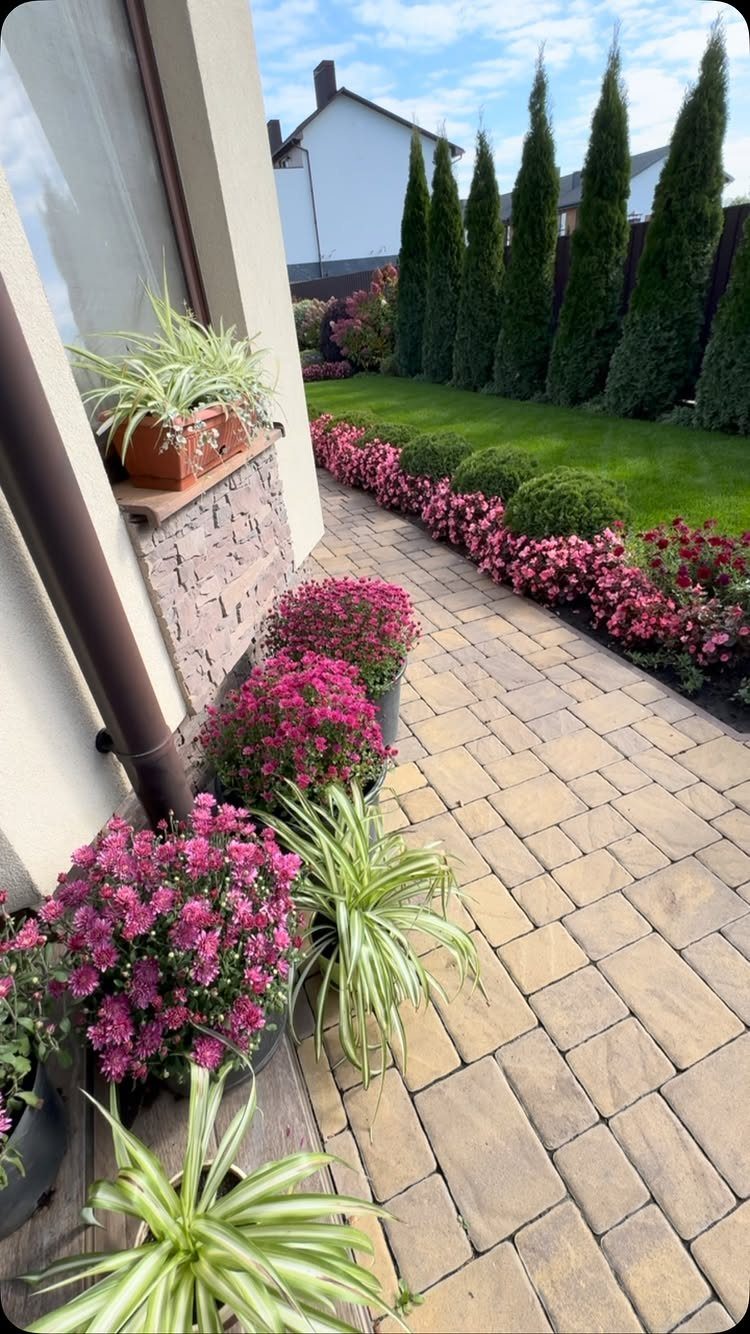
Round, sheared shrubs suit a formal side yard where you want structure without height. Boxwood or Japanese holly holds a neat shape with occasional trimming and stays low enough that your light and air are not blocked.
The paved path here is doing double duty; it keeps foot traffic off the roots and gives you access for pruning without stepping into beds.
I would plant in odd numbers, three or five, for a natural rhythm; pairs look like sentries and draw attention to any mismatch in size.
Pots of annuals at the path start add color the shrubs cannot deliver on their own.
7. Side Yard Garden with Trees
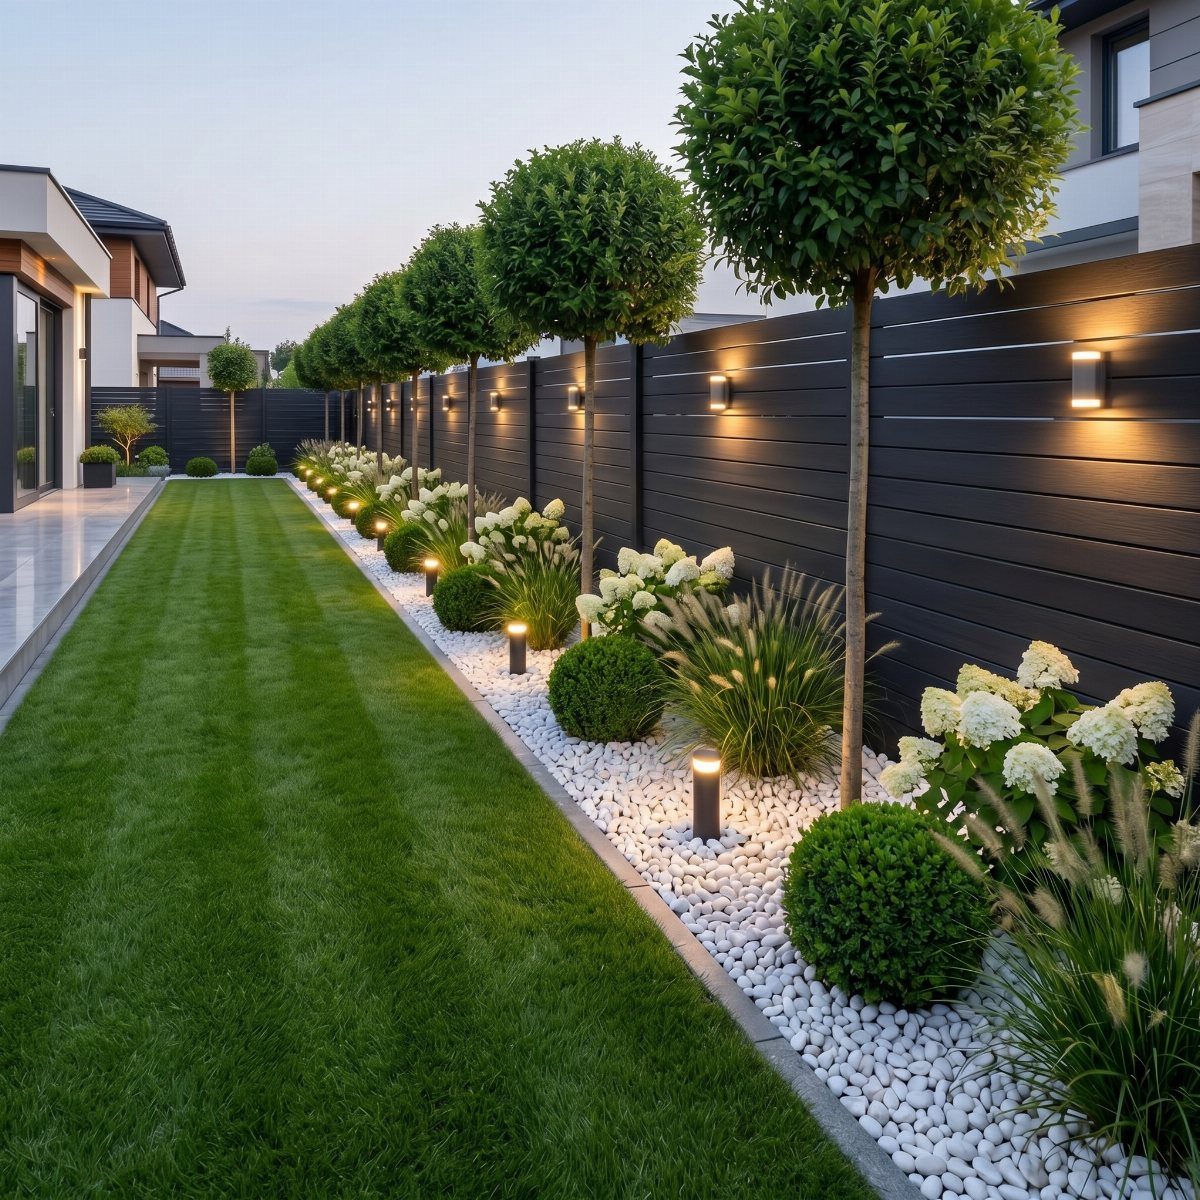
Standard trees with clipped round crowns give a narrow side yard height without bulk. The white stone bed keeps roots cool and shows off the lollipop shapes, while hydrangeas and grasses fill the middle layer so nothing looks bare below.
I would check my fence line for afternoon sun before copying this; too much shade and the lawn stays patchy no matter what you spend on seed.
The pebble strip needs a solid edge to stop migration into the grass. Steel or concrete works; plastic warps in 2 seasons.
8. Courtyard Patio with Outdoor Seating
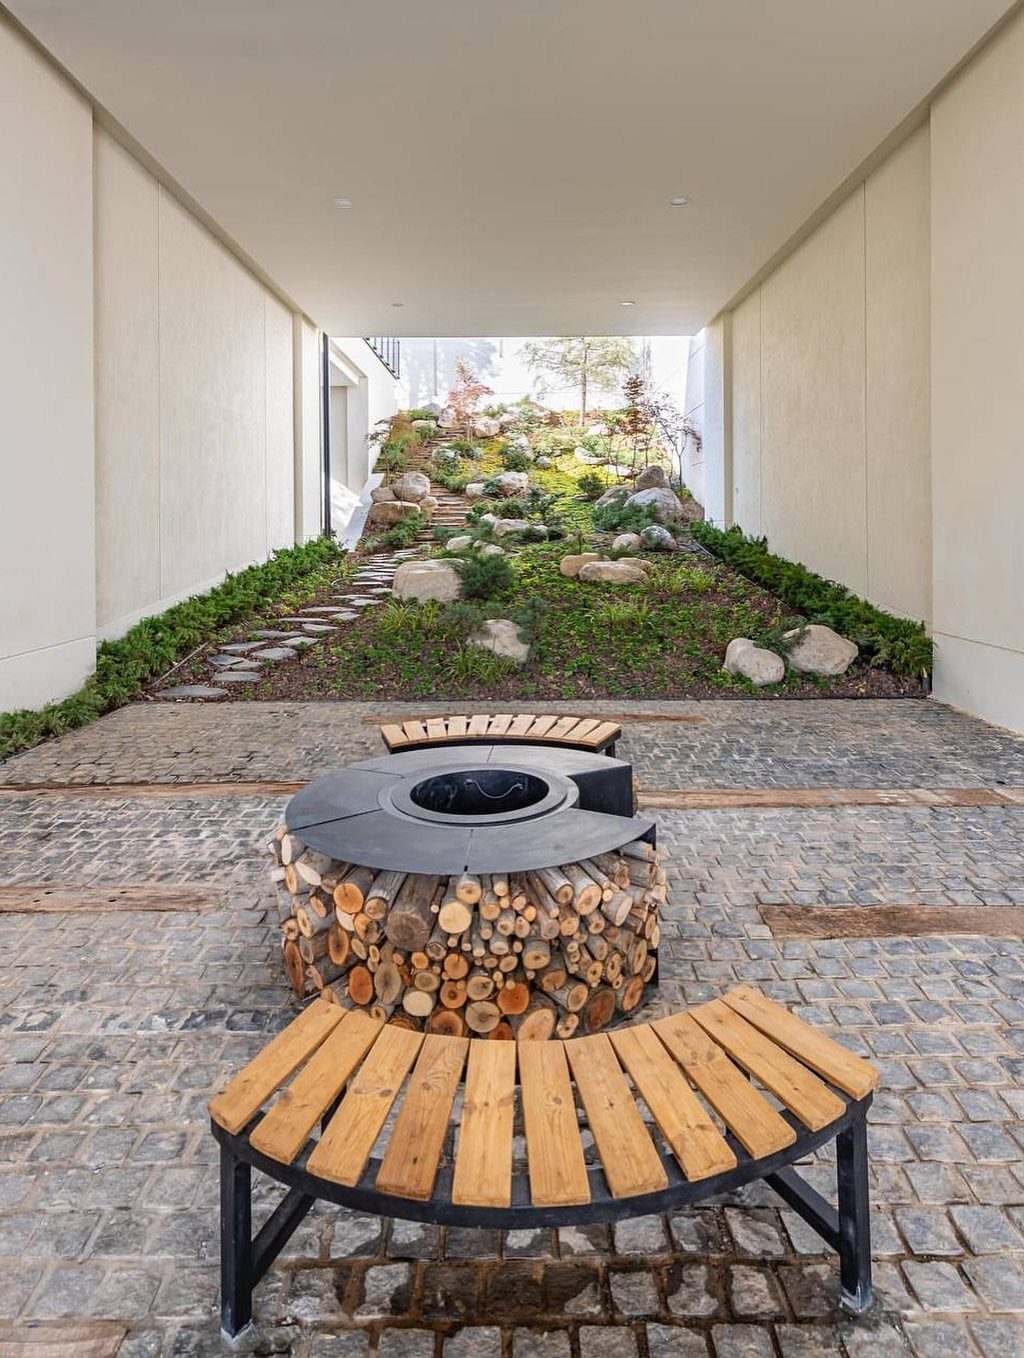
A covered patio between 2 walls turns a gap into outdoor living space you use after dark.
The cobblestone floor handles weather and the fire pit gives you a reason to sit out when temperatures drop. Curved benches follow the pit’s shape and seat more people than straight backs would.
I would verify drainage before laying stone; water trapped between walls has nowhere to go and will heave your work in one freeze cycle. Gas line or propane?
Propane tanks hide easier in a tight space but need swapping. Covered does not mean dry; slope the roof to a single drain point.
9. Narrow Fence-line Garden Bed
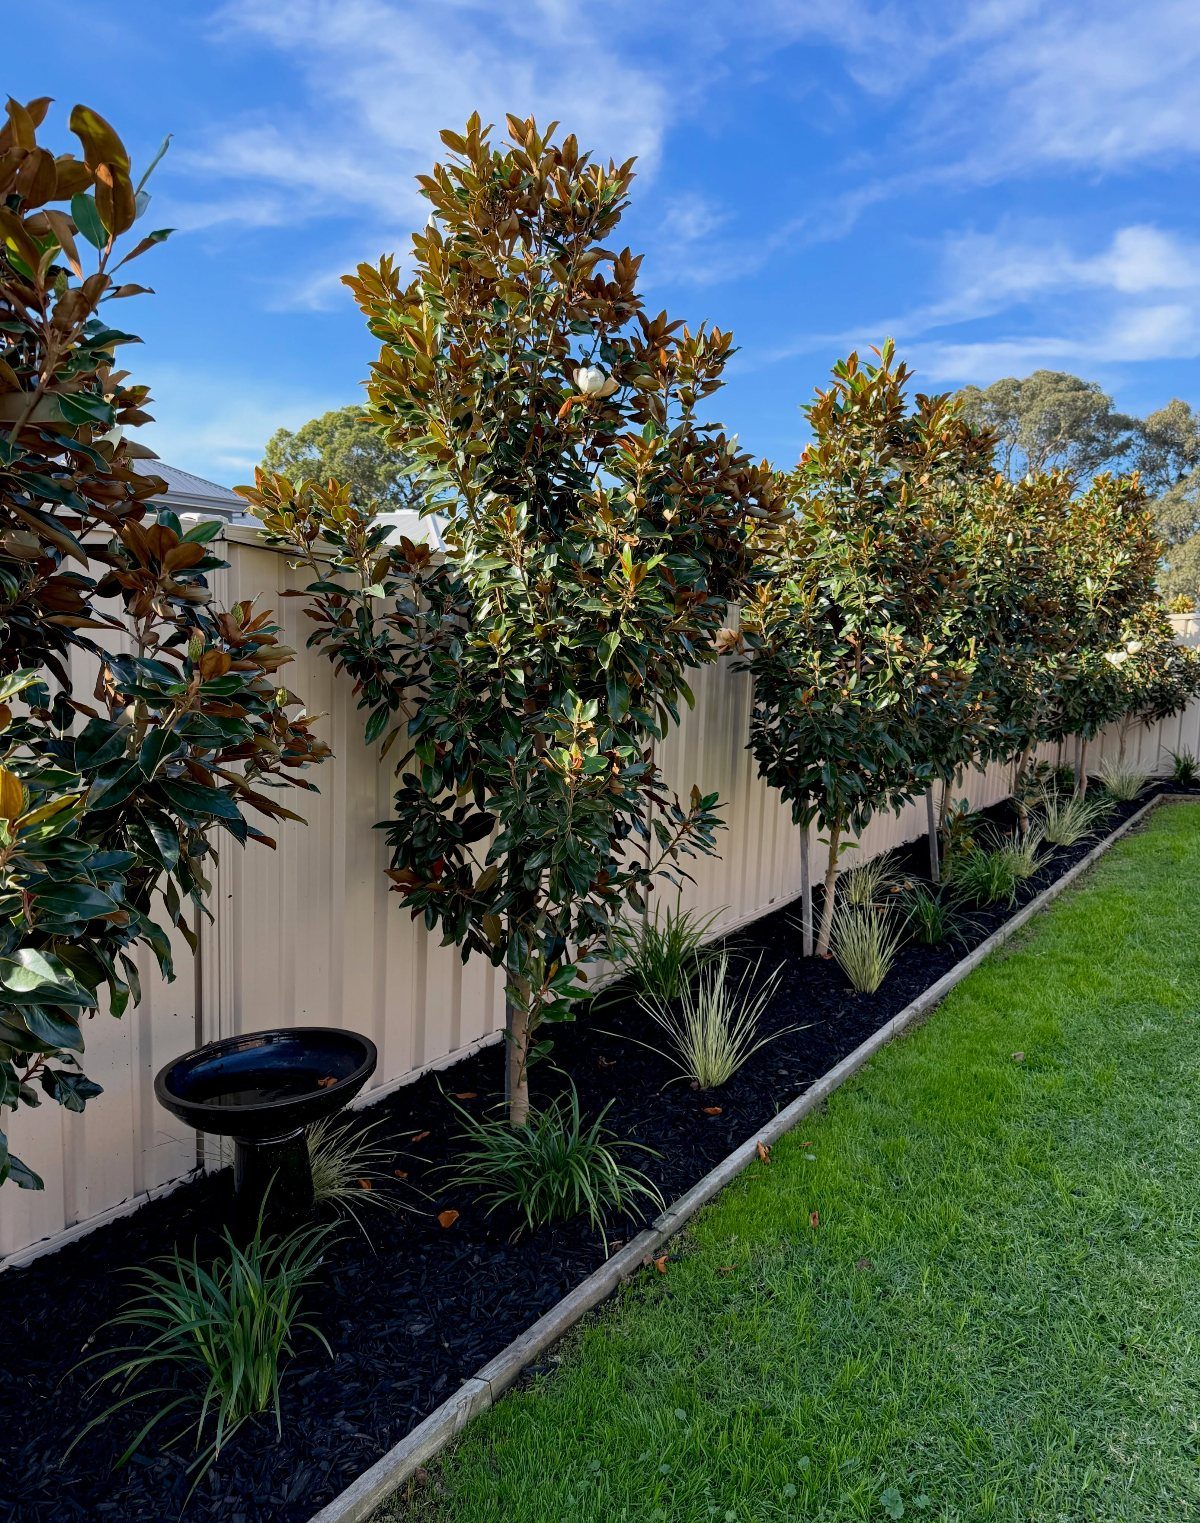
A slim bed along the fence line is where you plant when side yard width is measured in feet, not yards.
Dark mulch recedes visually so the plants read as the feature, and the magnolia trees give structure without the width of a full canopy tree.
Ornamental grasses catch the breeze between houses and never ask you to deadhead them, which matters when the gap is tight and your weekend is short.
I would set the birdbath where you see it from a window; otherwise it becomes a mosquito nursery you forget to empty. Wood edging rots eventually but is easy to replace and looks softer than stone against metal fence panels.
10. Shaded Narrow Side Planting
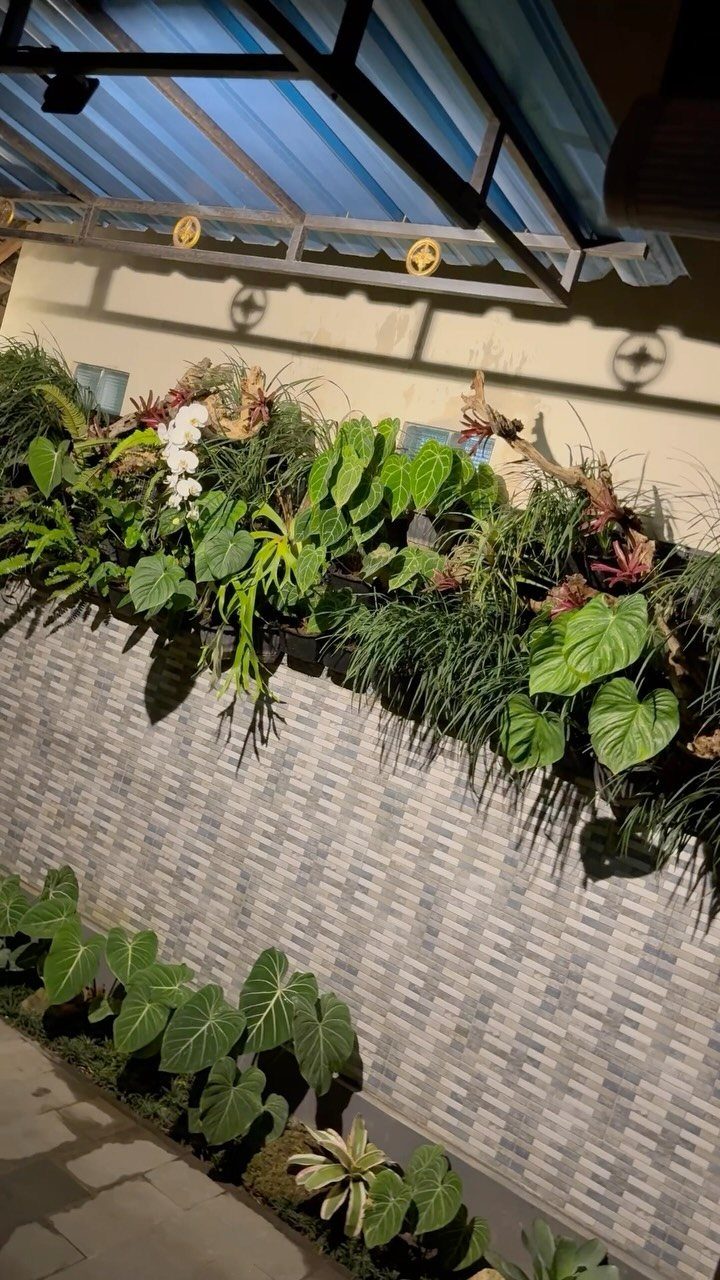
Ferns and broad-leaf tropicals grow where direct sun never reaches, which makes a narrow side strip under an awning workable instead of hopeless.
The wall-mounted planter adds a second layer without stealing ground space. I would skip orchids unless you are already keeping houseplants alive; they want humidity and air movement in a balance most beginners miss.
A drip line is worth the install cost here; hand-watering a shaded strip is how you get inconsistent moisture and fungal spots. The tiled wall will stain from pot splashback; seal it or plan to scrub.
Importance of Spacing Plants
I would rather plant too loose than too tight. Crowded roots fight for water and nutrients, and that stress invites pests and disease that keep coming back once they settle in.
Give shrubs their mature width from day one; the gap looks bare for one season, not broken for five.
Simple plant palettes also mean simpler maintenance.
Three species that repeat across a bed are easier to prune, fertilize, and troubleshoot than a dozen one-offs competing for different care. I would pick a backbone plant, a mid-layer filler, and one seasonal interest, then repeat that grouping.
Adequate spacing also lets air move through, which keeps fungal pressure down in the humid gaps between houses where morning sun arrives late and leaves stay wet.
Seasonal Changes Impact
Soil around your foundation moves with the seasons, and what you plant affects how much. Rain saturates the perimeter and swells clay soils; dry summers pull that same soil away and let the house settle unevenly.
I would keep large shrubs and thirsty trees well back from the wall, where their root zones cannot accelerate either cycle.
Plant for your actual conditions, not the tag photo. A hydrangea that thrives in a neighbor’s afternoon shade may crisp in your narrow gap where reflected heat bounces off siding.
Check your hardiness zone, your sun hours, and your drainage before buying. Local nurseries carry what survives local summers; big-box centers truck in what sells, and the difference shows by August.
I would also watch how winter wind tunnels between buildings. Evergreens in exposed gaps need hardiness one zone lower than your map suggests.
Professional Landscaping Benefits
Some problems are worth solving alone; others are worth paying to avoid. Drainage between two roofs, two downspouts, and a concrete foundation is not amateur territory.
A designer reads the slope, the soil percolation, and where water actually goes in a downpour, then builds that into the plan from the start rather than discovering it after the plants drown.
Professionals also match plants to light that shifts across the day in ways a single visit cannot capture. Morning shade and afternoon bake between walls is a specific niche; getting it wrong means replacement, not recovery.
I would spend the consultation fee before committing to stone, irrigation, or a full planting. Even a partial design that maps drainage and sun patterns gives you a filter for every decision after.
Local knowledge of what heaves, what rots, and what survives your specific gap saves the trial and error that costs more than the design did.
Frequently Asked Questions
What are common landscaping mistakes new homeowners make?
Planting trees and shrubs too close to the house without accounting for their mature size is the costliest error; in five to ten years, overgrown roots and branches damage roofs, gutters, and foundations.
Irrigation needs scrutiny too: sprinklers or drip lines hugging the wall trap water against the perimeter, and in clay soils that pooling erodes the grade and opens the door to basement seepage or foundation shift.
Invasive or fast-growing species chosen for quick coverage become maintenance headaches that outpace your weekend time.
What is the cheapest way to landscape my front yard?
A crisp bed edge and a fresh layer of mulch deliver the biggest single visible change for the smallest outlay; after that, a handful of low-care shrubs or perennials repeated across the bed stretches the dollars further.
Natives or locally hardy perennials are where I’d sink the plant budget instead of annuals; they come back on their own, which matches the weekend-timeline budget this site is built around.
Big-box centers often stock what photographs well, not what survives local Augusts, so a local nursery saves money over a season even if tags cost more upfront.
How wide should landscaping be around a house?
Group plantings in beds about 3 to 5 feet wide; that width allows layering from back to front, gives roots room to spread without crowding, and leaves space for maintenance access.
The spread at maturity counts more than how it looks the first spring; the wider gap looks thin for a few months, not strangled for years.
How do seasonal changes affect home foundations?
Rain saturates foundation perimeter soil and swells clay, while dry summers pull that same soil away and let the house settle unevenly; that cycle cracks foundations and opens basement leaks.
Grading and drainage squeezed between two structures is one place I would pay for a professional eye; water caught between walls has no escape route.