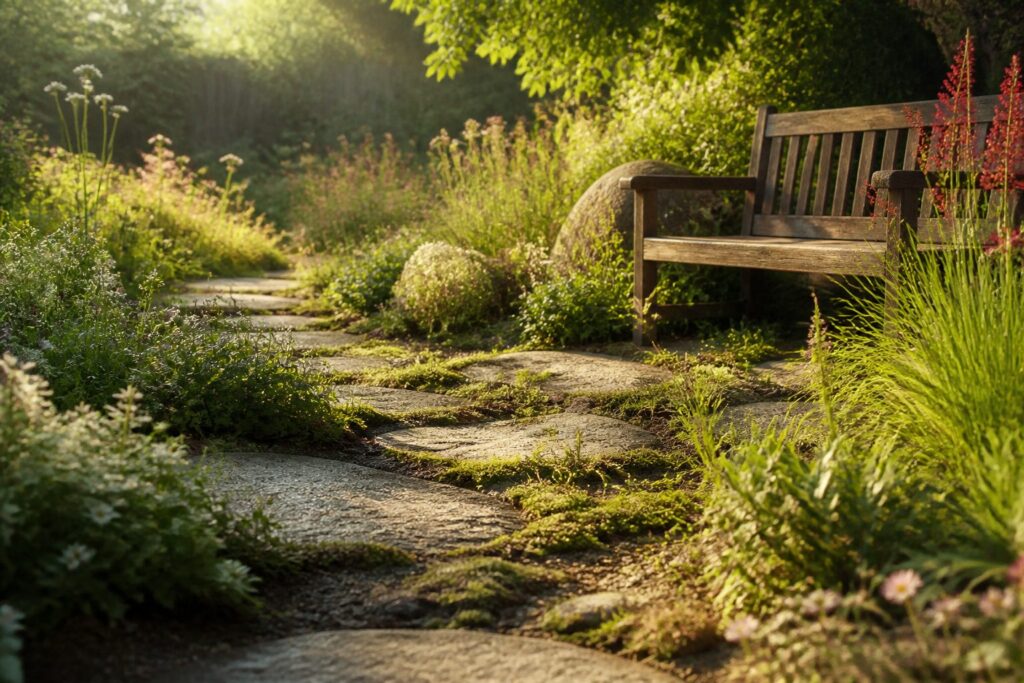
A fully landscaped backyard runs most homeowners $2,600 to $13,700, but starting with hardscape and paths drops the first phase to a few hundred dollars and still gets you a yard that improves immediately.
The catch most people miss is drainage. A 12-inch test hole filled with water will sit there for hours in clay soil, telling you whether you are planting a garden or building a French drain before anything green goes in.
[link-whisper-related-posts]1. Define Purpose and Priorities
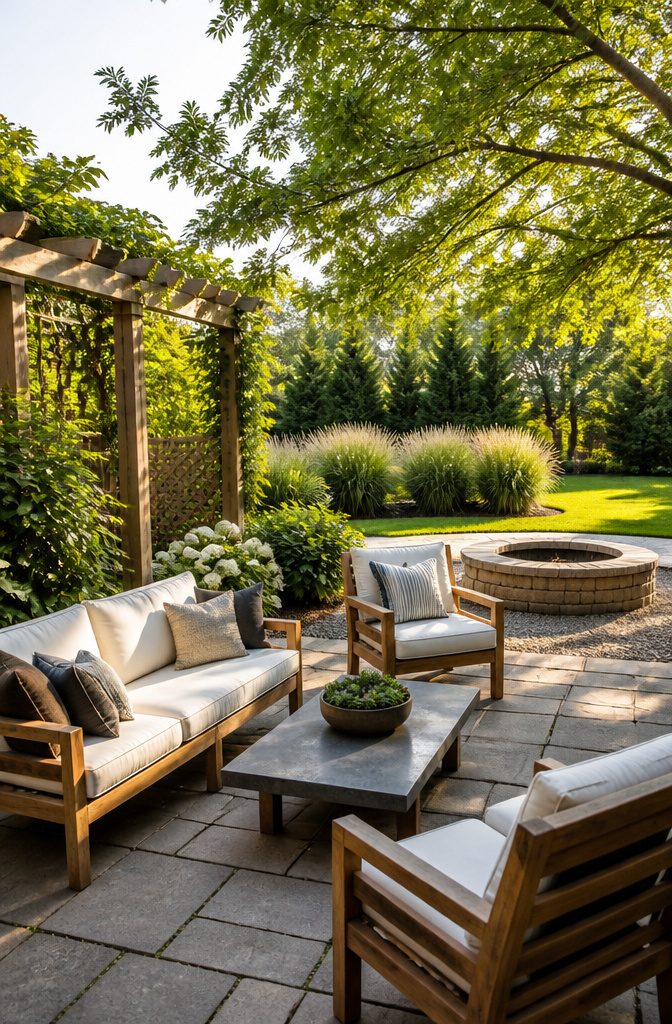
Every backyard needs a single primary purpose and one secondary use before a single plant goes in.
Entertaining, gardening, a play area for kids, a quiet reading nook, a vegetable patch: pick one that drives the layout and another that fills the gaps.
The primary use shapes where the seating or paths go; the secondary one decides what fits around the edges.
Most homeowners spend $2,600 to $13,700 on a full landscaping overhaul, averaging $8,150. That figure stops a lot of people from starting.
A phased approach changes the math entirely. Begin with the hardscape and the main circulation paths, then add plantings and decorative pieces in later seasons or years.
Early costs drop to a few hundred dollars, and the yard still improves immediately instead of waiting for a budget that may never arrive.
2. Assess Site Conditions
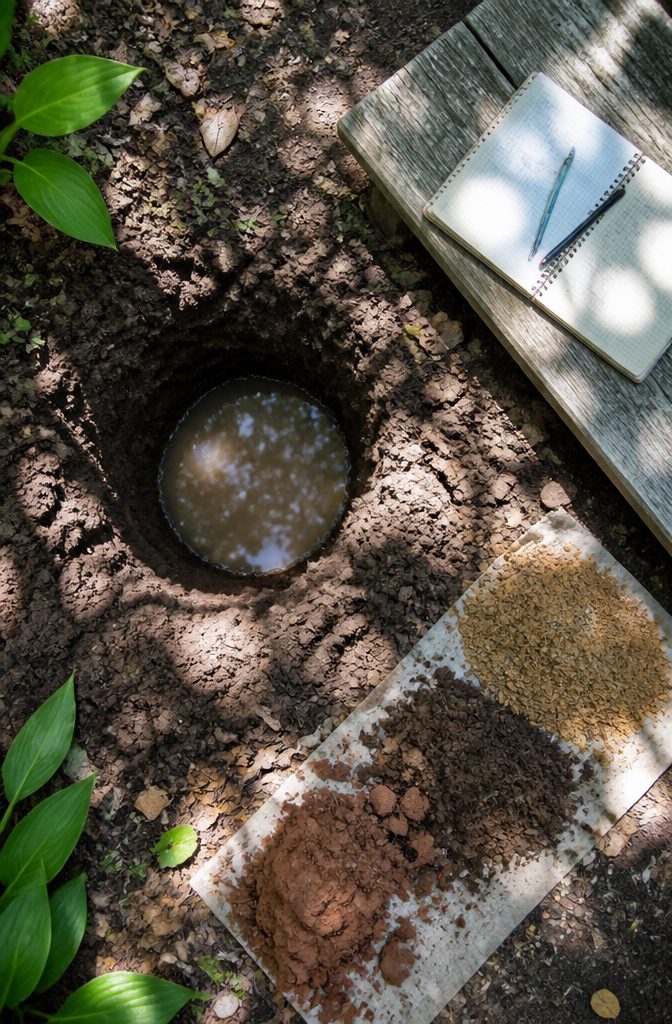
A notebook and a Saturday morning are the only tools you need for this step. Walk the yard once at 9 a.m. and again at 4 p.m., sketching where sun and shadow fall.
That morning-afternoon pair catches the spots that read as "partial shade" on paper but fry by July or stay damp enough to rot roots.
Dig a 12-inch hole, fill it with water, and time how long it drains.
Under an hour means fast drainage and drought-prone beds; still wet after four hours means you are planting a swamp or building a French drain before anything else goes in.
Soil type comes from feel, not a lab.
Rub damp dirt between your fingers: grit that barely holds together is sand, smooth ribbon is clay, and the crumbly middle is loam. Each needs different amendments and different plants, so this is worth the five minutes.
Mark what you cannot move. Mature trees, utility boxes, slopes that shed water toward the house: these are fixed points the layout bends around, not problems to solve.
A patio built in a flood-prone spot or sun-loving plants tucked under established oaks are the expensive mistakes this walk prevents.
3. Create a Simple Layout
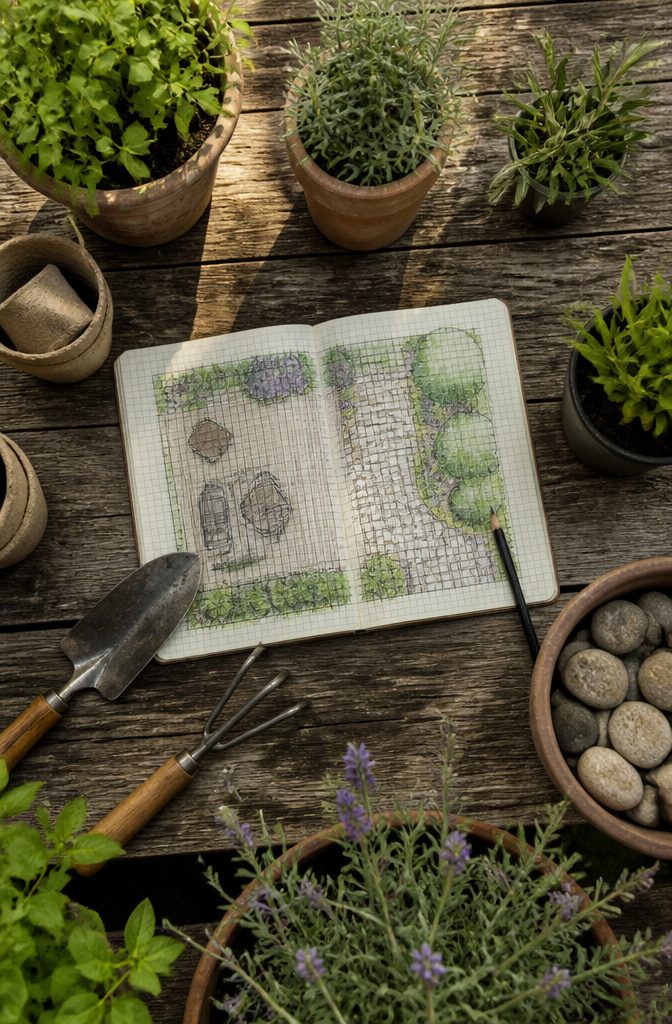
A scaled sketch of your yard on graph paper or a free app stops expensive regrets before they happen.
I start with the house footprint, property lines, and anything staying put, then block in zones: a sitting area, a path, and planting beds.
Keep circulation paths 3–4 feet wide so two people can pass with a tray of drinks or a wheelbarrow without stepping into the dirt. Resist detailing every plant at this stage.
Shapes matter more than species. A rectangle labeled "shade bed" tells you enough to see whether the afternoon sun will bake your patio at 4 p.m. because you placed it in the one spot no tree reaches.
One hour of rough blocking now saves a season of wishing you’d noticed the gap in coverage.
4. Select Plants
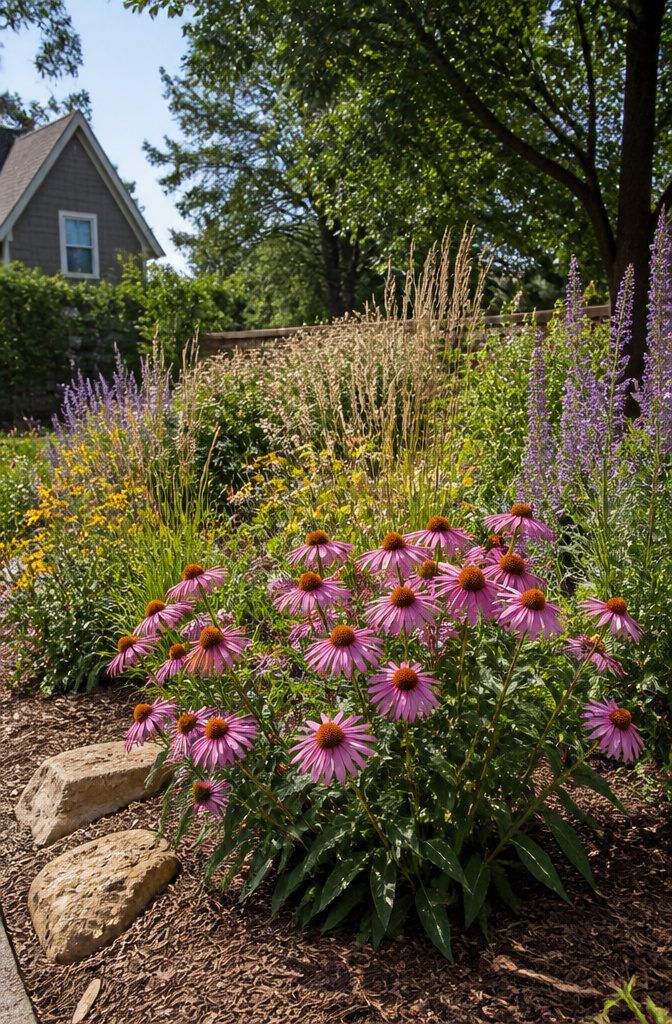
A plant tagged "full sun" in Maine can settle into the same label in Tucson and still fry against a south-facing wall that throws reflected heat.
The tag describes the light, not the temperature, so record where the sun actually lands in your yard, not just for how long, and note the surfaces nearby that turn a bed into an oven.
I start with the USDA Hardiness Zone to filter what survives winter, then cut the list further by honest light readings and the maintenance I will actually do.
Native plants win on all three counts: they handle the local water cycle without pampering, resist pests I will not have to spray for, and once established they rarely need fertilizer.
That leaves weekends for enjoying the yard instead of rescuing it.
If I want year-round structure, I mix evergreen and deciduous forms rather than betting everything on one look. The variety also breaks up pest pressure; a monoculture of anything is an invitation.
For watering, I group plants by need so one zone does not drown while another thirsts. Drip irrigation and a thick mulch layer, two or three inches, hold that moisture in place and spare me the evening hose ritual.
I skip anything labeled invasive no matter how easy the nursery makes it sound. A plant that escapes the bed becomes a long-term problem dressed up as a short cut.
5. Incorporate Hardscaping
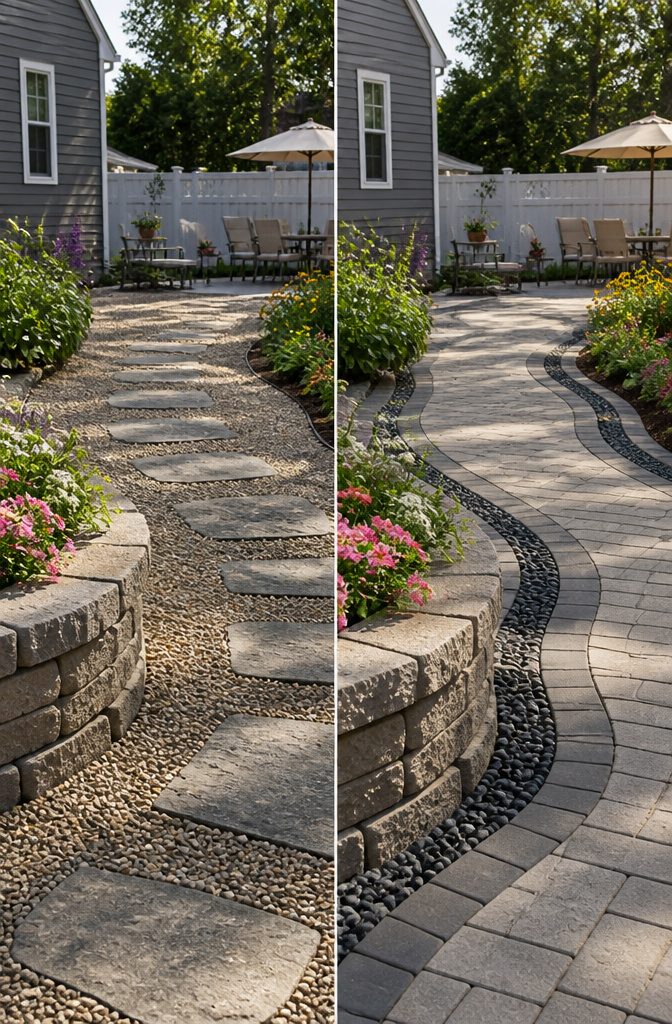
Hardscaping gives a backyard its bones, and the materials you choose decide whether those bones last through freeze-thaw cycles or heave apart by spring.
Stone, concrete pavers, and gravel each handle winter differently, and the cost gap between them is wide enough to matter on a real budget.
Concrete pavers run about $10 to $25 per square foot for materials alone, and they need a compacted gravel base plus bedding sand to sit level.
That excavation and tamping adds a weekend of labor, but you get a surface that drains well and stays put.
Natural stone leans toward the higher end of that range and demands the same prep; it looks classic, though the install is less forgiving since irregular edges require more fussing to keep joints tight.
Gravel is the cheapest path or patio surface by a fair margin, and it can be laid on grade without the full base layer pavers require.
The problem is migration: stone spreads, ruts form underfoot, and every spring brings a fresh rake-and-redistribute job.
For a renter or a first homeowner working with a few hundred dollars and a Saturday, gravel works as a temporary fix, but pavers win if you want structure that survives winter without becoming maintenance.
6. Implement Water-Wise Practices
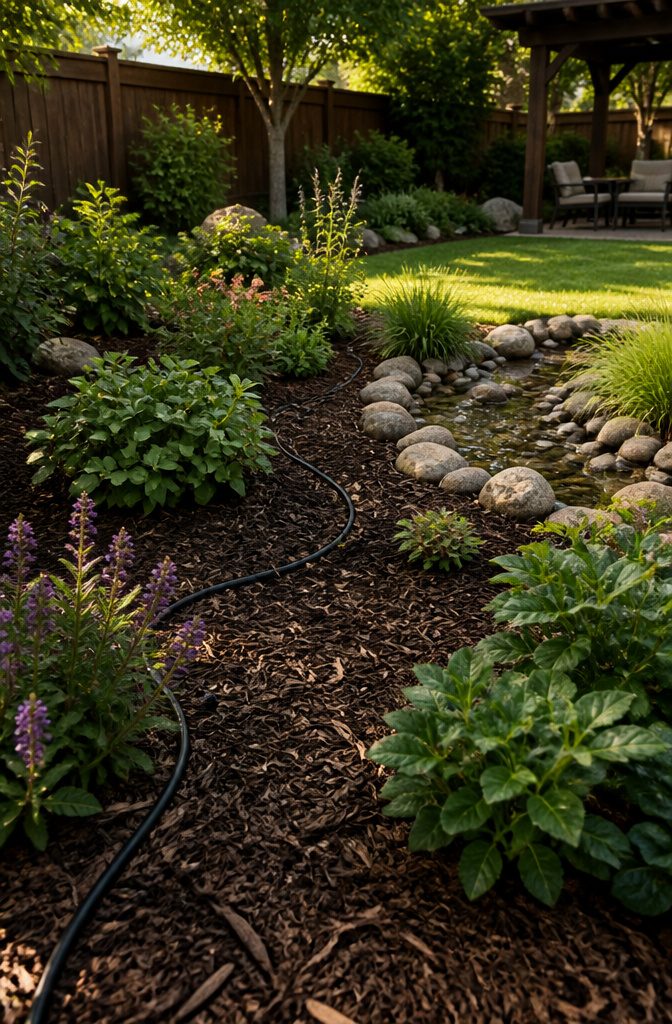
Water runs off hard surfaces fast, but your planting beds want to hold onto it.
A 3–4 inch layer of mulch does exactly that, slowing evaporation and buying you a few extra days between waterings while it quietly smothers the weeds that would otherwise steal what moisture is there.
Hardwood chips or straw work best for most beds, rock mulch only if you know your plants can take the heat it throws back.
Where your downspouts dump matters more than most people think. Aim them toward a bed or a small rain garden, not the driveway where the water just becomes your problem twice, once as waste and once as runoff.
For actually getting water to roots, drip irrigation beats a sprinkler head every time. It puts water where roots live instead of broadcasting it into the air to evaporate or onto leaves to scorch.
If you want the sound of moving water without the maintenance of a pond, a submersible pump for a small DIY fountain runs about $17.
Ceramic pots, a bucket, some stones, and you have the trickle without the bill that comes with professional installs, which can climb past $150 before you have asked a second question.
7. Plan for Maintenance
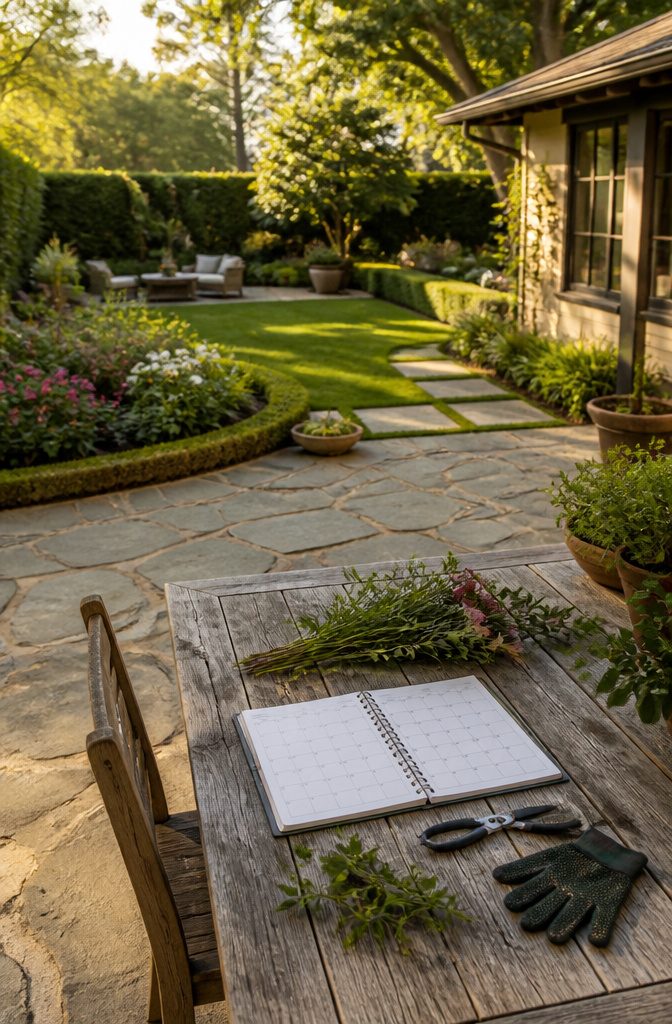
A maintenance calendar keeps the work from piling up into an overwhelming weekend.
Spring means clearing winter debris, pruning dormant shrubs, and putting down pre-emergent before weeds germinate. Summer settles into a rhythm of deadheading, light pruning, and steady watering.
Fall is when I cut back perennials, rake leaves, and refresh the mulch layer. Winter is quieter, mostly inspecting for damage and planning, though a mulch top-off every couple of years prevents thin spots where weeds slip through.
Budget roughly 2–4 hours monthly for a typical suburban lot during the growing season.
That figure drops in winter, but it never hits zero. Hardscaping needs less attention than planting beds, yet paver joints still refill with polymeric sand over time and gravel migrates enough to need raking back.
The term "low maintenance" gets overused in landscaping. What it actually means is lower, not absent, and the difference matters when you are deciding how much bed versus patio to install.
A space that looks tidy with minimal effort still needs those hours, just spent on sand and stone rather than deadheading and weeding.
8. Budget and Phase the Work
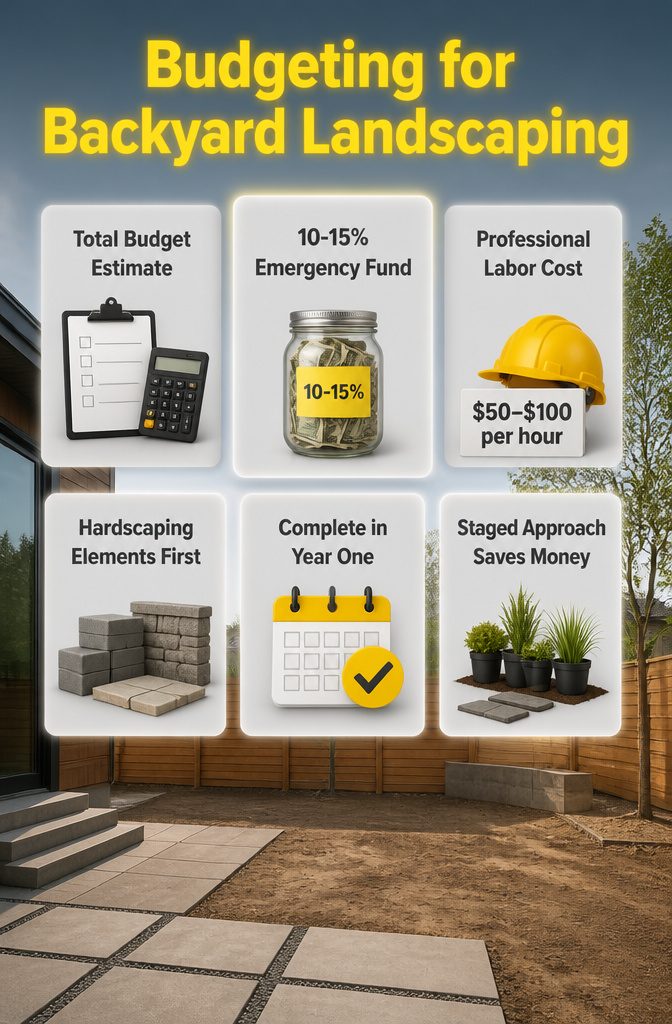
Set your total budget first, then add 10–15% for surprises: buried concrete, bad soil that needs amendment, a dying tree you didn’t notice until the shovel went in.
I have watched a Saturday project stretch to three weekends because of a slab the previous owner poured and forgot to mention.
Professional labor runs $50–$100 per hour, so doing your own planting and mulching keeps the first phase under $1,000 if you are disciplined about materials.
Complete hardscaping in year one if your budget allows; patios, walkways, and retaining walls give the immediate structure that makes a yard feel finished, while plants fill in over seasons or years.
Decorative elements can wait. The staged approach spreads cost without leaving you living in a construction zone, and starting small preserves the joy of working on your own property rather than exhausting it in a single sprint.
Native Plants and Drought-Tolerant Choices
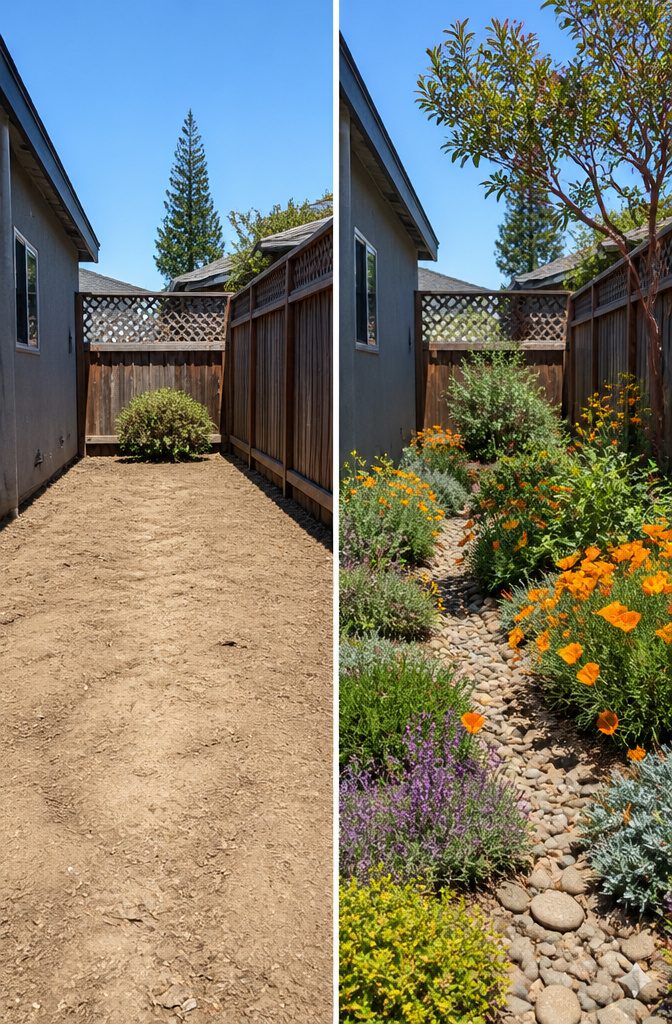
Native plants earn their place in a backyard plan through what they remove from your schedule, not what they add to it.
Once established, they need little water beyond normal rainfall and rarely require fertilizer because they are already adapted to local soils and climate.
That matters if you are someone who takes a week of vacation in July and comes back to crispy ornamentals. Natives keep working through your absence.
The pollinator piece is quieter but just as practical. These plants have existing relationships with local bees and butterflies, so you get the activity without installing a "pollinator garden" from scratch.
A yard with coneflower and little bluestem in the Midwest, or manzanita and California poppy in dry western regions, carries its own ecosystem.
Be careful with exotics.
Some run invasive, need more water, and push out the natives that were doing the low-maintenance work for you. State Plant Something affiliates can point you toward nurseries that stock properly sourced natives for your area.
DIY Hardscaping Versus Hiring Out
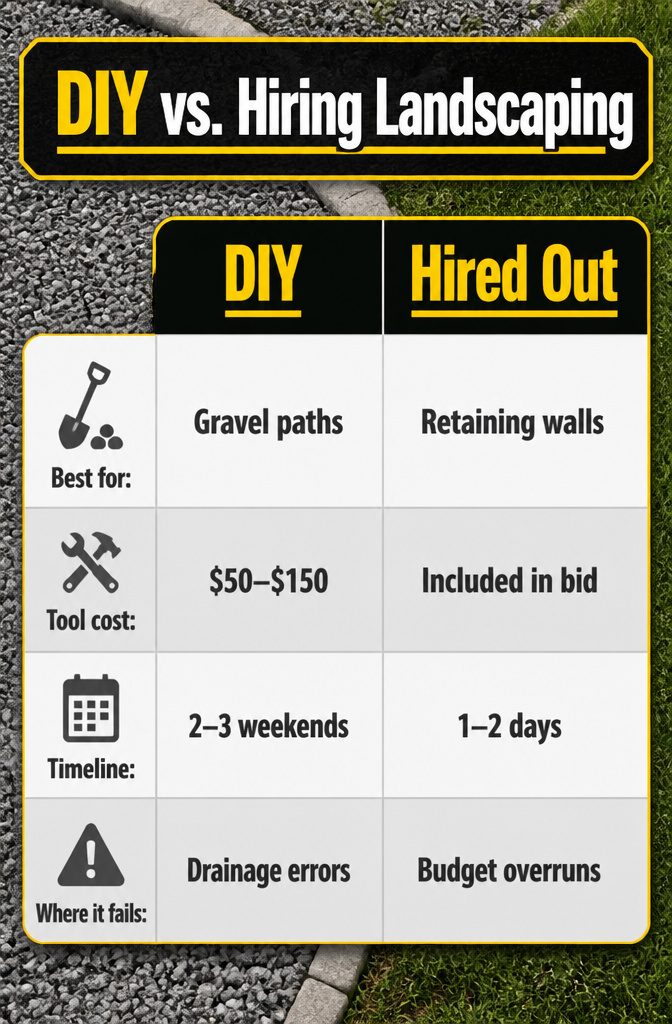
Gravel paths, prefab paver patios on sand, and small dry-stacked walls sit right at the edge of what a first-timer can handle with a shovel, level, and a rented tamper.
Brick pavers run about $0.50 to $10 per square foot, and the tool list is short: rake, shovel, rubber mallet, plus landscape fabric and builder’s sand you will need to buy.
I would skip anything that carries structural load or code scrutiny. Retaining walls over two feet, poured concrete, and gas lines for fire features belong to crews with permits and compactors.
The timeline gap is what separates weekend projects from summer-eaters. A pro crew finishes in two days what stretches across two weekends for a homeowner, mostly because excavation and grading move faster with multiple hands and a plate compactor.
For a simple patio, the choice is straightforward: your labor saves the labor cost, but the rental gear and material outlay still add up.
| DIY | Hired Out | |
|---|---|---|
| Best for | Gravel paths, paver patios, dry-stacked walls under 2 ft | Retaining walls, concrete, gas fire features |
| Tool cost | $50–$150 in rentals | Included in bid |
| Timeline | 2–3 weekends | 1–2 days |
| Where it fails | Drainage errors, settling pavers | Budget overruns on markup |
I would hire out anything that needs a permit, and I would do my own paver patio only after marking utilities and checking slope for drainage. The patio how-to is forgiving; a failed retaining wall is not.
Common Mistakes to Avoid
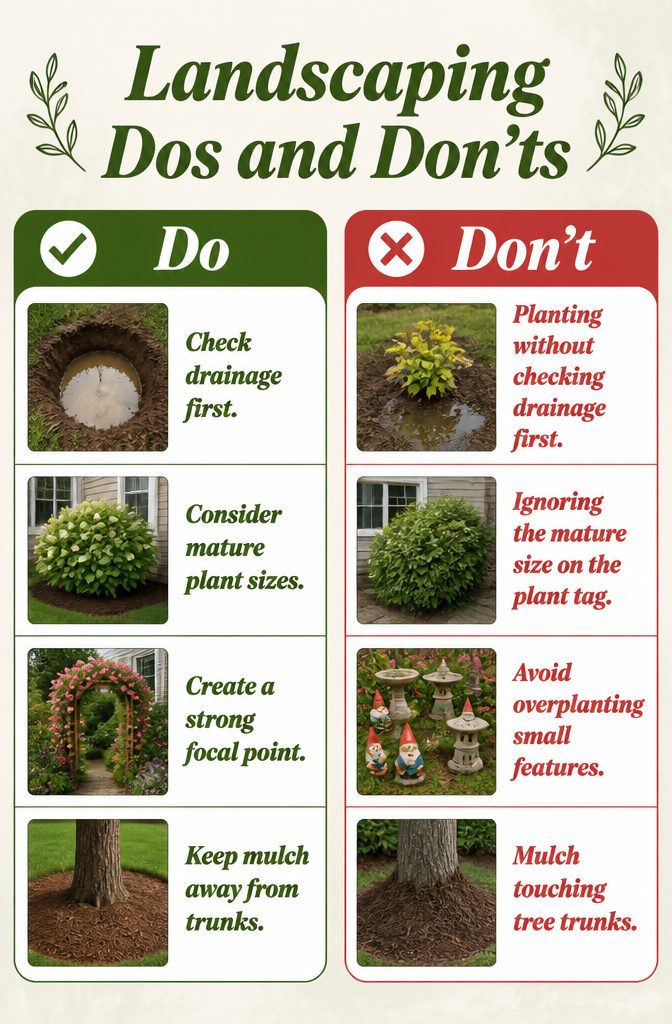
A few mistakes cost more to fix than the original planting, so I check these before I start.
- Planting without checking drainage first. Clay soil holds water like a bowl, and roots rot in standing moisture. I dig a test hole, fill it with water, and watch how long it takes to drain. If it is still sitting there after several hours, I know I need to amend the soil or choose plants that tolerate wet feet, not the Mediterranean herbs I had in mind.
- Ignoring the mature size on the plant tag. That three-foot shrub becomes a ten-foot wall in three years, blocking windows and crowding the walkway. I place tall varieties toward the rear of beds, never where they will obstruct glass or paths once they fill out.
- Scattering too many small features. One strong focal point, a trellis or a grouped planting in odd numbers, reads intentional. Four competing birdbaths and a half-dozen garden gnomes read garage sale.
- Mulch touching tree trunks. It traps moisture against bark and invites rot. I keep a clear ring, the same distance from the trunk I would keep a lawn mower.
Quick Ideas Under $500
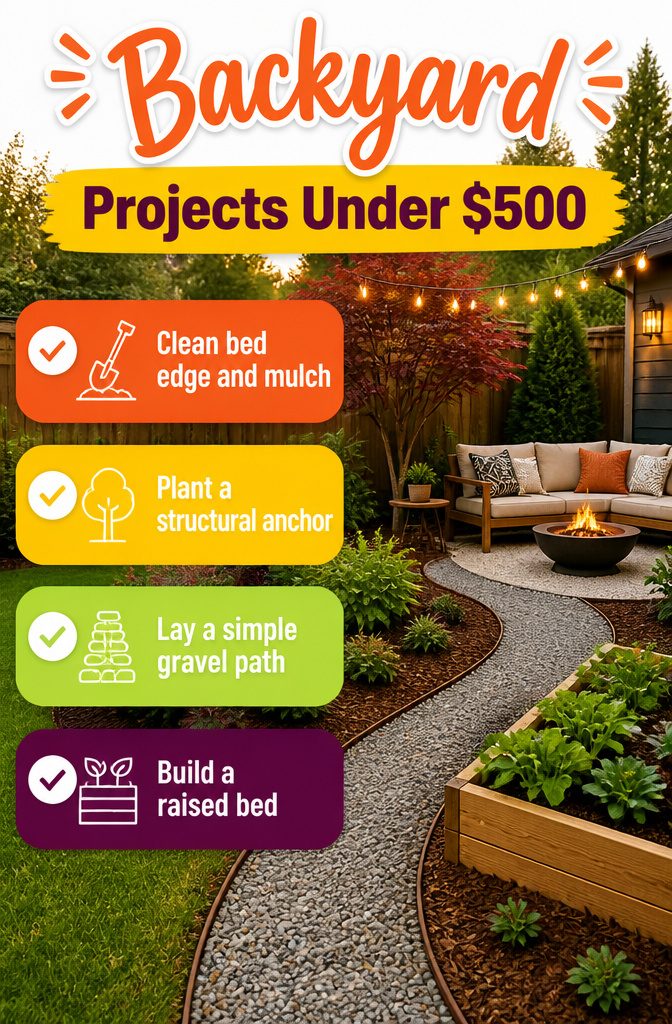
A $500 weekend can reshape how a backyard feels without touching a design app. These four projects stand alone; pick one and finish it by Sunday.
- Cut a clean bed edge with a spade, strip the turf, and lay 2–3 inches of shredded hardwood mulch. The crisp line against the lawn reads as intention, and the mulch buys you a season of weed suppression. Cost runs roughly $100–150 for a modest bed.
- Plant one structural anchor, like a small ornamental tree or a compact evergreen shrub. A single well-placed Japanese maple or arborvitae draws the eye across the whole yard and makes everything around it look more considered. Most garden centers stock container sizes in the $75–200 range.
- Lay a simple gravel path. Dig out 4 inches of soil, edge with steel or brick, and fill with 3/4-inch crushed stone. It handles foot traffic immediately and defines circulation where grass always wore thin. Budget $150–300 depending on length.
- Build one raised bed from cedar boards. Cedar holds up to ground contact without pressure treatment, and a 4×8 foot box gives you serious growing space. Lumber and soil together land near $200–350.
I would start with the edge and mulch. It changes the most visual ground for the least money, and everything after it looks like it belongs.
Frequently Asked Questions
What are some budget-friendly tips for designing a backyard landscape?
Start with a simple layout on graph paper or a free app, then focus on hardscape and paths first while leaving plantings for later seasons.
Native plants cut water and replacement costs, and materials like gravel, mulch, or concrete pavers run cheaper than stone or poured surfaces.
A phased approach drops early spending to a few hundred dollars instead of the $8,150 average for a full overhaul.
How do I select the right plants for my landscape?
Record where the sun actually lands in your yard, not just for how long, and note nearby surfaces that throw reflected heat.
Filter by your USDA Hardiness Zone, then cut the list by honest light readings and the maintenance you will actually do. Group plants by water need so one zone does not drown while another thirsts, and skip anything labeled invasive.
What are the common mistakes to avoid in landscaping?
Planting without checking drainage first tops the list: dig a 12-inch hole, fill it with water, and time the drain. Still wet after four hours means you need amendment or wet-tolerant plants.
Also ignore mature size tags at your peril, scatter too many small features instead of one strong focal point, and pile mulch against tree trunks, which traps moisture and invites rot.
How do I decor my backyard?
One strong focal point reads intentional where many small features read cluttered. A trellis, a grouped planting in odd numbers, or a single well-placed ornamental tree draws the eye and makes surrounding space feel considered.
Add low-cost features like solar lights or a DIY fountain with a submersible pump, which runs about $17, rather than spreading attention across competing pieces.
Can AI design my backyard for free?
Free apps can handle the scaled sketch stage, blocking in zones like sitting areas, paths, and planting beds without detailing every plant.
AI tools may help here, but the site assessment, drainage test, and plant selection still need your own observation and judgment.
What are the key principles of garden design?
Every backyard needs a single primary purpose and one secondary use before any plant goes in; the primary use shapes seating and paths, the secondary fills edges.
Keep circulation paths 3–4 feet wide so two people can pass with a tray or wheelbarrow.
Block in shapes, not species, at the layout stage, and place tall varieties toward the rear of beds so they do not obstruct windows or paths at maturity.
What is the 70/30 rule in gardening?
It does recommend mixing evergreen and deciduous forms for year-round structure rather than betting on one look, and it suggests hardscaping like patios and walkways in year one if budget allows while plants fill in over seasons.
The staged approach spreads cost without leaving you in a construction zone.