These 11 tips run from a 5-gallon bucket hung on a hook to a stone raised bed built by hand, so the deciding factor is how much soil you control and how much weekend you have to spare.
[link-whisper-related-posts]1. Watering at the Base
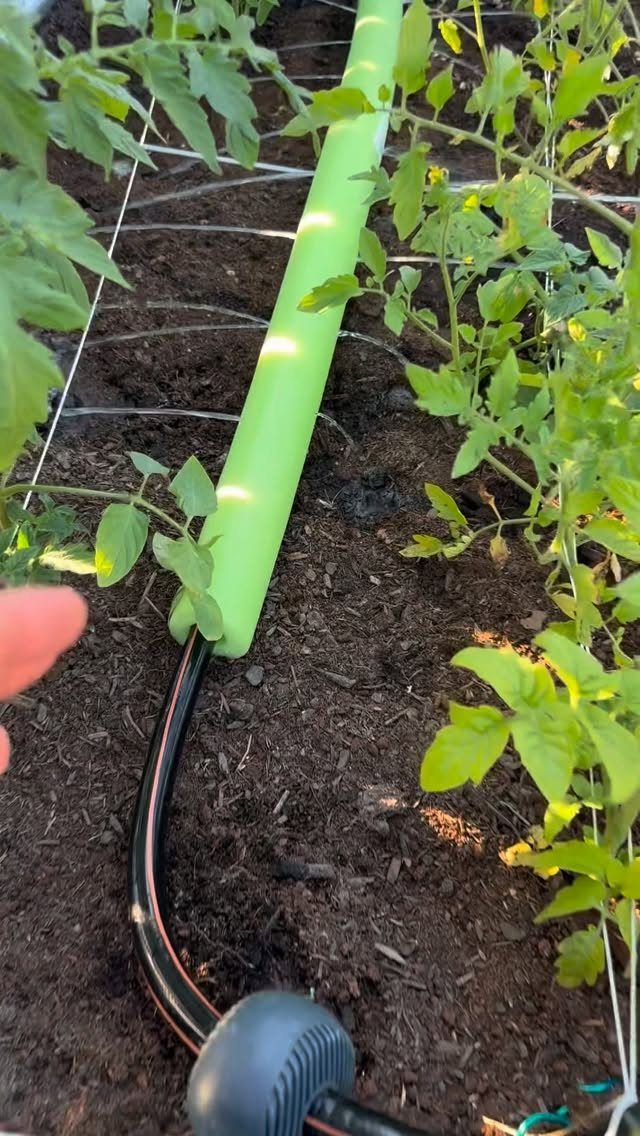
A soaker hose threaded through a cut pool noodle keeps water at soil level where tomato roots can reach it, not on leaves where blight settles.
I would set this up on a timer before I trusted myself to remember. Check that your hose reaches a spigot without stretching, and that water pressure stays low enough to seep rather than spray.
2. Harvesting Ripe Tomatoes
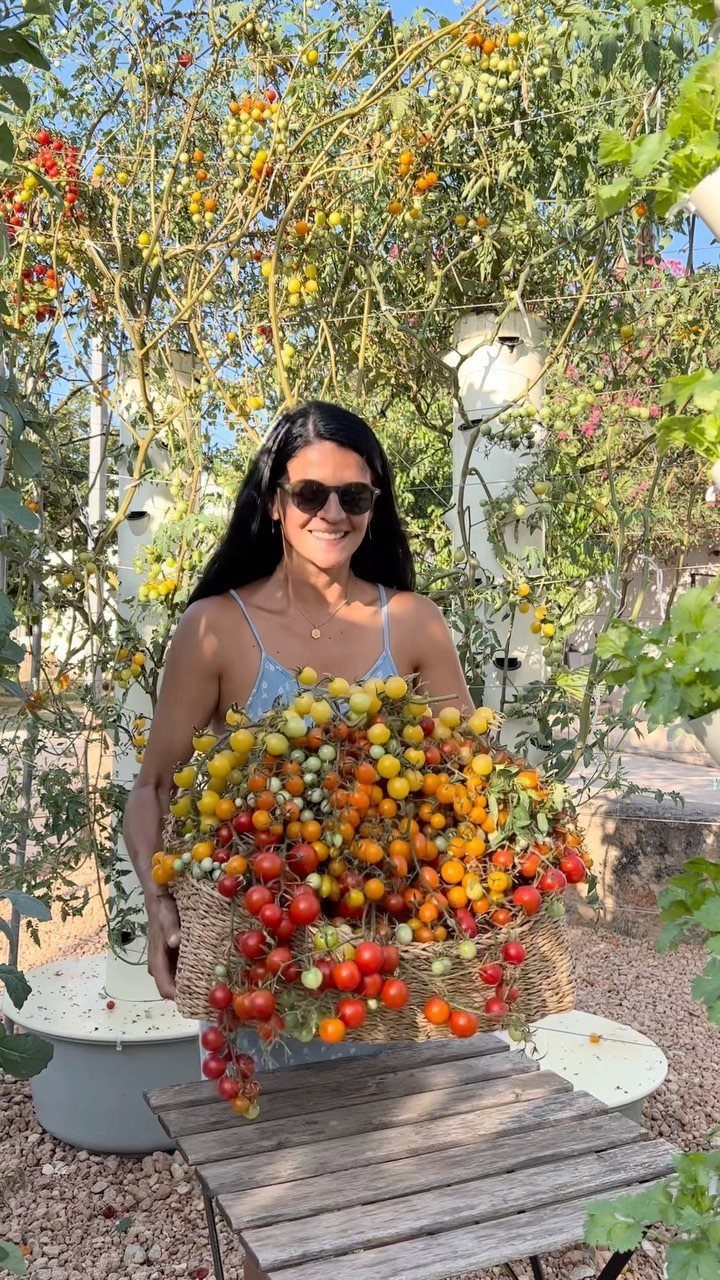
Picking every ripe tomato as it turns tells the plant to keep setting fruit instead of directing energy into seeds.
I harvest in the cool of morning when the fruit is firm. A basket with some breathing room beats a deep bucket that bruises the bottom layer; cherry tomatoes especially collapse under their own weight if you stack them.
3. Provide Sturdy Support
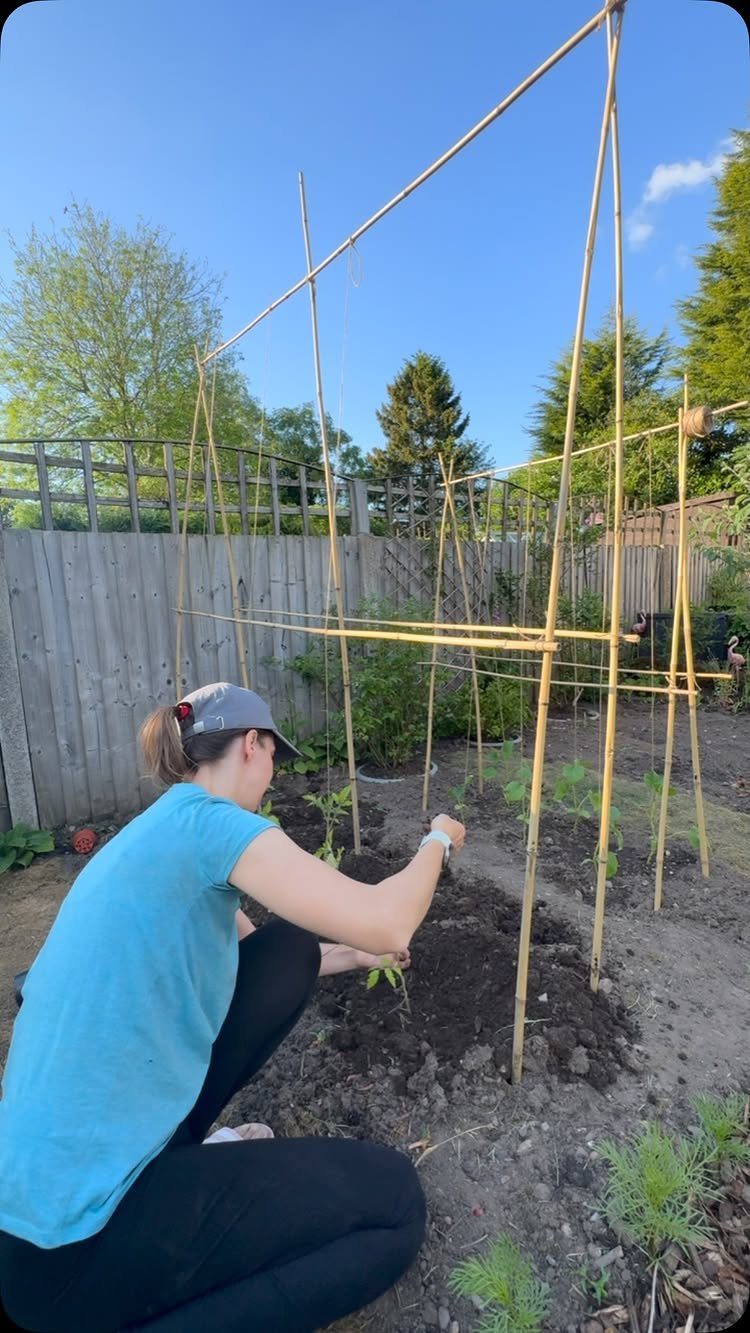
Bamboo canes lashed into a teepee shape let me train vines upward from the start, before stems harden and crack from bending.
I would sink the canes deep enough that they do not shift and angle them slightly inward so the trellis resists wind.
Keep your knots above where you will be working, or you will snag a knee on them every time you prune.
4. Use Quality Soil
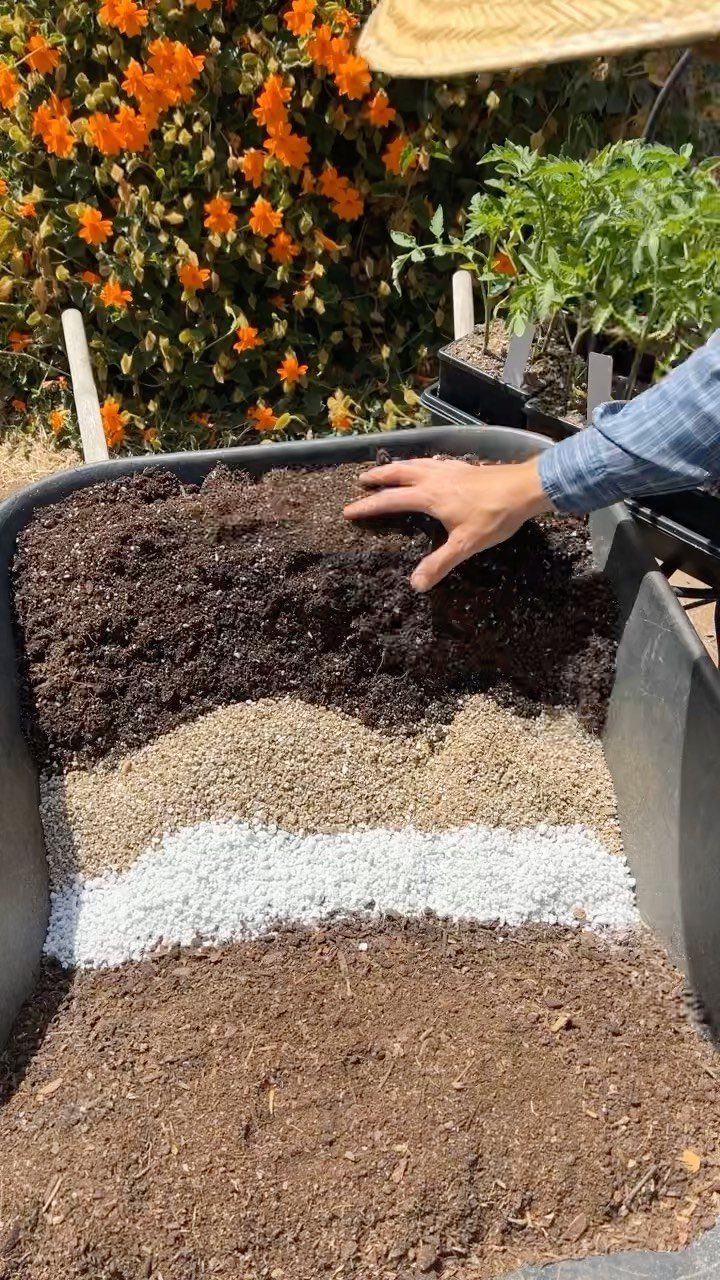
Perlite and vermiculite mixed into bagged soil lighten the mix so tomato roots get air, not the dense anaerobic stuff that comes straight from the ground.
I buy plain potting soil and amend it myself; the pre-mixed "garden soil" bags are usually too heavy for containers.
I add enough perlite to keep the mix loose and airy; this is the balance I have settled on after years of soggy seedlings.
5. Growing in Stone Raised Beds
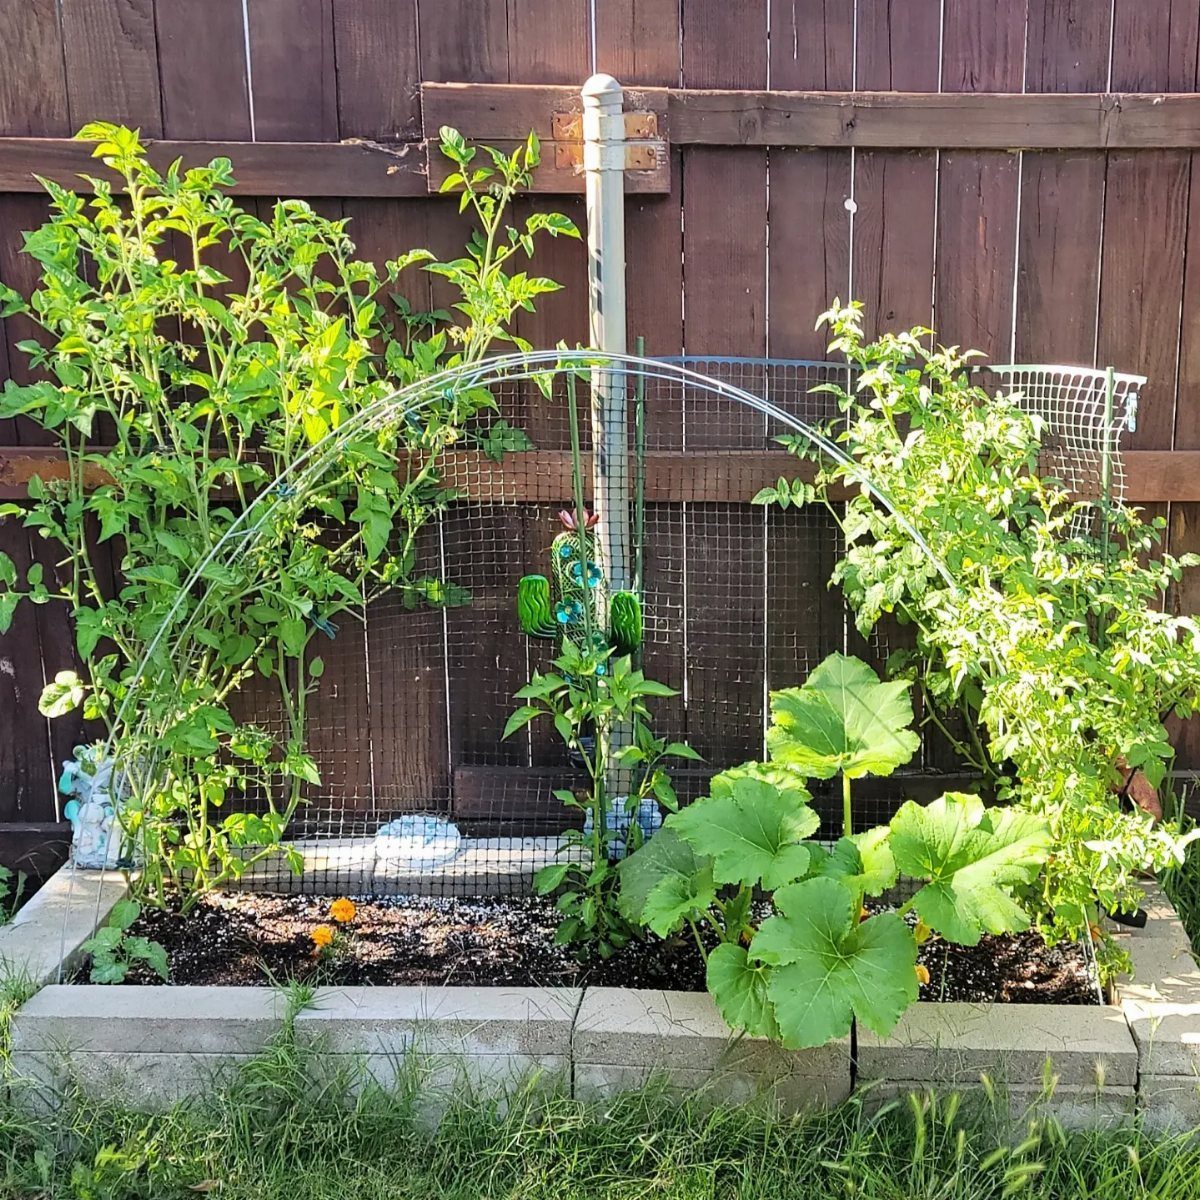
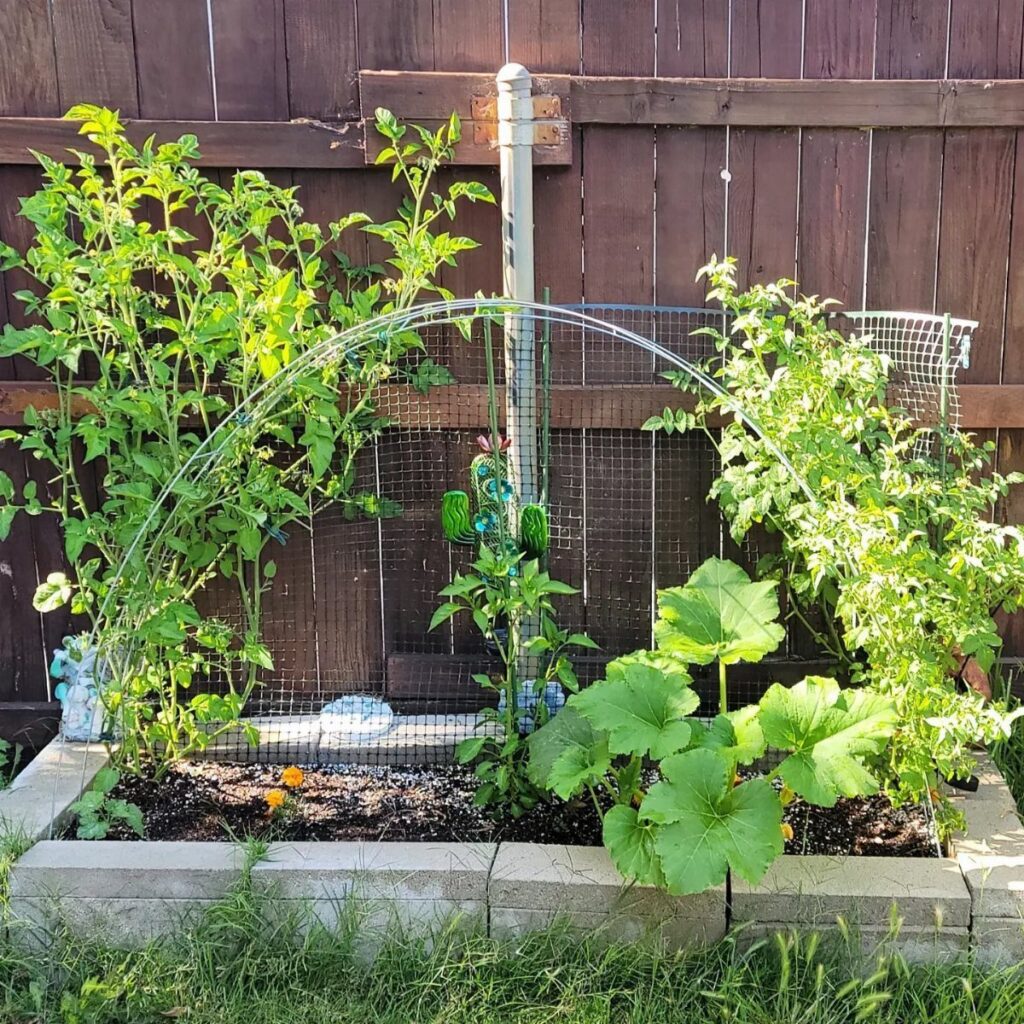
Stone-bordered beds heat up faster in spring and drain better than ground-level soil, which matters when tomatoes sulk in cold wet roots.
I would orient the long side south and keep the bed no wider than 4 feet so I can reach the center without stepping on the soil.
Standard concrete block will shift slightly each season, so I would check the border every March before planting.
6. Prune Young Tomato Plants
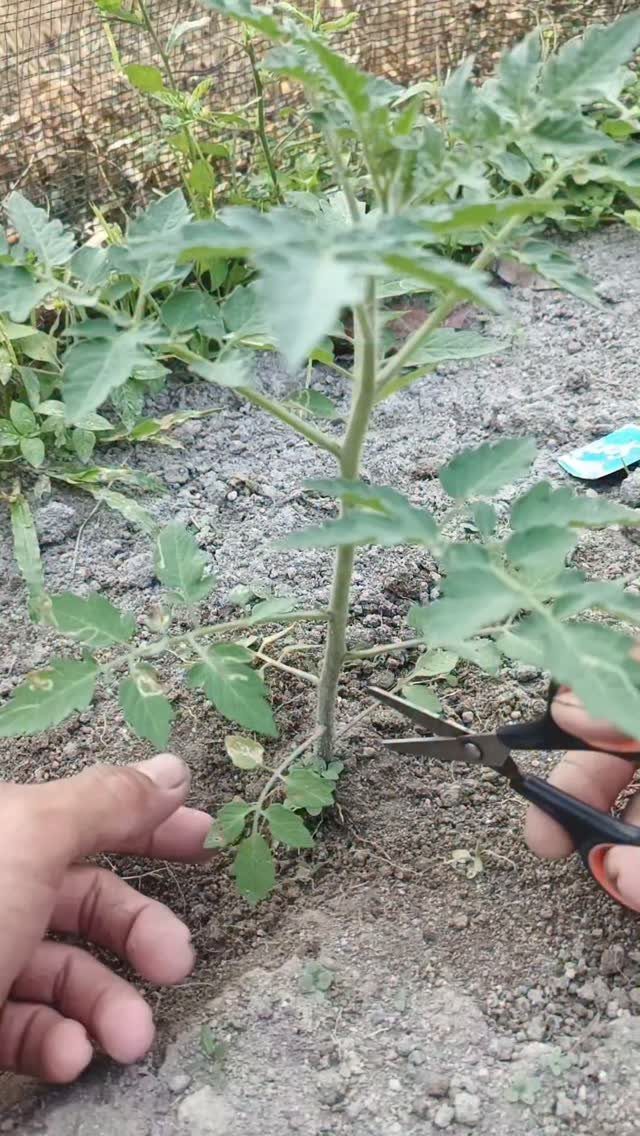
I prune when the plant is dry, mid-morning after dew burns off.
One clean cut flush with the stem beats a ragged tear that invites disease. I would skip this on determinate varieties; they have a set size and every leaf feeds the crop they will bear.
7. Use Plastic Mulch Sheeting
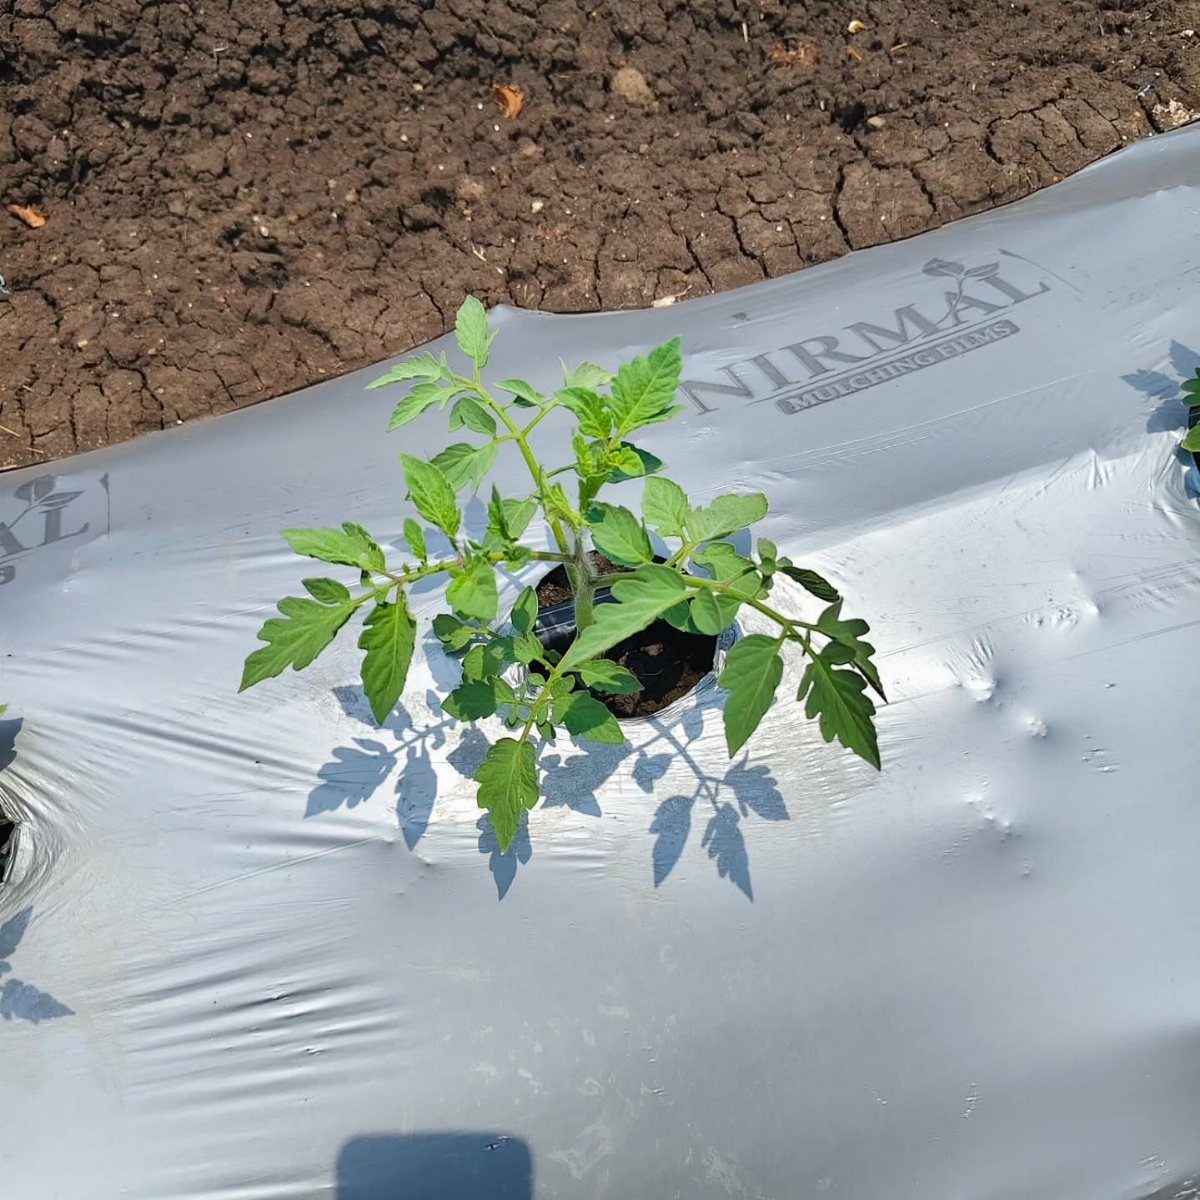
Silver or white plastic mulch reflects light up under the tomato canopy, which helps fruit ripen faster from below while the film itself blocks weeds and keeps soil moisture steady.
I would measure my row length and buy sheeting a foot wider on each side so I can bury the edges and keep wind from pulling it loose.
Cut an X for each seedling, not a circle; the flap shapes help funnel water inward.
8. Grow Upside Down in Hanging Buckets
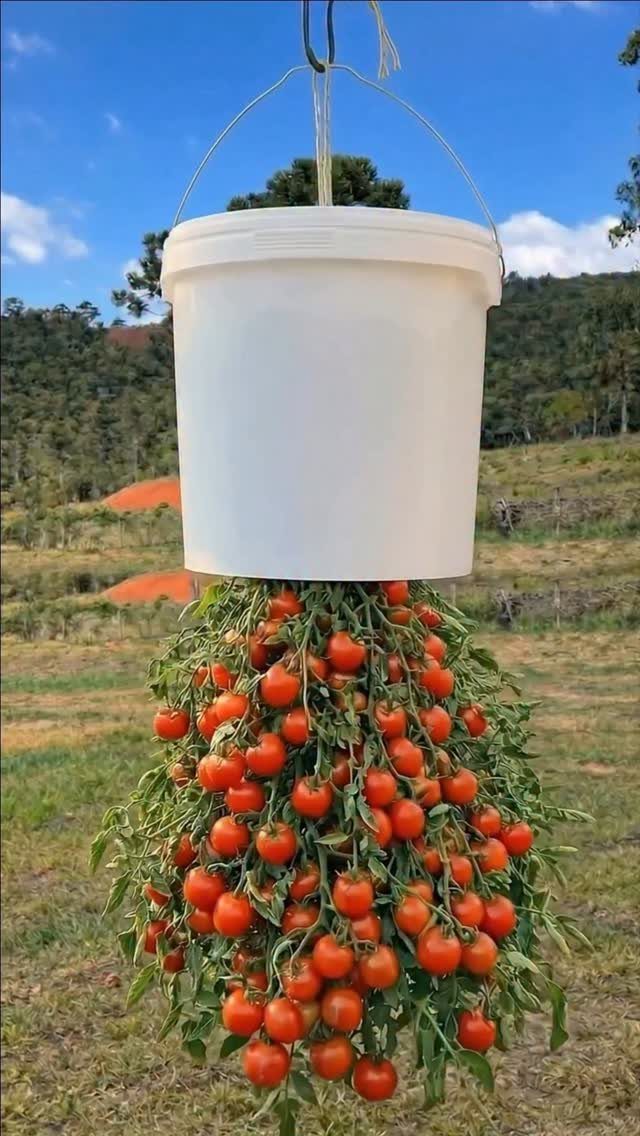
A 5-gallon bucket with a hole drilled in the bottom lets a tomato plant hang root-first, the stem threading through so the fruit can develop below without staking or caging; I would pick a determinate variety since the confined roots limit how much water and nutrient volume you can supply.
I would hang this where the bucket gets afternoon shade so the black or dark plastic does not cook the roots; white buckets handle full sun better.
Start with a young plant; mature stems will snap if you force them through.
9. Irrigate with Trench Flooding
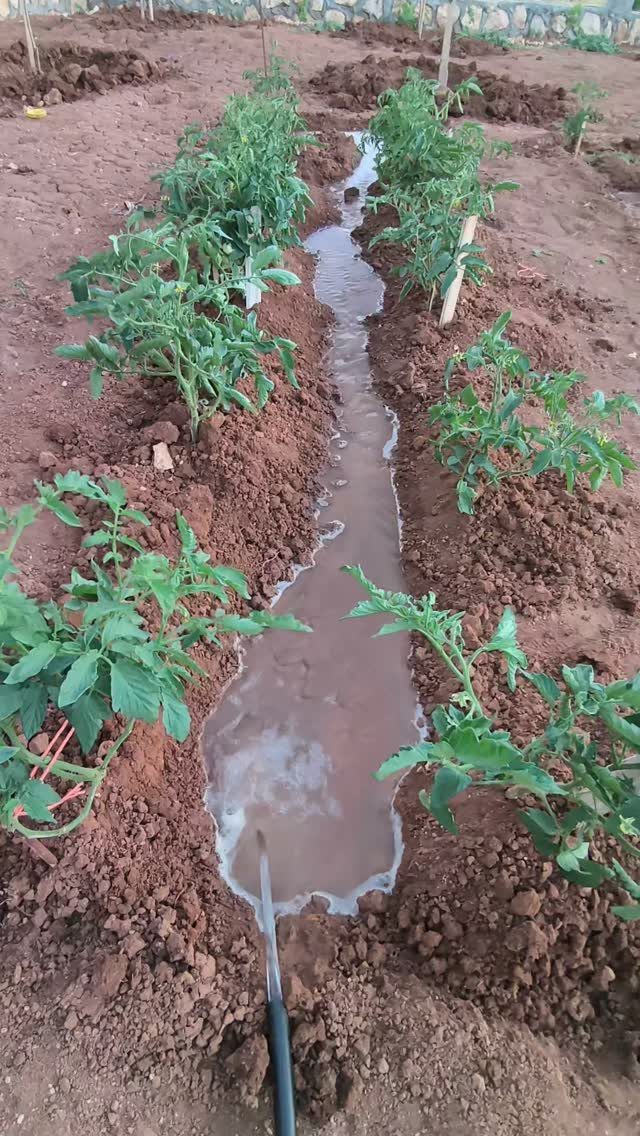
A shallow trench between tomato rows catches water from a hose and lets it spread sideways to roots slowly, instead of running off the soil surface or spotting leaves from above.
I would keep the trench level so water pools evenly; a slope sends it all to one end and leaves plants thirsty at the high side.
Let the water sink in before you move the hose, or you are just wetting the path.
10. Apply Straw Mulch Around Plants
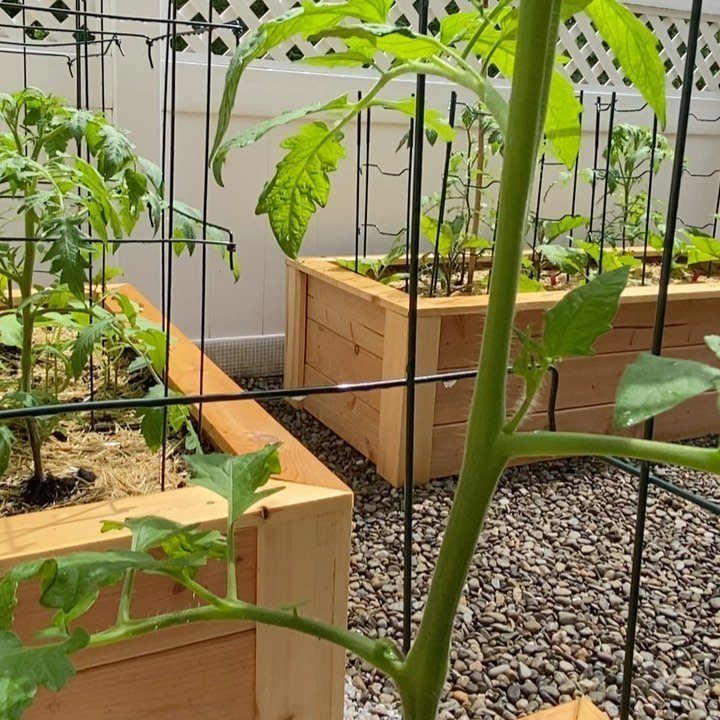
Straw mulch breaks down slower than grass or leaves, and its hollow stems let air reach the soil surface so it does not compact into the soggy mat that wet wood chips can become.
I would lay it deep enough to block light and hold moisture once the soil has warmed in late spring; too early and the cool, damp layer stifles young roots.
Keep it an inch back from each stem to discourage rot at the base.
11. Plant Tomatoes in Large Containers
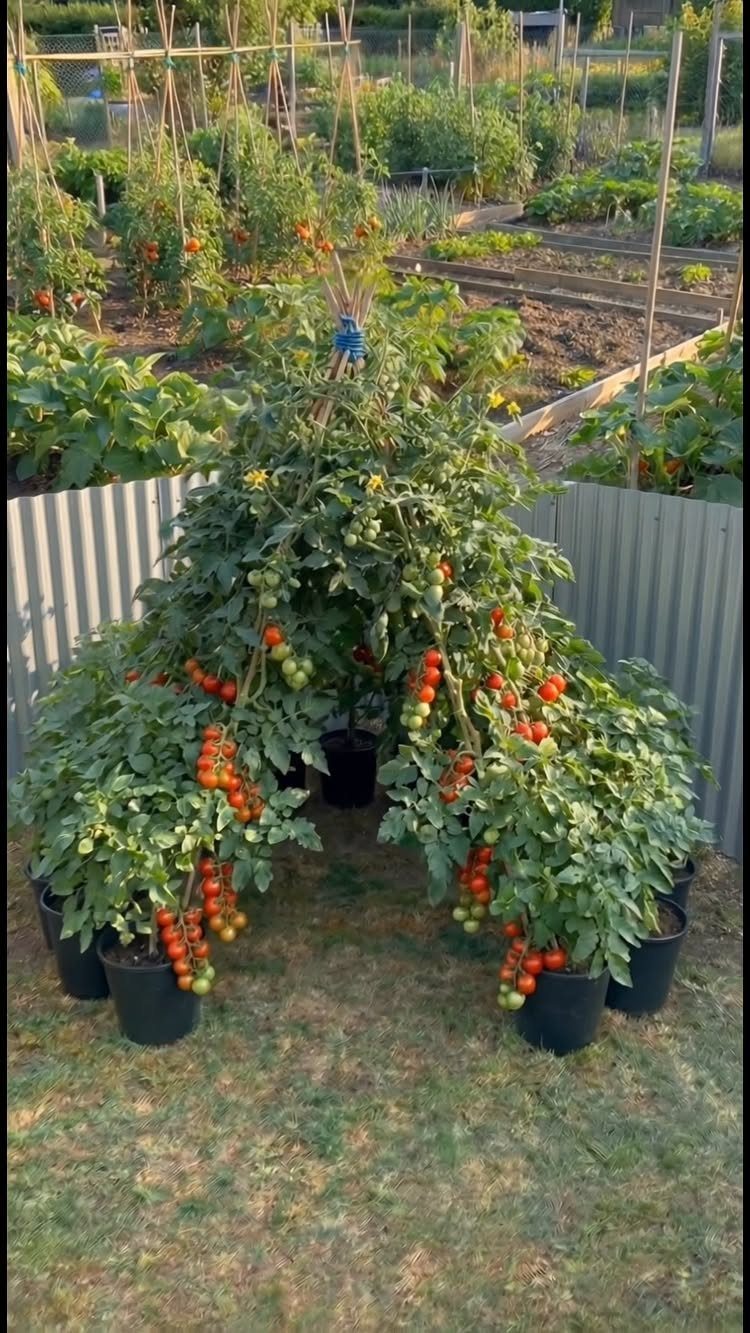
A pot sized for a full tomato root system gives the plant room to spread and enough soil volume to buffer water swings that would stress a plant in a smaller container.
I would set one plant per pot and stake early, before the root ball settles and a late stake tears through it.
Black plastic heats in sun, which speeds growth early but means more watering in July; I would line up my drip lines before the fruit load gets heavy.
Common Tomato Diseases
Blossom end rot hits the bottom of the fruit with dark, sunken patches; the real culprit is erratic watering, not a lack of calcium in the soil, since the plant cannot absorb what is there through swings from bone dry to waterlogged.
A soaker hose on a timer keeps moisture steady and takes the human guesswork out of it.
Early blight tends to arrive in July when sticky humidity meets warm nights.
Look for dark concentric spots about half an inch across on lower leaves and stems. Strip those infected leaves off and destroy them; the plant may survive if you catch it before it spreads upward.
Good air flow and removing lower leaves as fruit sets are your best defenses outdoors, and the ripening bonus is real.
Late blight spreads as a gray, moldy film that browns as it takes over. Persistent damp weather spreads it, and once it takes hold, the plant is finished.
Fusarium wilt yellows and wilts one side first, then climbs.
Mosaic virus twists new growth narrow and mottles leaves yellow. Both mean destruction, and neither goes in your compost.
Powdery mildew dusts leaves white. It can be managed.
Tomatoes need a consistent supply of moisture. If it rains less than 1 inch per week, water to make up the difference.
Pest Management Strategies
I check tomato plants daily, lifting leaves, scanning fruit, and looking near the soil line where problems start small.
A hard stream from the hose knocks aphids off early in the day. I look for parasitized aphids, bloated and gray-brown, or the alligator-shaped larvae of lady beetles and lacewings; those mean natural enemies are working.
Tomato hornworms I pick by hand with gloves on and drop into soapy water. They are large enough to spot, and their natural controls often keep them in check without my help.
Spider mites and other small pests call for insecticidal soap sprayed right on the body.
Neem oil mixed into water coats breathing pores and suffocates the insect. Horticultural oils are another option.
Whiteflies ride in on infested transplants, so I inspect every plant before I buy. Colorado potato beetles, eggs, and larvae all get handpicked and destroyed.
Cutworms meet cardboard collars pushed around each stem at planting. For flea beetles, row covers go on at planting and come off before heat builds; weed control around the bed helps too.
If I resort to something like Sevin, I know I am taking out beneficial insects along with the target.
Best Tomato Varieties
Determinate varieties grow bushier, set flowers on short branch ends, and ripen their crop all at once. They are usually the early-season types.
Indeterminate vines keep climbing, flowering, and fruiting until frost kills them; they are what most backyard growers plant. Semi-determinate varieties stay bushier than indeterminate vines but keep fruiting in waves rather than one big flush.
Days to harvest counts from transplanting, not from seed.
I use 65 days or less as early, 65 to 80 as mid-season, and 80 or more as late. In cooler zones, early varieties are the only safe bet for fruit that actually ripens on the vine.
Heirlooms deliver flavor, but disease resistance tends to run lower. Modern bred lines often trade some of that taste for tougher constitutions, since tomatoes started as desert plants without natural defenses against humidity-loving diseases.
Color and size range is wide: red through orange, yellow, pink, and multicolor; beefsteak rounds, elongated paste types, tiny cherries and grapes.
I match variety to use, slicing versus sauce versus salad, and I check the label for disease tolerance codes before I decide.
Frequently Asked Questions
What are common mistakes to avoid when growing tomatoes?
Planting too early, overcrowding, and erratic watering top my list. Cold soil stunts roots before they start; give the ground time to warm.
Crowded plants trap humidity and block air flow, which invites early blight. Uneven moisture, swinging from dry to soaked, locks out calcium and gives you blossom end rot even when the soil carries plenty.
What do coffee grounds do for tomatoes?
Coffee grounds add organic matter and some nitrogen as they break down, but I would not count on them as a main fertilizer.
They can help lighten heavy soil and draw in beneficial microbes, yet too much packs tight and holds excess moisture around roots.
I treat them as a side dressing in moderation, not a replacement for the perlite and vermiculite I already mix in to keep my potting soil airy.
What should never be planted near tomatoes?
Keep potatoes and other nightshades away, since they share the same pests and diseases and make it easier for problems to hop from plant to plant.
Corn is another poor neighbor; its heavy feeders compete hard for water and nutrients, and the tall stalks block light.
Fennel and mature dill can stunt tomato growth too. I give my tomatoes their own bed or at least a few feet of clearance so I can move around them and spot trouble early.