These ideas run from free food-grade buckets to a seven-pack of fabric grow bags that costs less than one pressed planter of the same size, so the right pick depends on whether you have storage space for bulk supplies and winter gear.
If you do, mixing your own soil from peat or coir, perlite, and compost is the cheapest move of all.
[link-whisper-related-posts]1. Potting Mix
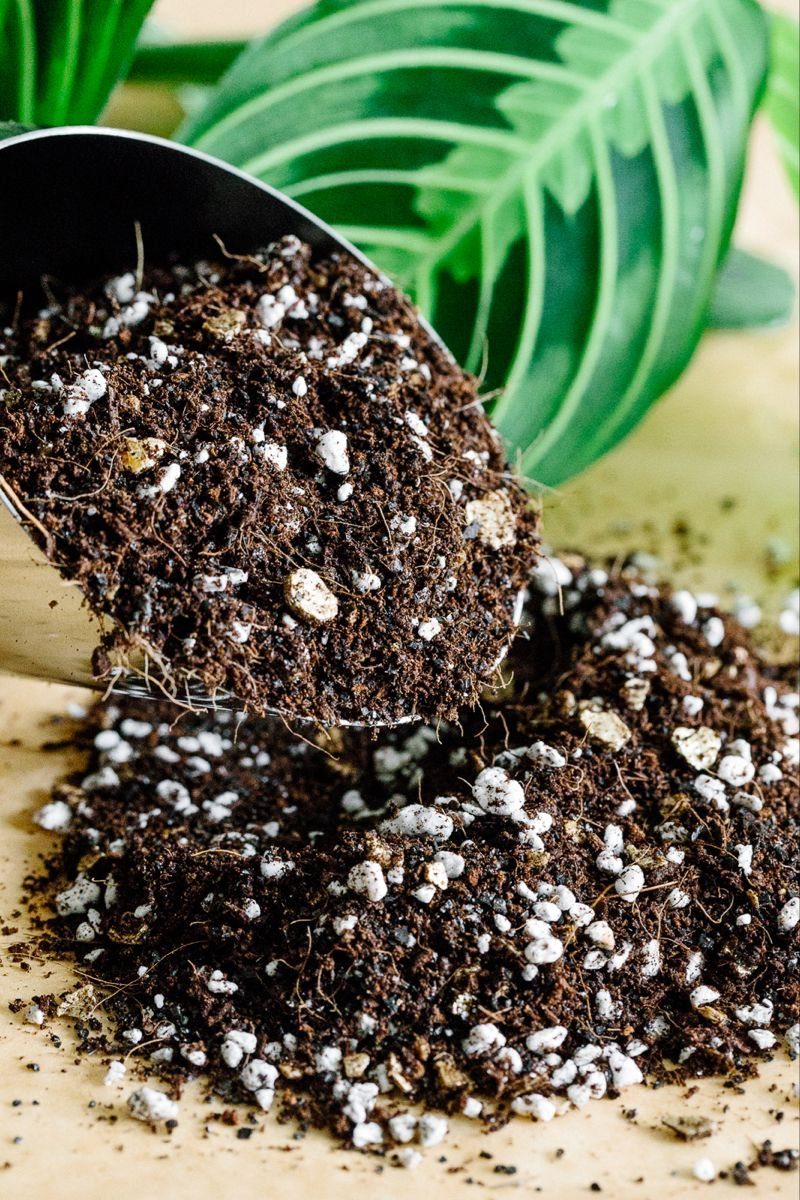
The cheapest move in container gardening is mixing your own soil instead of buying bags marked premium.
I start with peat or coconut coir for the base, add perlite for drainage (those white granules you see), and finish with compost for nutrients.
The perlite ratio matters more than brands.
Too little and roots rot in wet corners; too much and water runs straight through before the plant drinks. I check that my mix holds a squeezed handful for 2 seconds then crumbles.
Before starting, decide if you have storage. Bulk ingredients save money only if you keep them dry through the season.
2. Basil with Tomatoes
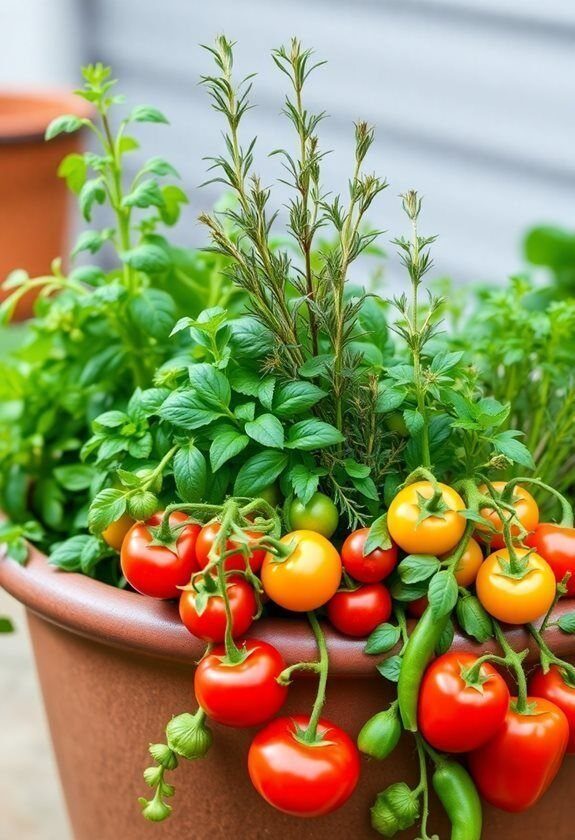
Basil and tomatoes share a pot because they want the same thing: sun, steady water, and soil that dries slightly between drinks. The basil’s shallow roots feed near the surface while tomatoes dig deeper, so neither crowds the other.
I pair them because stepping outside for a tomato and its matching basil beats a grocery run. Snip basil for a salad while the tomatoes ripen; no crossing the yard for one missing herb.
Check that your container is wide enough.
Cherry tomatoes spill and need room to hang, and crowded basil turns leggy reaching for light. A pot too narrow forces you to choose between a harvest and a decoration.
3. Drip Irrigation System
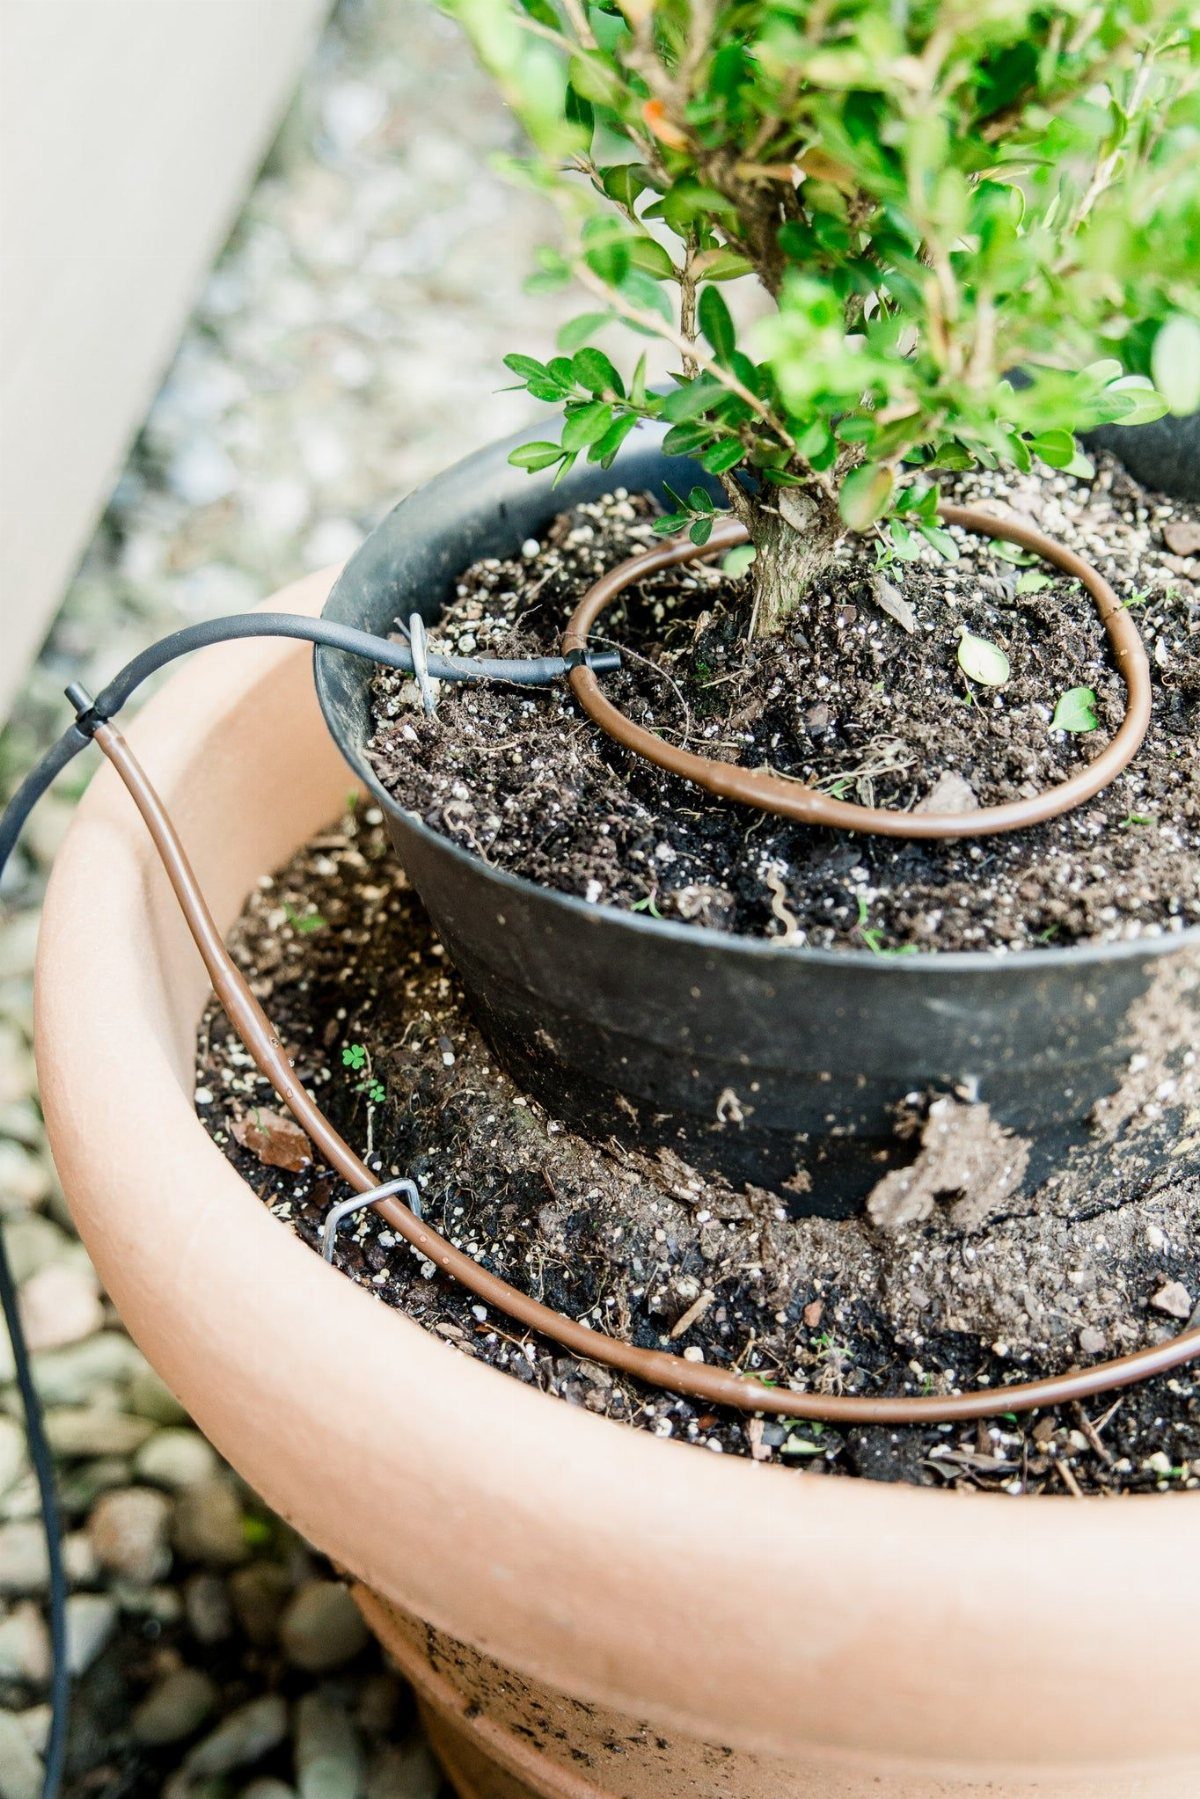
Brown tubing coiled on the soil surface beats hand-watering once you have enough pots to make the rounds tiresome. Water drips slow and direct to roots instead of misting leaves that then scorch in afternoon sun.
Setup starts with a timer on your spigot, then main tubing run like a backbone with smaller offshoots pinned at each plant base.
I check that emitters sit at soil level, not perched on pot rims where wind and curious animals dislodge them.
The real decision is whether your container cluster stays put. Drip rewards fixed arrangements; rearranging pots means replumbing lines each time.
4. Repurposed Containers
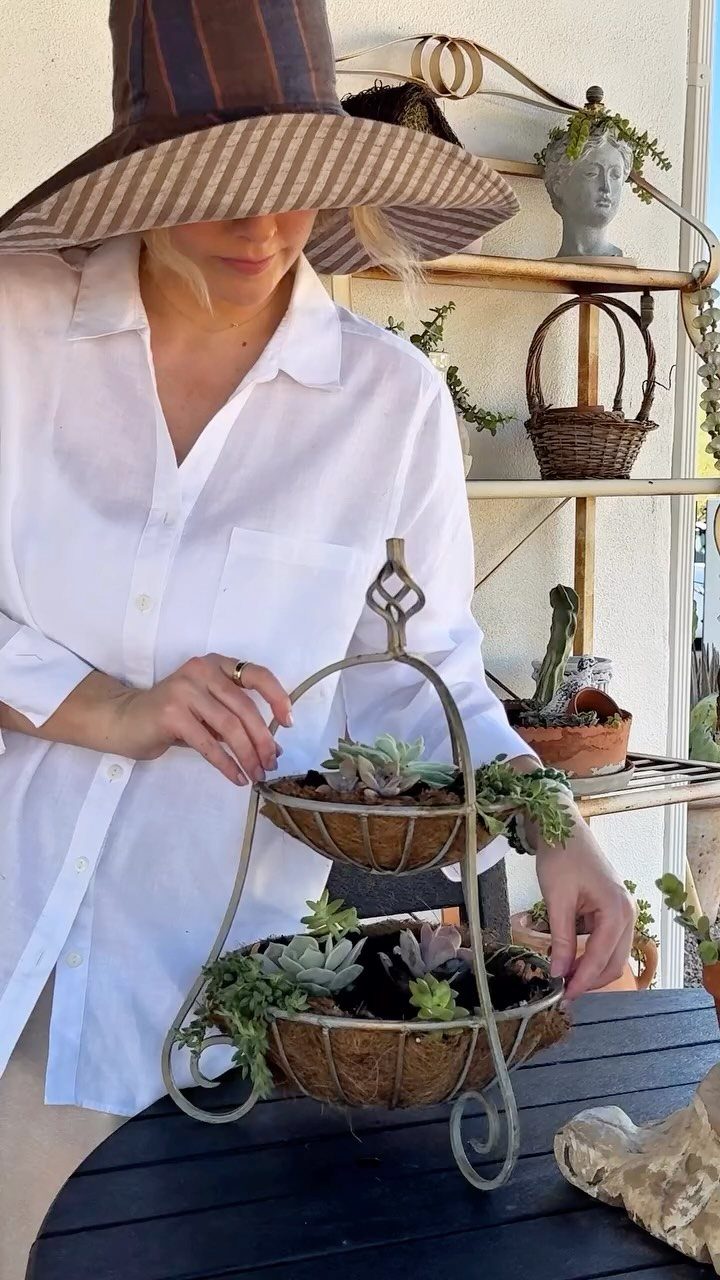
A metal basket lined with coconut coir becomes a planter for the cost of lining material, no drill needed since wire and coir drain on their own.
I look for wire frames, old tool caddies, or enamel buckets scored at yard sales.
The lining is nonnegotiable.
Soil presses through open mesh without it, and water carries fines straight out the bottom. I use coir sheets or landscape fabric held with wire ties; burlap rots out by August in my climate.
Check weight before filling.
A two-tier basket loaded wet gets heavy fast. I wall-mount only with anchors rated for double the expected load, or keep freestanding units low enough that tipping only bruises a tomato, not a toe.
5. Food-grade Buckets
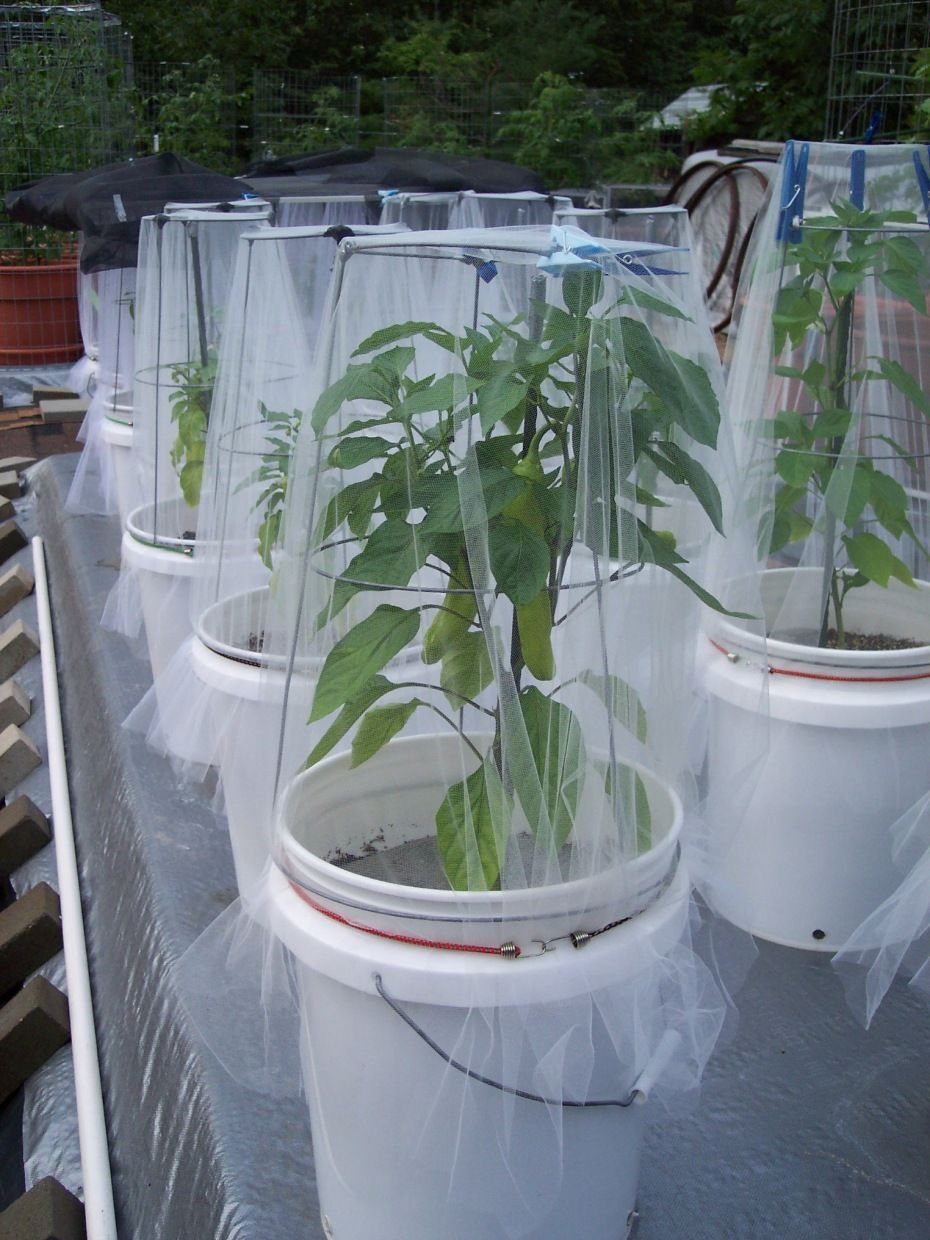
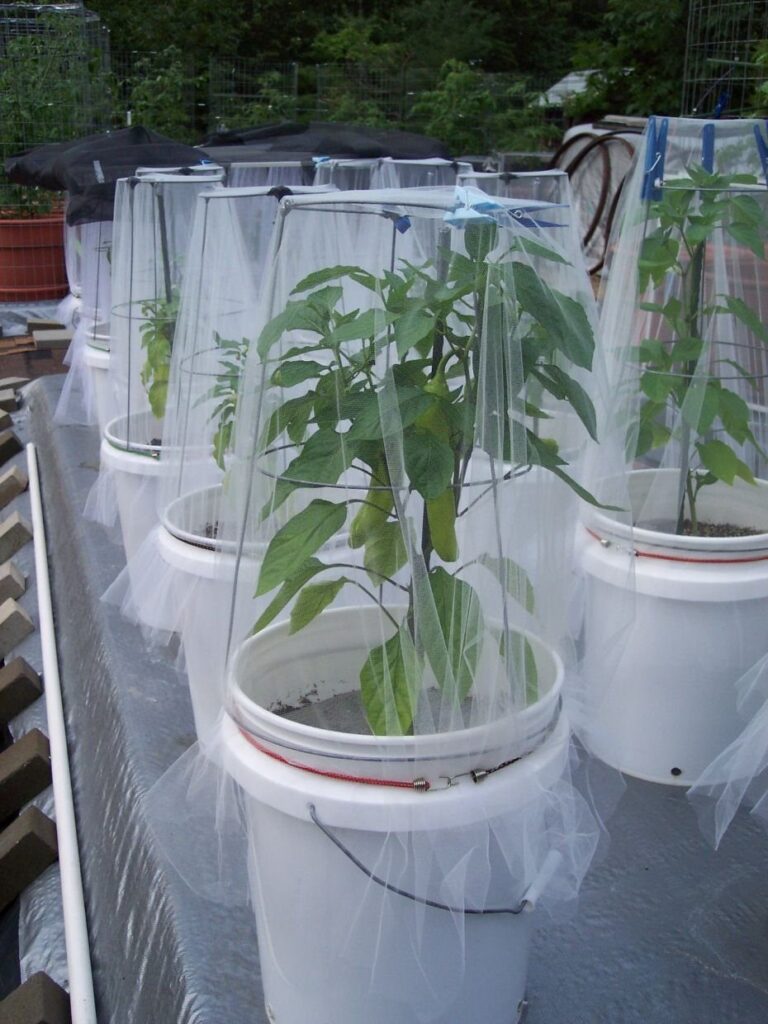
White five-gallon buckets with pepper plants inside them cost a few dollars at bakeries and delis, or nothing if you ask at the right counter. The food-grade resin means no chemical leaching into your edibles.
I drill drainage holes in the bottom inch, spaced every few inches so water can actually escape the root zone. That second row prevents a drowned root zone when heavy rain sits in the tray below.
Mesh cages like those shown keep squirrels from sampling and late-season weight from snapping stems.
Before building that structure, decide if you will move buckets seasonally. Rolling bases add cost but save your back come frost warnings.
6. Grow Bags
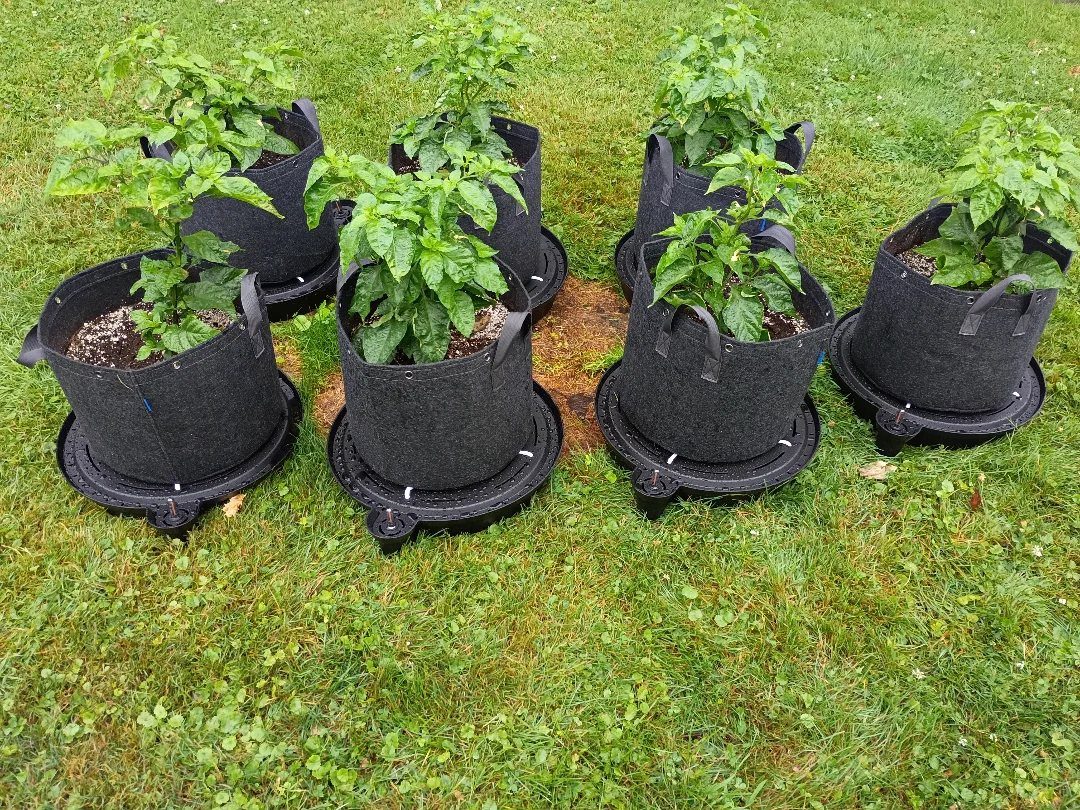
Dark grey fabric bags with handles warm soil fast in spring and fold flat for winter storage. The material breathes, so roots air-prune instead of circling; you get a denser root ball in less mix than a hard-sided pot demands.
Black plastic saucers underneath protect decks and grass from the staining runoff that follows heavy feeding.
Fabric dries faster than plastic.
I check moisture daily in July, sometimes twice. That extra attention is the trade for portability and price: a seven-pack of 5-gallon bags runs less than one pressed planter of similar size.
7. Inexpensive Plastic Planter
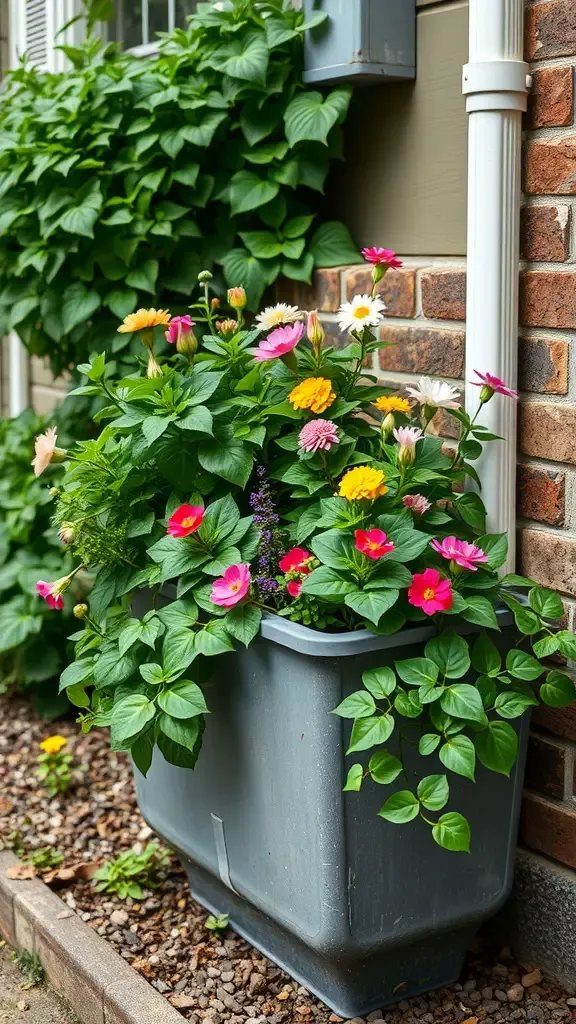
A rectangular storage tub from the hardware aisle works as a planter once you drill holes. A grey plastic planter this size holds enough soil for zinnias to hit full bloom, and the neutral color steps back behind the flower.
I like these for annuals that need root room: the soil volume matches much pricier pots, and the wide base resists tipping in wind. Check that the plastic is UV-stabilized, or expect brittleness after 2 seasons.
Before filling, lift the empty tub.
Filled wet, it may need a dolly to shift. I place mine where they will stay for the summer.
8. Classic Terracotta Pots Cluster
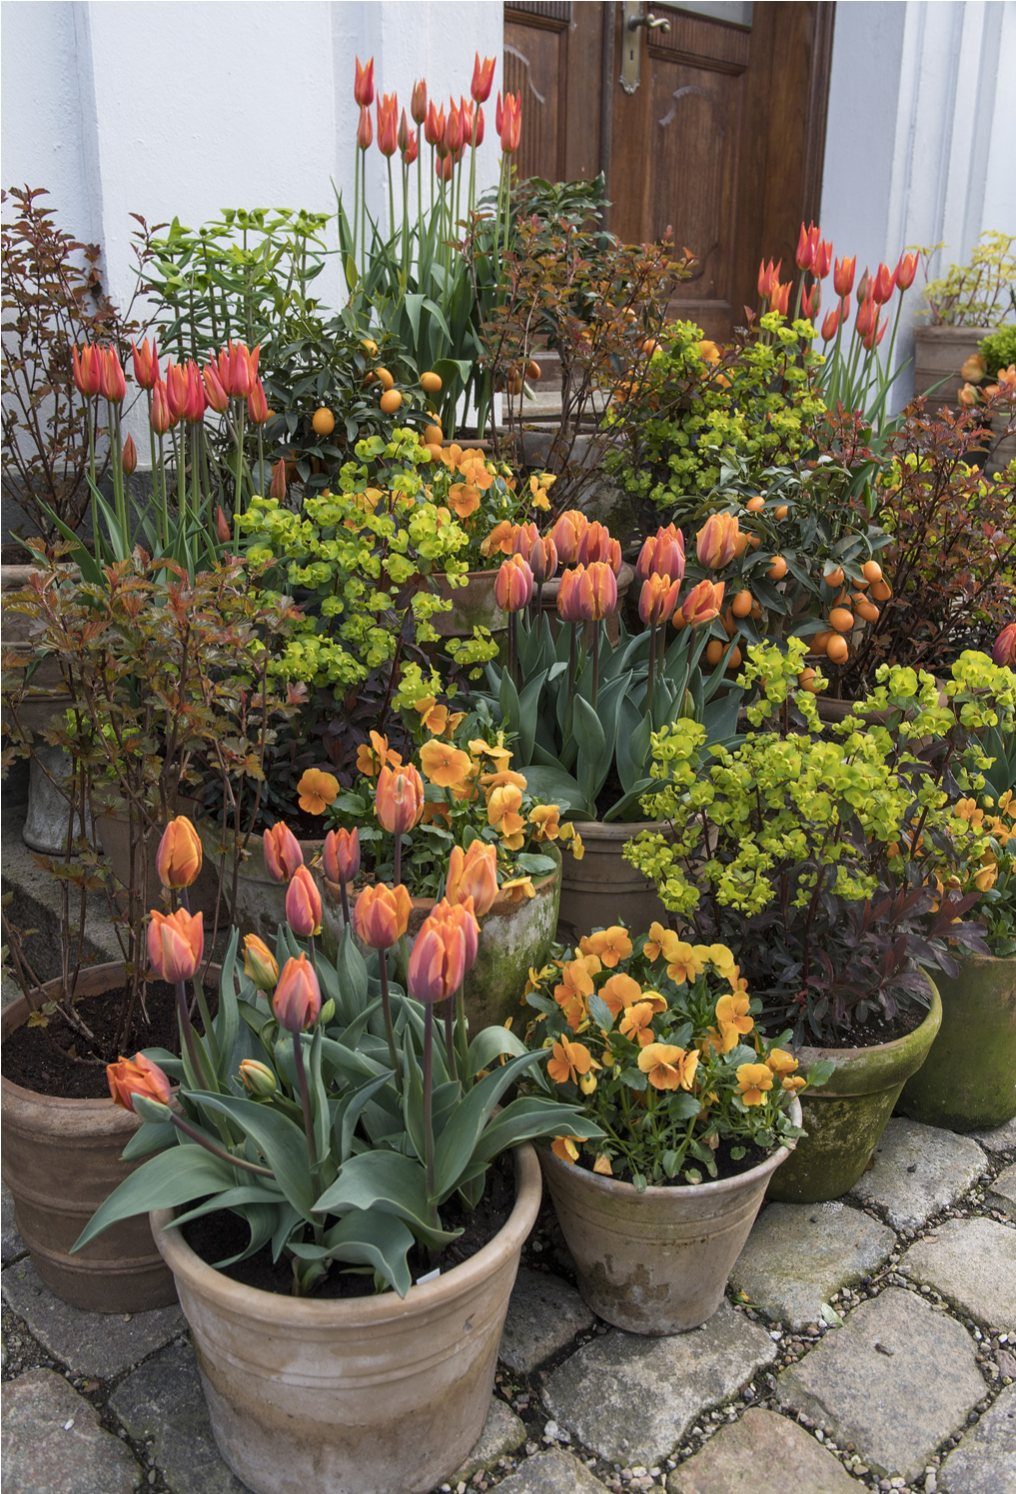
Terracotta breathes, and that matters more than the romantic look. Roots stay cooler in clay than in plastic, and the porous walls forgive overwatering by letting excess evaporate.
Grouping pots turns single plants into a display.
I vary heights with bricks or stands so each plant catches light, and I cluster by water need: thirsty tulips together, drought-tolerant herbs apart. Unglazed clay dries fast; check daily in August heat.
The weight adds up. I keep large pots on the ground, not railings, and I lift before frost to avoid freeze-thaw cracking.
9. Sub-irrigated Bucket Garden
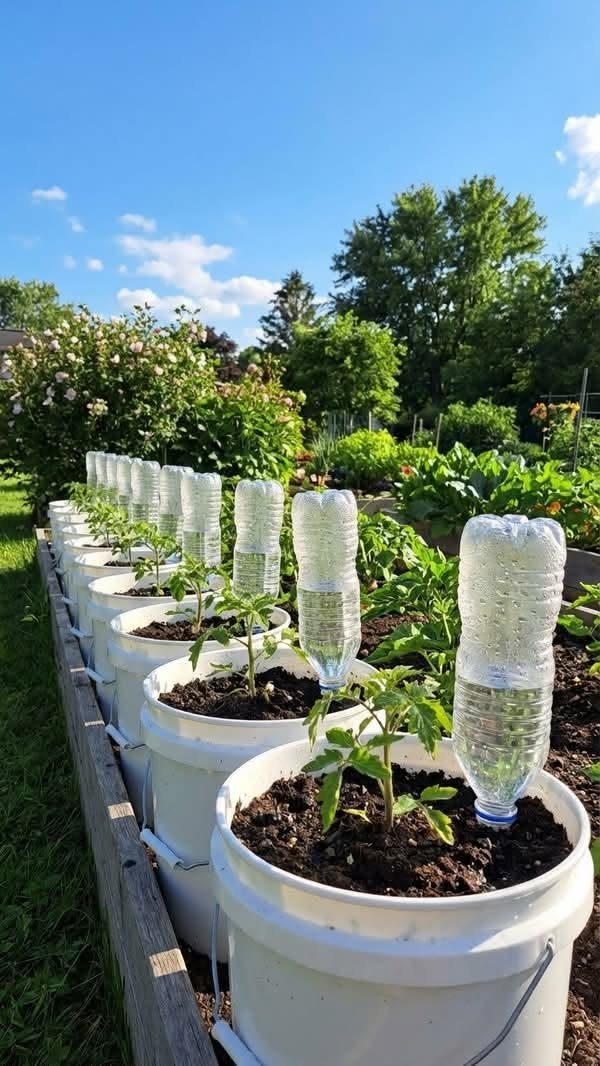
A bottle inverted into soil delivers water deep to roots from above, which still beats surface watering for thirsty tomatoes.
Five-gallon buckets in a row make a simple sub-irrigated system, with bottles neck-down to wick moisture deep while surface soil stays drier and less prone to fungus.
I would use this for determinate tomatoes or peppers, plants that fruit once and do not need rearranging. The bottles need refilling, not daily watering, but you must check them; a dry bottle leaves roots stranded.
Before building, decide if your bed stays put.
10. Colorful Seed Starter Cups
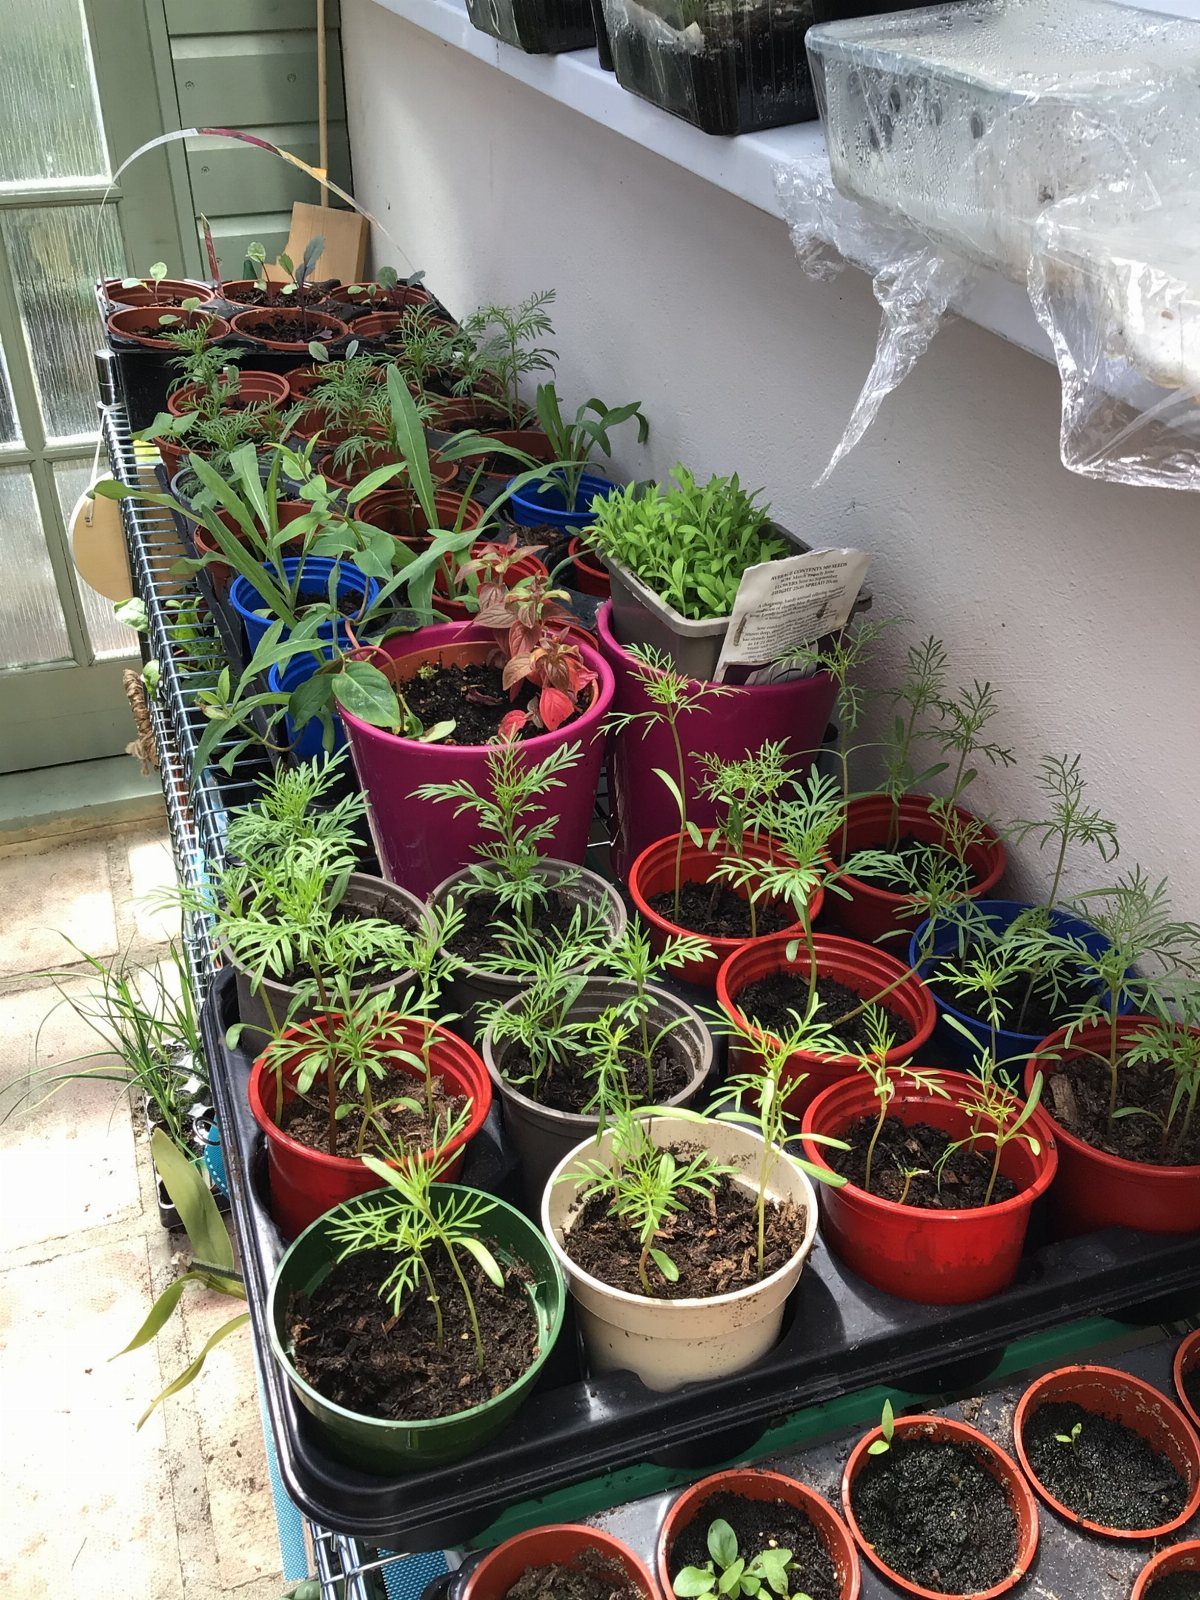
Small plastic cups in bright colors make seedling pots that cost pennies and let you start dozens on a windowsill. Small cups in trays on wire shelving hold one seedling each at the stage before transplant.
I punch holes in the bottom with a heated nail, then fill with fine potting mix, not garden soil.
The colors help me track varieties: red for tomatoes, blue for peppers. Roots coil fast in cups this size; transplant before they crowd or growth stalls.
Check the tray beneath. Shallow waterings pool there, and standing water rots stems at soil level.
Just set your search engine for something like “plastic grower’s pots,” and you should find plenty of vendors who will be happy to ship to you. Three-, 4-, and 5-gallon pots can cost as little as a dollar apiece, maybe even less.
11. Paper Bag Seedling Pots
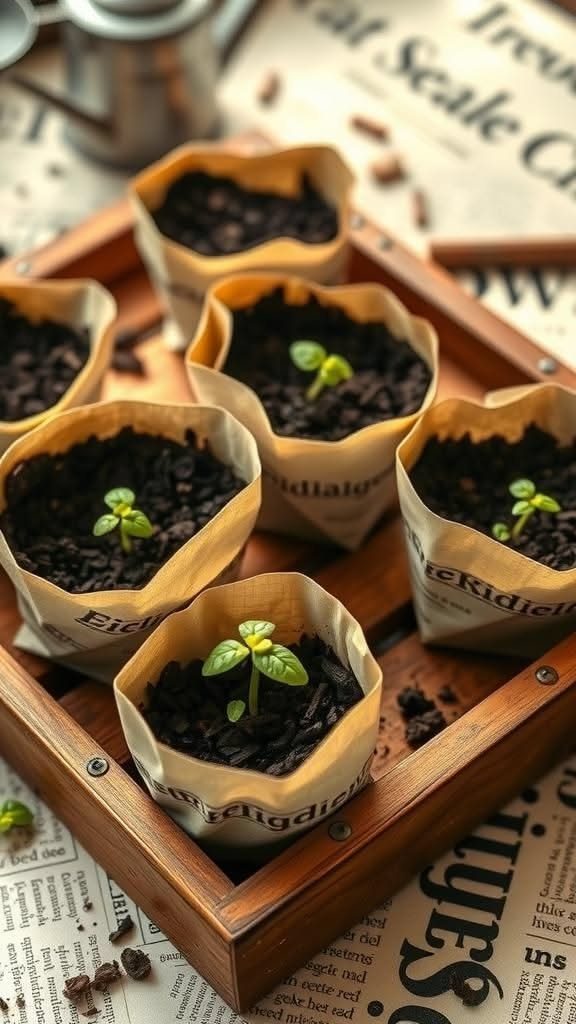
Folded brown paper holds soil for seedlings, then rots in place when planted. Small paper pots sit in a wooden tray ready for seeds or already sprouting, and the paper softens with moisture to let roots through.
I use these for plants that dislike root disturbance: beans, squash, anything that sulks after transplant.
The bags need firm folding; loose corners spill soil when lifted wet. I set them in a tray for stability, never alone on a sill.
I check morning and evening, and I bottom-water to keep the paper from dissolving before planting time.
Choosing the Right Plants
Match the plant to the pot depth before you match it to your taste. Standard tomatoes, eggplant, broccoli, cauliflower, and root vegetables like beets, carrots, and parsnips need solid depth and breadth; their roots will stunt in a shallow container.
Cherry tomatoes and most herbs fit smaller pots because their root systems spread wide rather than deep.
I group by water need once I know the sizes.
Thirsty plants together, drought-tolerant ones apart, so nothing gets flooded or parched by association. Light matters too; a pot in full sun wants different occupants than one in morning-only shade.
Indeterminate varieties outgrow most pots by August.
Watering Practices
Morning watering is the habit that saves the most plants.
I soak until water runs from drainage holes, then stop; partial wetting leaves dry pockets where roots die back. In extreme heat, I check again by mid-afternoon and soak a second time if the top inch is dry.
I aim near soil level, not over foliage.
Wet leaves in sun scorch; wet leaves overnight invite fungus. The squeeze test from my mix section still applies here: if a handful holds water too long, roots suffocate even when the surface looks dry.
For plants I overwinter, I cut back water as growth slows. Dormant roots in cold, wet mix rot fast; I let the soil dry further between drinks once temperatures drop.
Fertilizing Strategies
Container soil exhausts nutrients faster than ground beds because leaching happens with every watering. I feed regularly once plants are established, not heavy and rare.
Layering helps. I have had good results building soil in strata: compost layered through the full depth, then a finer mix top-dressed with more compost so roots find nutrients throughout.
This mimics the hugelkultur approach in miniature, letting roots find nutrients at depths rather than depending on surface feeding alone.
I trim back overgrown plants rather than fertilizing them harder; lush, leggy growth is more susceptible to pests and produces less fruit. A balanced approach of steady water, moderate nutrients, and occasional pruning outperforms any single input pushed to excess.
Frequently Asked Questions
What is the cheapest container for gardening?
Food-grade buckets run a few dollars at bakery or deli counters, or free if you catch the right employee at the right time.
Yard sales turn up wire frames, old tool caddies, and enamel buckets I line with coconut coir or landscape fabric to hold soil in.
What is the most common mistake with container plants?
Overwatering or watering wrong kills more container plants than anything else. Wet leaves in sun scorch, and wet leaves overnight invite fungus, so I aim near soil level.
Can I grow plants in 5-gallon buckets, and if so, how?
Yes, and I drill drainage holes in the bottom inch, spaced every few inches so water can actually escape the root zone.
The food-grade resin means no chemical leaching into your edibles, and mesh cages keep squirrels from sampling and late-season weight from snapping stems.