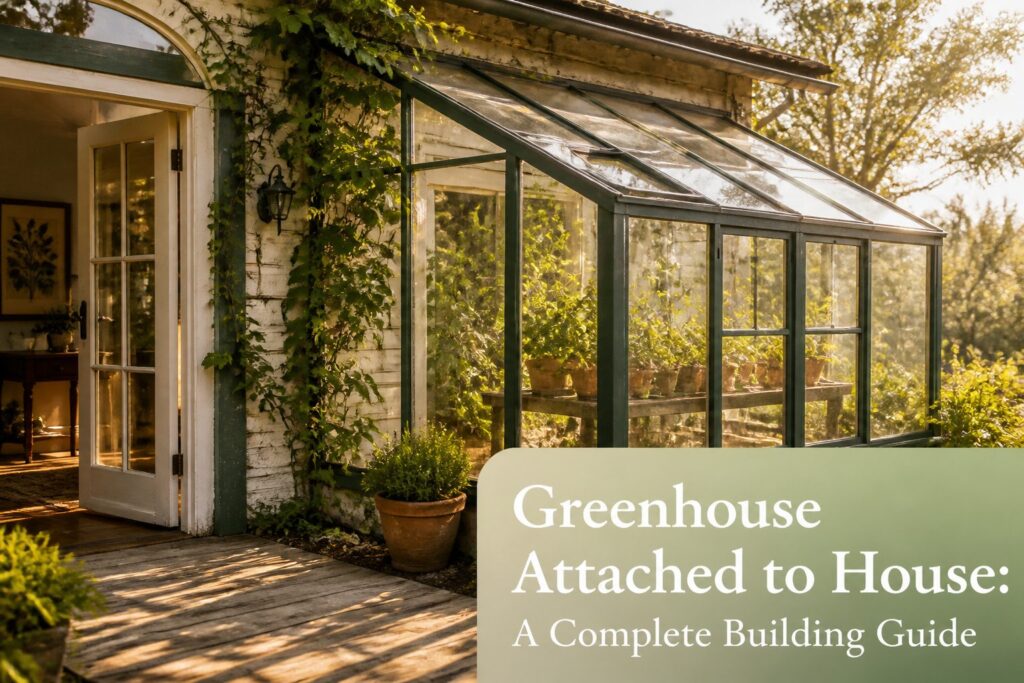
A greenhouse room attached to house is a lean-to or gable structure that shares one wall with your home, using the house itself as both thermal mass and windbreak.
That shared wall cuts construction costs by 20–30% compared to freestanding builds, but it also ties you to your existing orientation; south-facing walls win in most climates, while north-facing ones struggle to sustain year-round growth.
The joint where the two structures meet is the single most common leak point, requiring step flashing and careful sealing to keep moisture from rotting your wall cavity.
[link-whisper-related-posts]Planning and Design
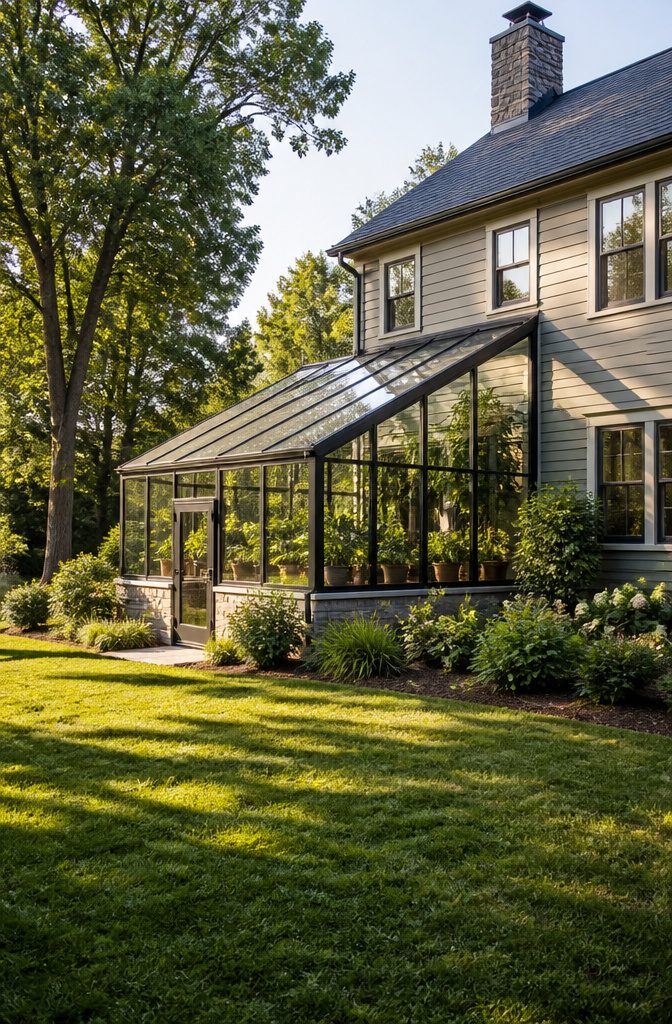
A south-facing wall is the orientation that wins for most climates, and it is the first thing I check when I am sizing up a greenhouse room attached to a house.
The low winter sun pours in all day when plants need it most, and the higher summer angle keeps direct overhead heat down. East-facing works if you are in a hot zone and want gentler morning light.
West-facing demands extra summer shading almost everywhere. North-facing is the one I would skip for year-round growing; it is fine for shade-loving plants, but it will not feed you in January.
Size and location come down to two practical checks: does the existing roofline and foundation let you tie in cleanly, and can you run utilities without tearing up half the yard?
Cedar or aluminum frames tend to blend with most home exteriors better than PVC, though the match matters more for curb appeal than performance.
The permit side is where budgets trip up. Between structural, electrical, plumbing, and setback review, permit costs run $250–$1,500 total across trades.
Processing takes days to several weeks, and a site plan showing your footprint against property lines is standard. Skip it, and you risk flagged inspections, uncounted square footage, and buyers’ lenders demanding removal at closing.
Foundation Preparation
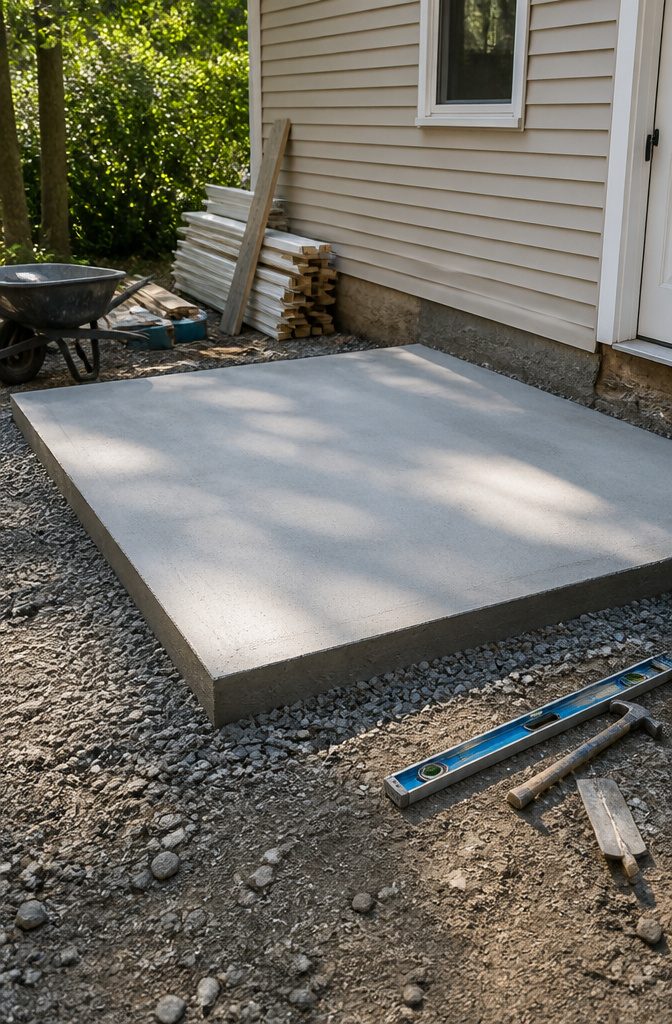
A concrete slab runs $1,000–$6,000 for a typical greenhouse room attached to house, and it is the option I would pick if I were pouring once and walking away for twenty years.
It gives you a dead-level surface, holds heat through the floor, and carries the weight of glass, framing, and a winter snow load without complaint.
You are stuck with that spot forever. Move the greenhouse later, and the slab stays.
Gravel costs far less and drains beautifully, which matters in clay soil or anywhere water pools against the house.
I would skip it for anything larger than a modest lean-to, though. Over time the stone shifts, your door frame racks, and you end up re-leveling every couple of seasons.
It works as a temporary base or for a structure you plan to rebuild, but I do not trust it for a permanent wall of glass.
Wooden decking bridges the gap between foundation and floor, and it feels warmer underfoot in January than concrete ever will.
The maintenance is real: treated lumber still checks and softens, and the gaps that let water escape also let cold air rise.
I would use a deck only where the structure is light, the climate is mild, and I were willing to reseal every few years.
Whatever you choose, the surface has to be level to within a quarter inch across the full footprint.
A greenhouse frame tolerates almost no twist; the glazing panels will bind, crack, or leak if the base settles unevenly. I always check with a long straightedge and a spirit level before a single wall plate goes up.
Framing the Structure
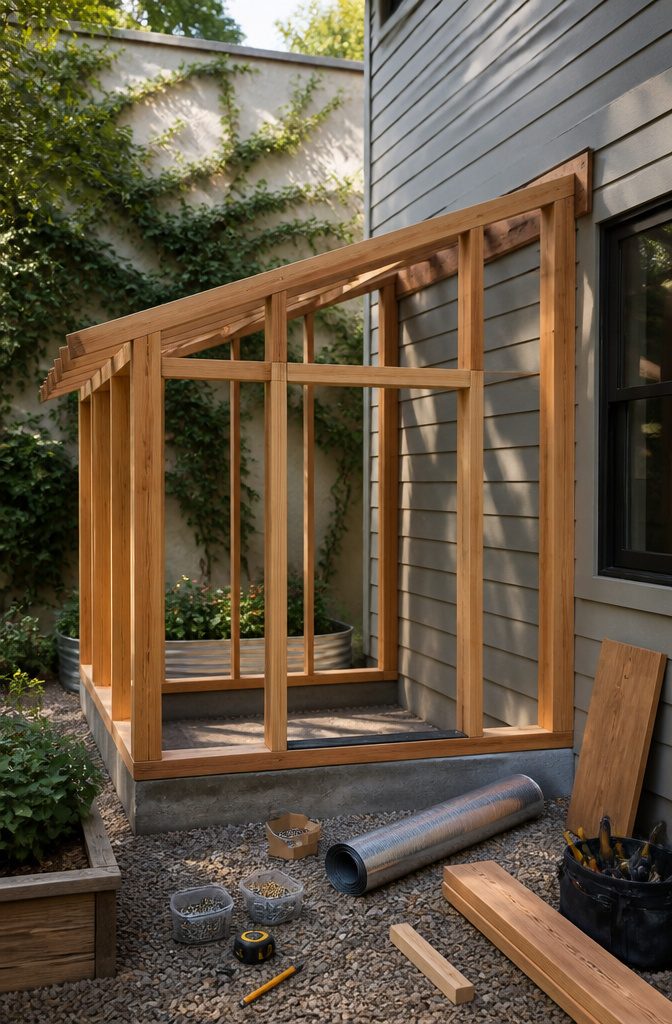
Wood, aluminum, and PVC each attach differently to a house wall, and the choice matters more than most people realize.
A ledger board bolted through the siding into the wall framing is the standard connection, similar to how a deck attaches, and this is where I’d start with any material.
Wood frames in cedar or redwood look warm and traditional but need regular sealing to survive the humidity a greenhouse generates.
That moisture is the real enemy: without proper flashing beneath the siding and over the greenhouse roof, water finds the wall cavity and rots what it finds.
Aluminum resists that rot and carries less weight, though it conducts temperature extremes straight through to the interior.
PVC is cheap and easy for small hobby builds but degrades under UV and lacks the strength I’d want against a house wall.
The shared wall itself has to carry load, not just look solid. Brick, concrete block, wood framing, and stucco all work, yet each demands its own sealing detail at the joint.
That joint is the most common leak point in any attached structure, so step flashing or continuous flashing belongs there without exception.
For anything beyond a lightweight lean-to, a structural engineer should confirm the wall and foundation can handle the transferred weight of wind, snow, and the roof itself. That assessment runs $500–$1,500, and I’d spend it before cutting a single board.
Installing Glazing
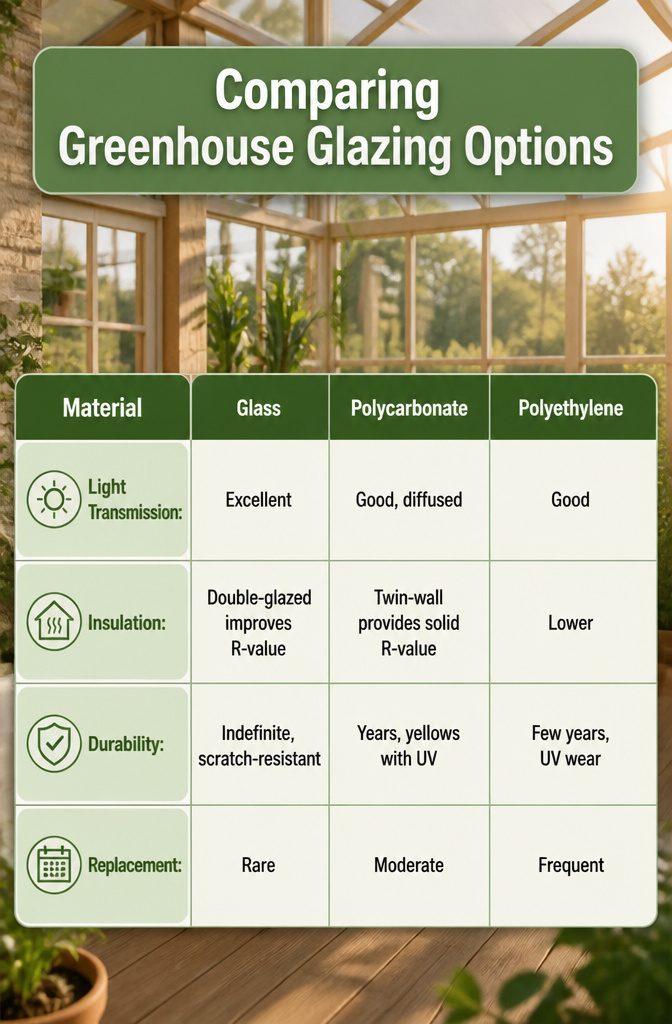
The glazing you choose for a greenhouse room attached to house will matter more than the frame material, because it controls both heat loss and how your plants actually grow.
Glass offers the clearest light and lasts indefinitely, but double-glazed units carry the highest cost and weight.
Polycarbonate twin-wall sheets diffuse light more evenly and resist impact, though UV exposure yellows them over time. Polyethylene film is the budget entry, flexible and easy to install, yet it wears from sun exposure and needs replacing every few years.
| Material | Light Transmission | Insulation | Durability | Replacement |
|---|---|---|---|---|
| Glass | Excellent | Double-glazed improves R-value | Indefinite, scratch-resistant | Rare |
| Polycarbonate | Good, diffused | Twin-wall provides solid R-value | Years, yellows with UV | Moderate |
| Polyethylene | Good | Lower | Few years, UV wear | Frequent |
For a lean-to against your home’s wall, I would pick twin-wall polycarbonate. The shared wall already cuts 20–30% off your total cost compared to freestanding builds, which leaves room to upgrade the glazing without hitting conservatory prices.
Glass wins on looks and longevity, but I would skip it here unless the structure doubles as a sitting room. Polyethylene film belongs on temporary hoop houses, not a permanent attachment you walk through daily.
Ventilation Setup
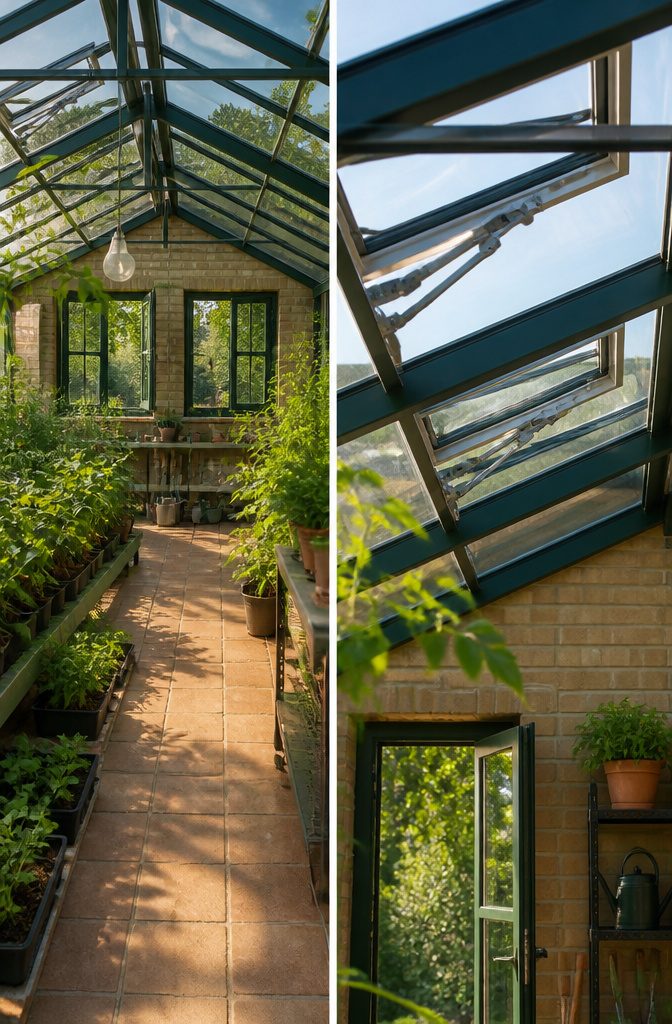
Roof vents matter most in a greenhouse room attached to house because hot air rises straight to the peak.
Side vents or louvers down low pull cooler air in, and together they create a cross-draft that flushes heat out the top.
Without that airflow, winter sun can push interior temperatures past 90°F even when it is freezing outside, which cooks plants just as surely as summer heat.
I would spend the $30 to $75 per automated vent opener and let wax-filled cylinders do the work. They expand in warmth, push the vent open, and contract to close it again, no wiring required.
Manual cranks cost nothing to operate and work fine if you are home every sunny morning, but one missed Tuesday in March can mean wilted seedlings by afternoon.
Automated systems are the first upgrade I would add; manual hardware stays useful as backup.
For humidity control, automation wins again. Sensors that trigger both roof and side vents keep air moving before condensation builds on glass and mold takes hold.
In a lean-to space against the house wall, that steady exchange also protects your interior drywall from moisture creeping through the shared surface.
Final Touches
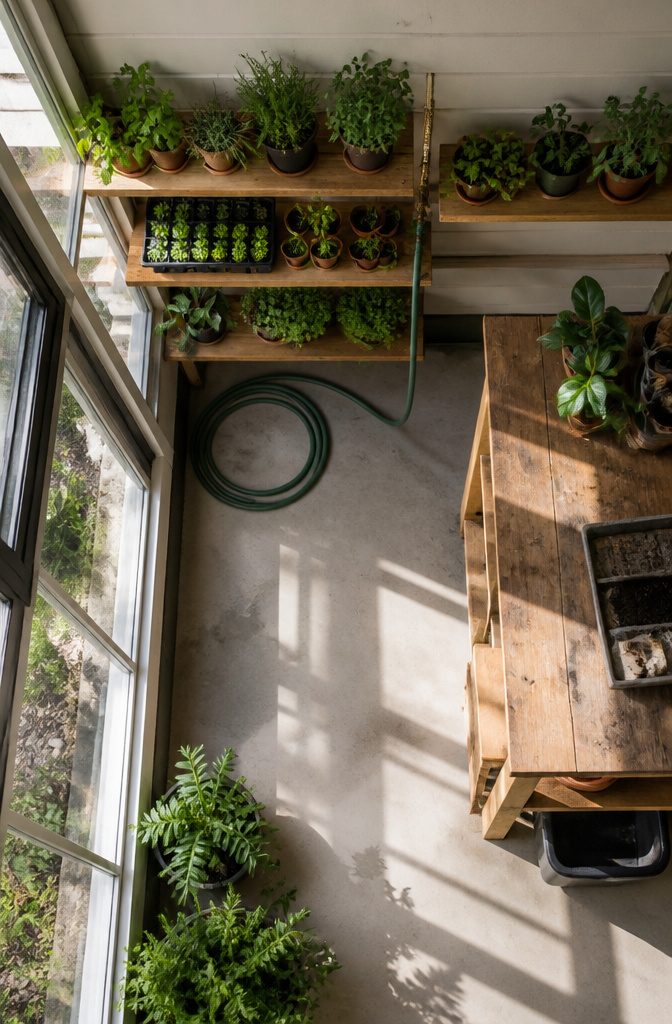
A greenhouse room attached to house needs the same utilities as any working space, routed through the shared wall so you are not trenching across the yard in February.
- Shelving and workbenches: I would run fixed shelving along the house wall and keep the workbench under the utility drop. Metal or cedar holds up to the humidity; particleboard swells and sags within a season.
- Water: A hose bib threaded through the foundation at the connection point is enough for most gardeners. If you want a sink or automated misting, stub out a line while the wall is open. I would skip buried supply lines; they freeze where the main house line does not.
- Electrical: One 20-amp circuit covers lights, a small heater, and a fan. Run conduit through the shared wall at bench height, not along the greenhouse frame where condensation collects.
- Drainage: A floor drain in the corner, piped about 100 feet to daylight or a runoff ditch, keeps the slab from becoming a puddle after watering. The house wall inside needs rubberized flashing slipped under the siding to divert water down and away from the joint.
The cleanest routing wins. Utilities enter where the greenhouse meets the house, travel the interior wall, and stay out of the plant zone.
Lean-to Greenhouse
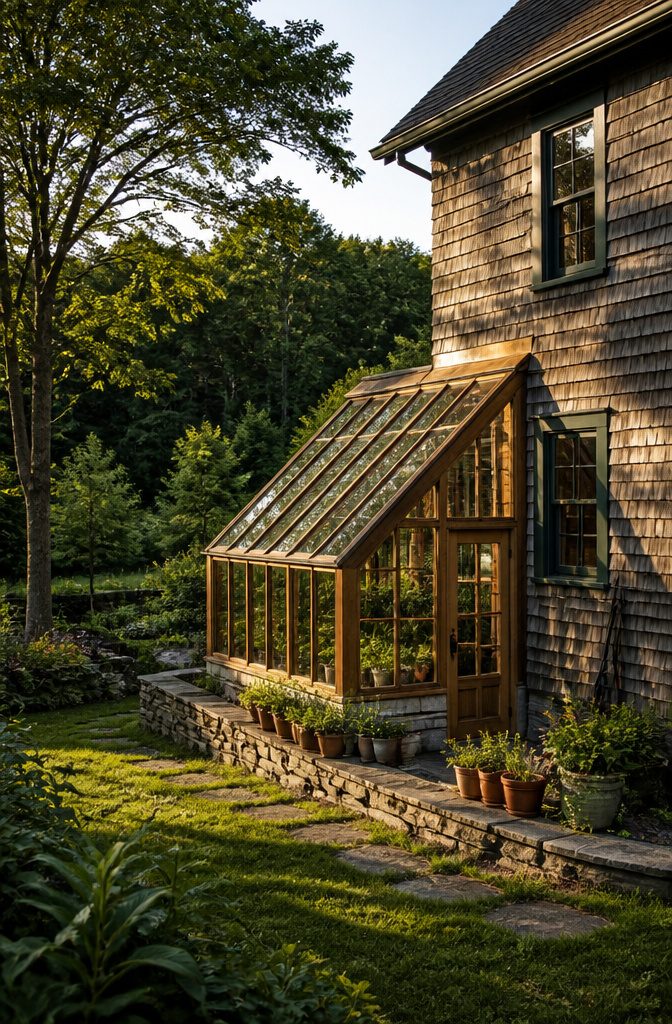
A lean-to greenhouse room attached to house uses the simplest roof geometry there is: a single plane sloping down and away from your wall, which means every rafter is the same length and every cut is identical.
That shared wall carries the structural load, so you are framing three sides instead of four and tying into existing eaves rather than building a standalone ridge.
You save on labor and cost, with attached greenhouses typically running 20–30% less than a freestanding build of the same footprint.
You lose headroom and layout flexibility.
The high side sits against your house, but the low side drops fast, and that slope dictates where tall plants can go. Tomatoes or a small citrus tree need the back row; low herbs and starts fit the front.
You also lose the option of a center walkway with clearance on both sides unless you push the width wider than the standard kit.
Straight-eave and curved-eave profiles both work in this form, though I would pick straight-eave for anything I planned to butt tight under existing rooflines; the curve buys you style points but fights your soffit height.
Where this design wins is narrow sites. A lean-to eats the least yard space of any greenhouse room attached to house, and the shared wall doubles as thermal mass, absorbing daytime heat and releasing it after dark.
For a weekend build on a real budget, the simplicity is hard to beat.
Gable-attached Greenhouse
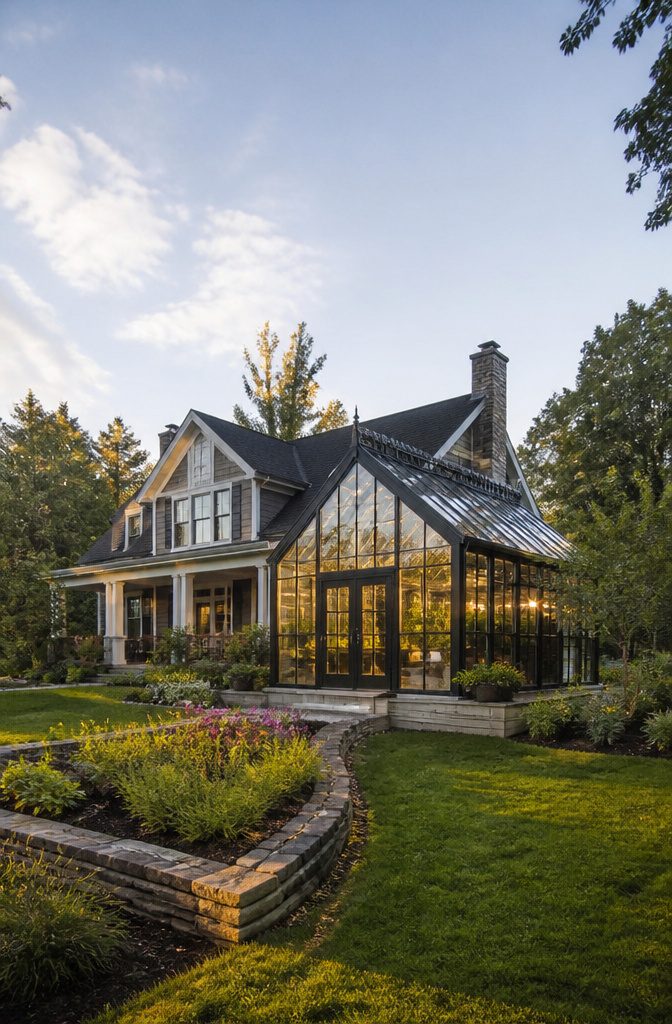
A gable-attached greenhouse keeps the familiar pitched roof but connects at one or both ends to your house, or even bridges between two buildings.
That extra height buys you real volume, and volume matters when summer heat builds: hot air rises, collects under the ridge, and vents out through roof windows or a ridge vent before it cooks your tomatoes.
I would not try serious seed starting in anything lower; the temperature swings in a shallow lean-to are manageable for hardening off, but not for the steady warmth peppers need.
You pay more for materials. You are building two full gable walls plus the roof system, and only one of them might share the house wall.
For a mid-range glass build in the 100–200 square foot range, that runs about $15,000–$30,000 including foundation, structure, glazing, and basic climate control, versus the lean-to that starts closer to $5,000–$12,000.
The extra money pays off if you are growing year-round or keeping tropicals that need headroom and stable air. For six weeks of seed starting in April, I would skip it and put the savings toward a better exhaust fan.
Cross Country styles can all be configured gable-attached, so you are not locked into one look.
Pick the profile that matches your roofline; a mismatched pitch is the kind of detail that makes an addition look tacked on rather than built in.
Solar Greenhouse
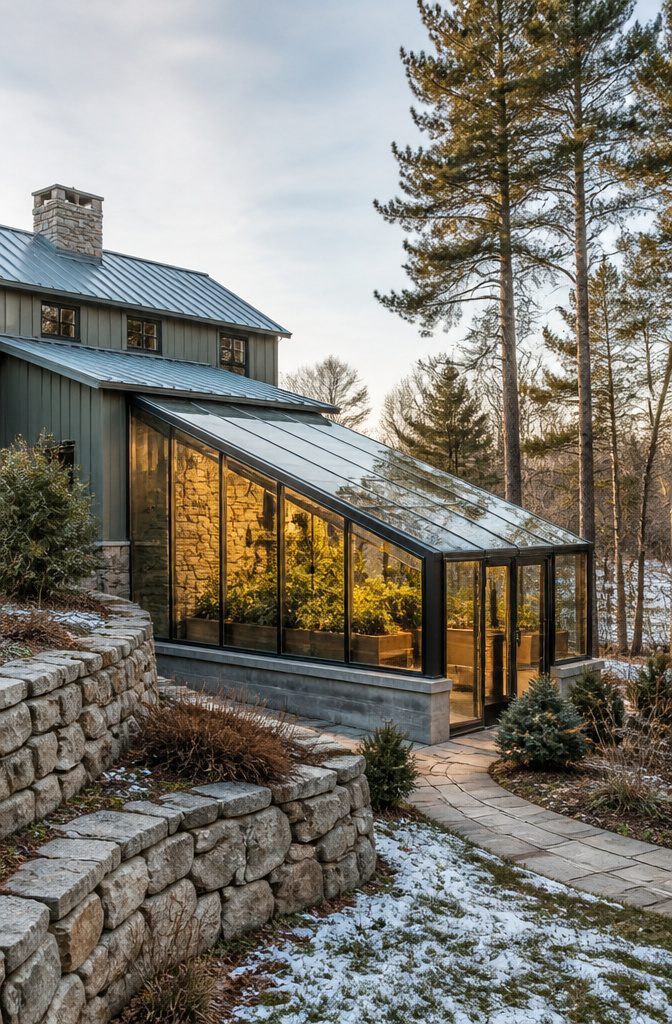
A solar greenhouse room attached to house works best when the glazing tilts toward the sun rather than standing straight up.
Vertical glass alone leaves plants reaching for light from above; slanted glazing or overhead panels give fuller exposure and lusher growth.
The angle matters most in winter when the sun sits low, so I would design for December gain even if it means a steeper pitch than looks balanced in summer.
Thermal mass is what turns a glass box into a heater. Concrete planter beds, masonry floors, even barrels of water tucked between benches absorb heat all day and release it after dark.
The shared wall with your house adds mass too, and in cold climates that wall can carry enough stored warmth to cut supplemental heating by a noticeable margin.
I have seen claims of weeks without furnace use in Vermont January weather, though that demands tight construction and clear glass kept free of snow.
The upfront work is real. You need insulation everywhere the sun does not hit directly: the north wall, the foundation perimeter, the roof and walls at night with roll-down curtains or fitted panels.
Automated vent openers run $30–$75 each and pay for themselves in preventing one overheated afternoon that cooks your starts.
Skip the direct duct connection to your home HVAC; the humidity load will foul your ducts and cost more than a small dedicated heater or mini-split.
I would pick the slanted-glazed lean-to over a vertical wall every time for a cold-climate build. The thermal performance difference is worth the trickier flashing and the custom-cut glass.
Sunroom and Conservatory
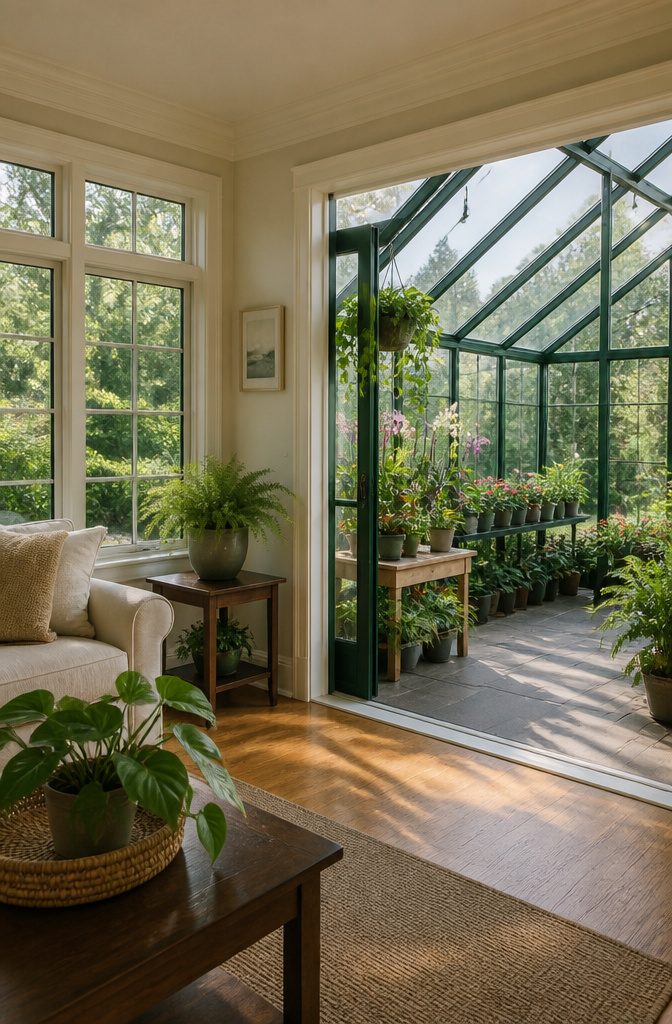
A sunroom or conservatory attached to your house blurs the line between living space and plant growing area in a way a standard greenhouse room attached to house never quite does.
The finishes matter here: you are looking at real flooring, finished drywall, and HVAC tie-ins that push the project out of greenhouse territory and into residential construction.
That shift hits the budget hard. A mid-range glass build runs $15,000–$30,000 for a 100–200 square foot space, and a high-end conservatory of the same size climbs to $40,000–$75,000.
Those figures already include foundation, structure, glazing, and basic climate control, but you will still add $1,500–$4,000 for electrical and $500–$1,500 for permits.
Where I would pause is the code distinction. Building departments often treat a finished sunroom as habitable space, which means insulation values, egress windows, and full permitting that a lean-to greenhouse might slip past under agricultural or accessory rules.
Some regions require permits for greenhouse construction regardless, but a conservatory almost always triggers residential scrutiny. The shared wall with your house still saves 20–30% over freestanding construction, and the passive heating from that thermal mass is real.
For my money, if you actually want to grow plants, the conservatory premium buys a lot of houseplants but not much extra horticultural function.
What Attached Greenhouses Cost
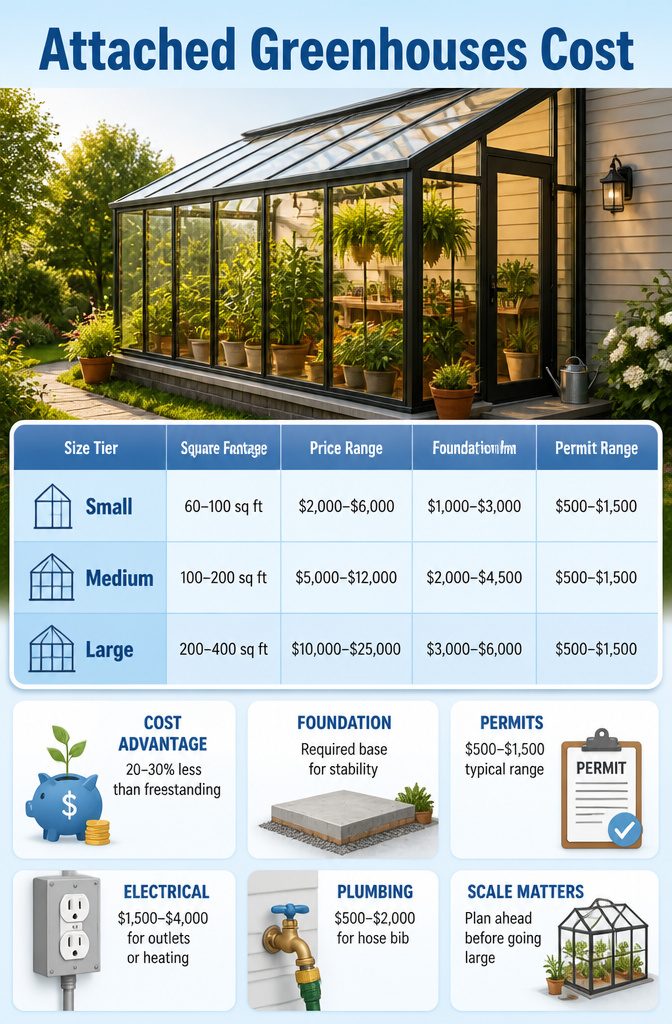
Attached greenhouses run about 20–30% less than freestanding ones because that shared wall does real work. The savings show up most clearly in the three size brackets most people actually build.
| Size Tier | Square Footage | Price Range | Foundation Add-On | Permit Range |
|---|---|---|---|---|
| Small | 60–100 sq ft | $2,000–$6,000 | $1,000–$3,000 | $500–$1,500 |
| Medium | 100–200 sq ft | $5,000–$12,000 | $2,000–$4,500 | $500–$1,500 |
| Large | 200–400 sq ft | $10,000–$25,000 | $3,000–$6,000 | $500–$1,500 |
I would stack the foundation estimate from earlier onto whichever tier fits your footprint, then add permits at the low end if your town treats this as an accessory structure and at the high end if they want engineered drawings.
Electrical runs another $1,500–$4,000 if you want outlets or heating, and plumbing for a hose bib adds $500–$2,000. For a weekend builder, the small tier is where the math stays friendly.
The medium tier is where most people end up once they account for walking paths and shelving; I would not go large unless I had a clear plan for climate control, because $25,000 in shell costs turns into $35,000 fast once you finish the inside.
Benefits of the Shared Wall
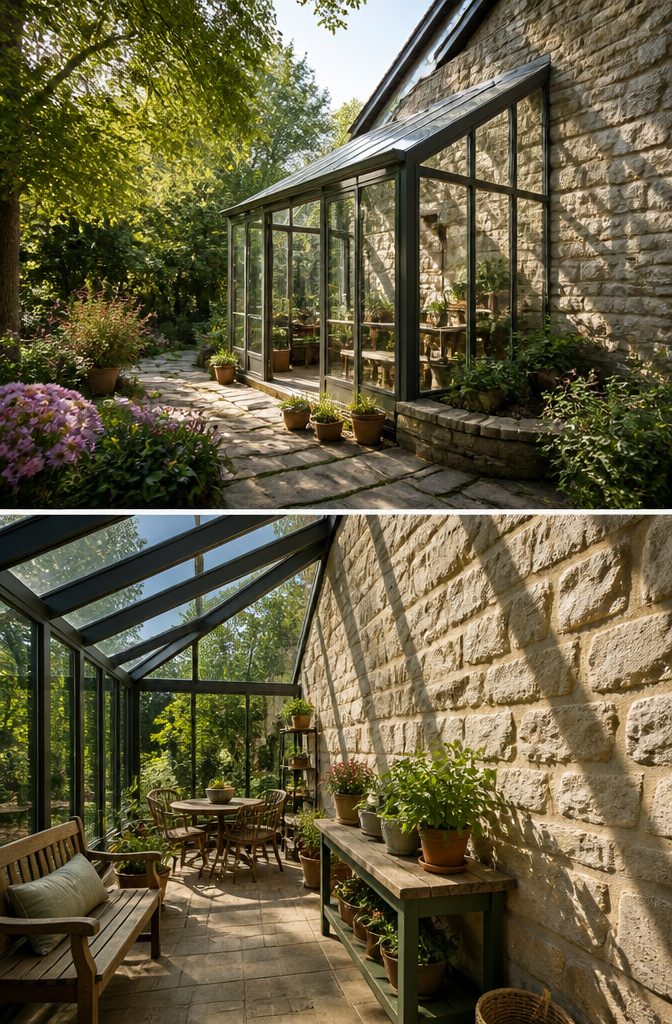
The shared wall is where a greenhouse room attached to house earns its keep. That masonry or framed wall acts as a thermal battery, soaking up sun through the day and radiating warmth back after dark.
On cold nights the house itself becomes the heat source, bleeding enough BTUs through the common wall to keep frost at bay without a dedicated heater running full tilt.
One grower in Vermont stopped running supplemental heat for weeks at a stretch in January, even with outdoor temperatures at -20°F, because the greenhouse collected and held solar gain against the shared surface.
Windbreak effect matters too. The house blocks prevailing winds that would strip heat from a freestanding structure, which means less air infiltration and lower heating demand.
On the flip side, a south-facing greenhouse can push excess warmth back into the house on sunny winter days through open windows or a connecting door, shaving something off the main heating bill.
Access is the quieter benefit. A door from the kitchen or mudroom turns the greenhouse into usable space for morning coffee or seedlings on the counter, not a trek across the yard in slippers.
You are tied to the house’s orientation; if your best sun hits the wrong wall, the thermal advantage still holds but the growing season shortens.
For most DIY builds on a modest lot, the convenience and the heat savings together make the shared wall the deciding factor.
Overheating and Pest Risks
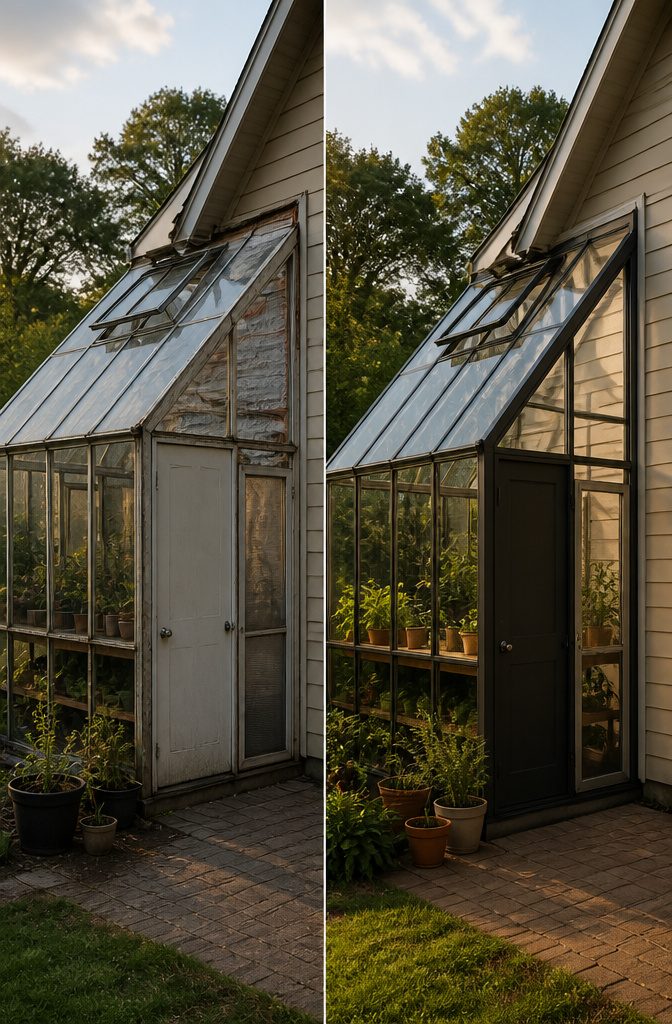
Heat moves both ways through that shared wall, and in summer the greenhouse wants to hand every extra degree back to your living room.
A lean-to roof angled away from the house helps, but roof vents and an exhaust fan are what keep the greenhouse from becoming a radiator against your wall.
Automated vent openers run $30–$75 each and open without you thinking about them, which matters on July afternoons when temperatures spike while you’re at work.
Humidity is the quieter problem.
The shared wall needs a vapor barrier on the greenhouse side, period. Without it, moisture finds gaps in flashing and rides into your wall cavity.
One builder I follow used a rubberized flashing system slipped under existing siding to divert water down and away from the attachment point. Treat that interior wall as exterior siding, because functionally it is.
Pests walk through any door you give them. A screened door plus a solid door at the passage, with small covered vents between spaces, lets you control when air and what else moves through.
I would not rely on screens alone; the solid door closes the highway on nights when moths and mosquitoes are active. This is mitigation, not elimination, and anyone promising otherwise is selling something.
For tropical humidity levels, a greenhouse dehumidifier protects both the plants and your house structure.
The alternative is managing moisture at the wall and hoping, and I would not take that bet on a structure I planned to live beside for years.
Frequently Asked Questions
What are the benefits of an attached greenhouse?
A greenhouse room attached to a house cuts construction costs by 20–30% compared to freestanding builds because the shared wall carries structural load.
That wall also acts as thermal mass, storing daytime heat and releasing it after dark to protect plants from frost.
Direct indoor access turns the space into usable living area, and the house itself blocks wind that would strip heat from a freestanding structure.
How do I manage temperature and humidity in an attached greenhouse?
Roof vents paired with low side vents create a cross-draft that flushes rising hot air out the peak.
Automated wax-filled vent openers run $30–$75 each and open without wiring as temperatures climb. A vapor barrier on the greenhouse side of the shared wall is mandatory to stop moisture from riding into your house framing.
What permits do I need to build an attached greenhouse?
Permit costs run $250–$1,500 total across structural, electrical, plumbing, and setback review.
Processing takes days to several weeks, and a site plan showing your footprint against property lines is standard. Finished sunrooms or conservatories often trigger full residential permitting as habitable space, while lean-to greenhouses may qualify under agricultural or accessory rules.
What materials are best for constructing an attached greenhouse?
Twin-wall polycarbonate works best for most attached builds: it diffuses light evenly, insulates well, and costs less than glass. Glass offers the clearest light and lasts indefinitely but carries the highest weight and price.
Polyethylene film belongs on temporary structures, not permanent attachments you walk through daily. Cedar or aluminum frames blend with most home exteriors better than PVC, which degrades under UV.
Is it possible to build a greenhouse attached to my house?
Yes.
Attaching a greenhouse to your house is one of the most common ways to build one. The key requirements are a suitable exterior wall, a proper foundation, waterproof flashing at the roof junction, adequate ventilation, and the necessary permits.
Should a greenhouse be attached to the house?
It depends on your wall orientation and goals. A south-facing shared wall wins for most climates because the low winter sun pours in all day.
The attachment saves 20–30% on construction, gives direct indoor access, and lets the shared wall store and release heat. You are tied to the house’s orientation; if your best sun hits the wrong wall, the growing season shortens.
How much to build a greenhouse attached to a house?
Small attached greenhouses run $2,000–$6,000 for 60–100 square feet, medium builds hit $5,000–$12,000 for 100–200 square feet, and large structures reach $10,000–$25,000 for 200–400 square feet.
Add $1,000–$6,000 for foundation work, $500–$1,500 for permits, $1,500–$4,000 for electrical, and $500–$2,000 if you want plumbing. A medium-tier build is where most people land once they account for walking paths and shelving.